Workflows
Workflows
Empower Administrator > Workflow Options > Workflows
Overview
Items, Changes/ECOs, Projects, Quality/CAPA items, Vendors, Vendor Items, and Service Objects are managed/controlled through signoff workflows. Signoff workflows are comprised of a set of signoff "stages".
| Workflow | Description |
|---|---|
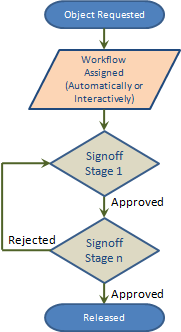 | When objects are requested, the system can automatically assign (or the user can interactively create) a signoff workflow. Automatic workflow assignment can be based on a number of "conditions". Workflows can contain one or more workflow stages. A Signoff stage can contain one or more users who are required to sign or review. During each signoff stage, user approvals or rejections can be processed in parallel. Once all required users (signers) approve the request, the next stage will be activated. Each signoff stage of the workflow can contain a "Reject Stage". If one person on an active stage rejects the object, the system can re-activate the "Reject" stage. All previous signatures will be cleared. Once all required users and stages have been approved, the object will then be available for "release". |
Each signoff stage can contain an unlimited number of users. Users can be defined as:
- Required
- User must approve or reject the request
- Reviewer
- User does not need to approve or reject the request, but will receive email notices, etc.
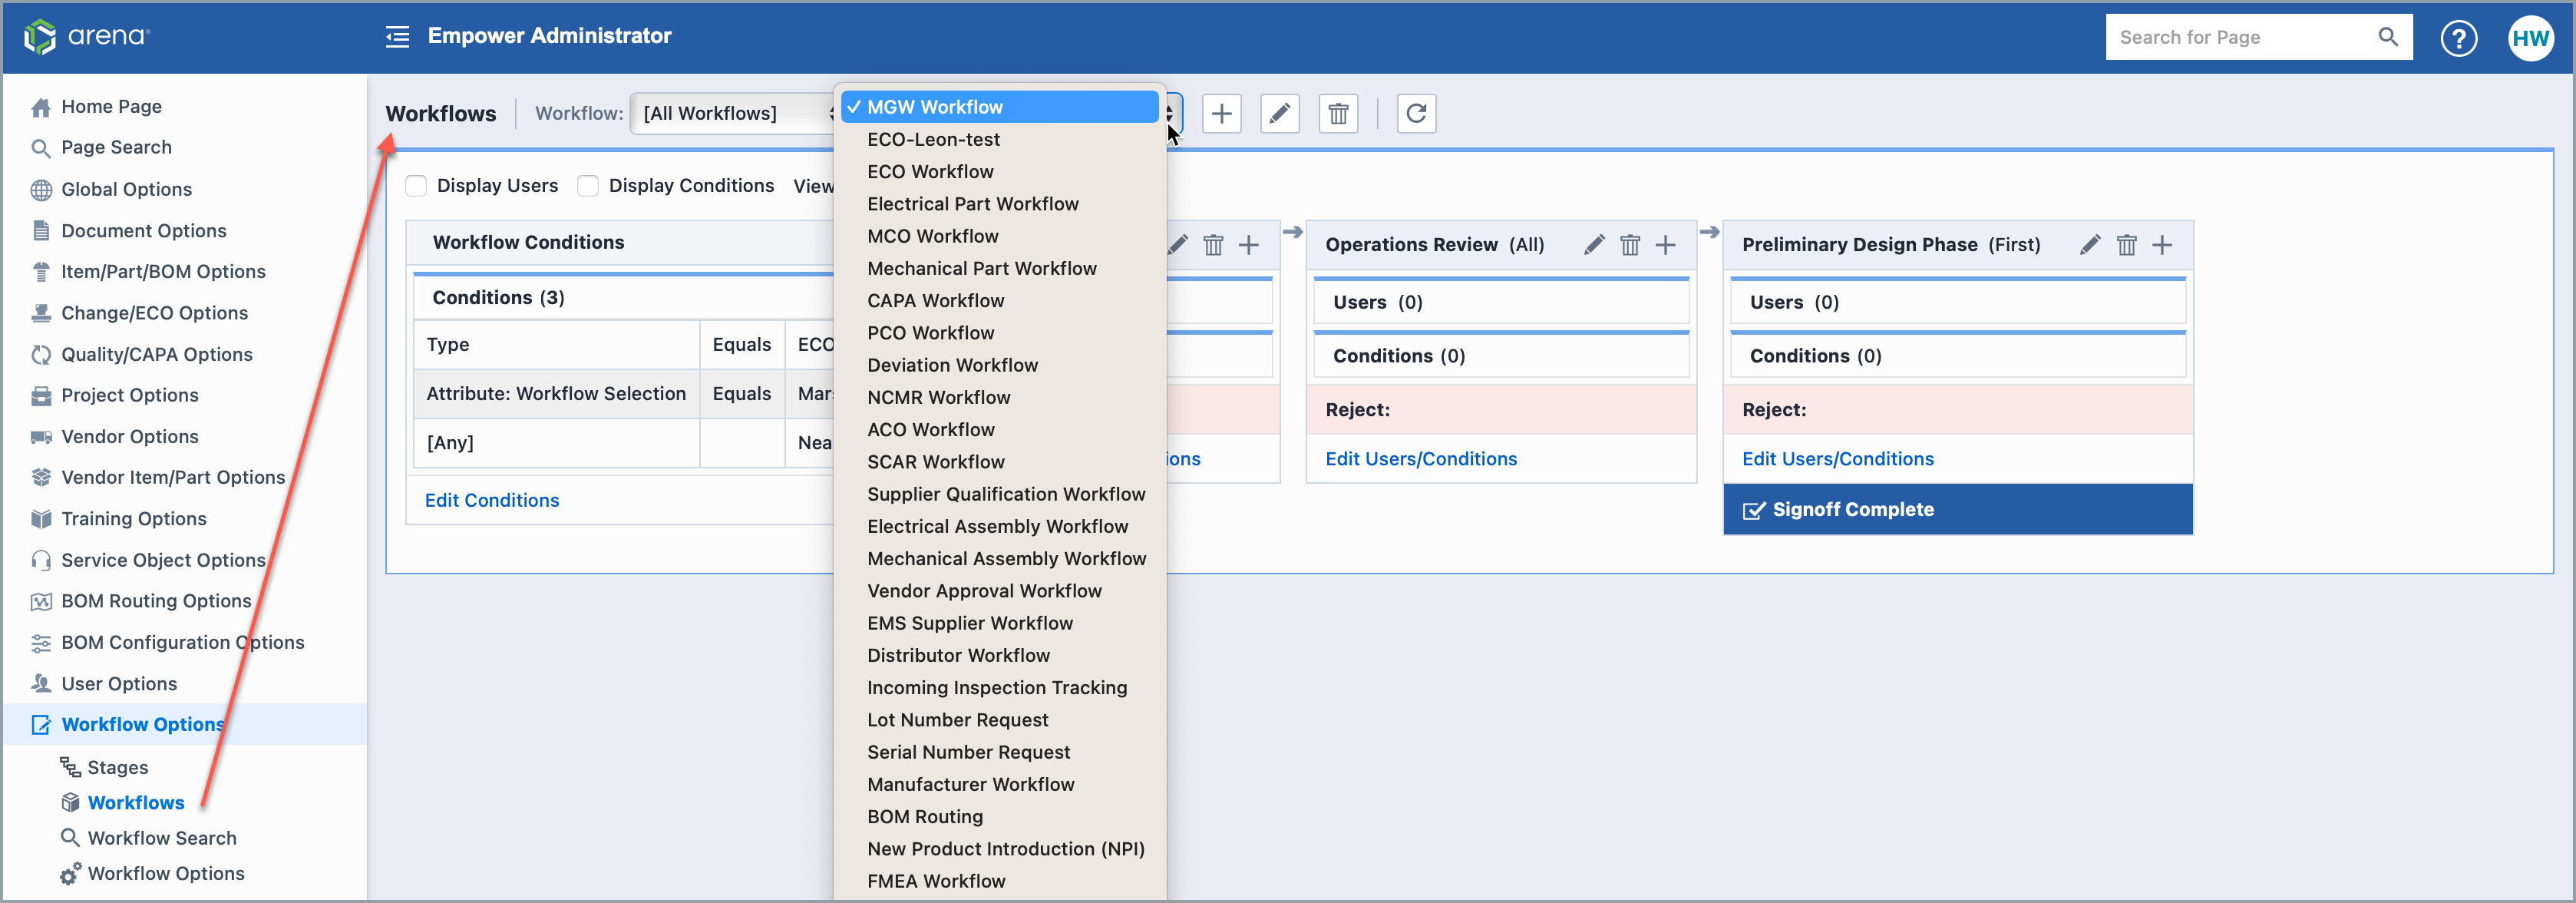
The Empower Administrator > Workflow Options > Workflows page provides a drop list that includes all existing workflows:
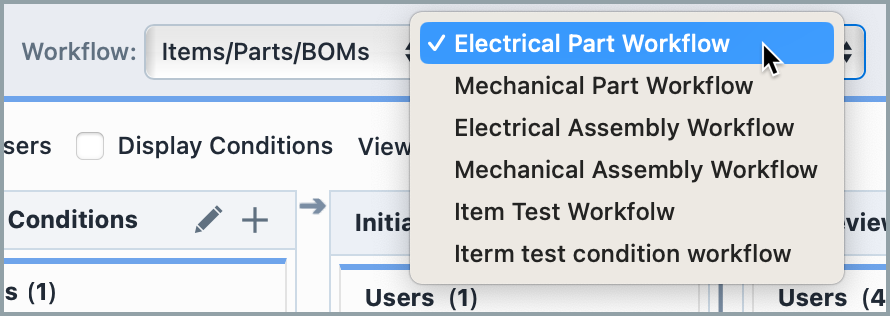
You can filter this list to specific objects using the Object filter drop list:
Workflow Sorting
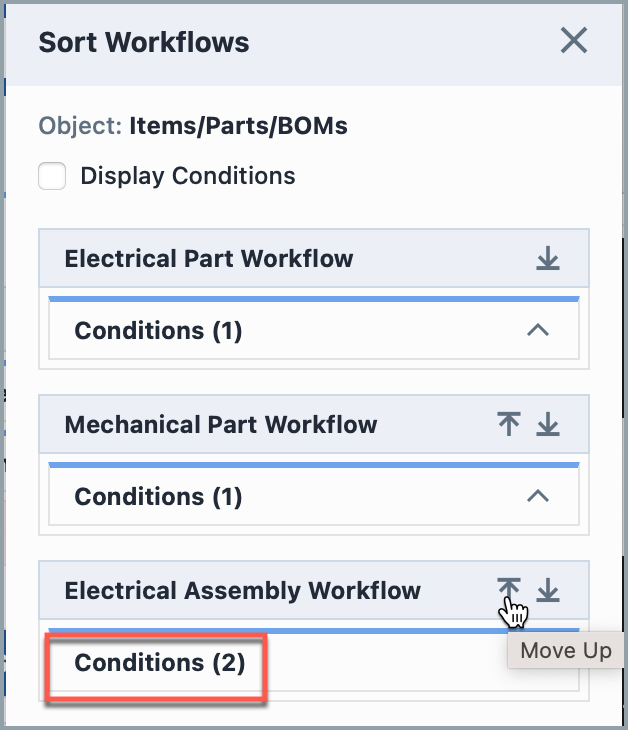
When selecting any specific object other than All Workflows, a Sort button is now available.
When clicked, the Sort Workflows panel opens up and allows Administrators to prioritize which workflows Empower should evaluate first.
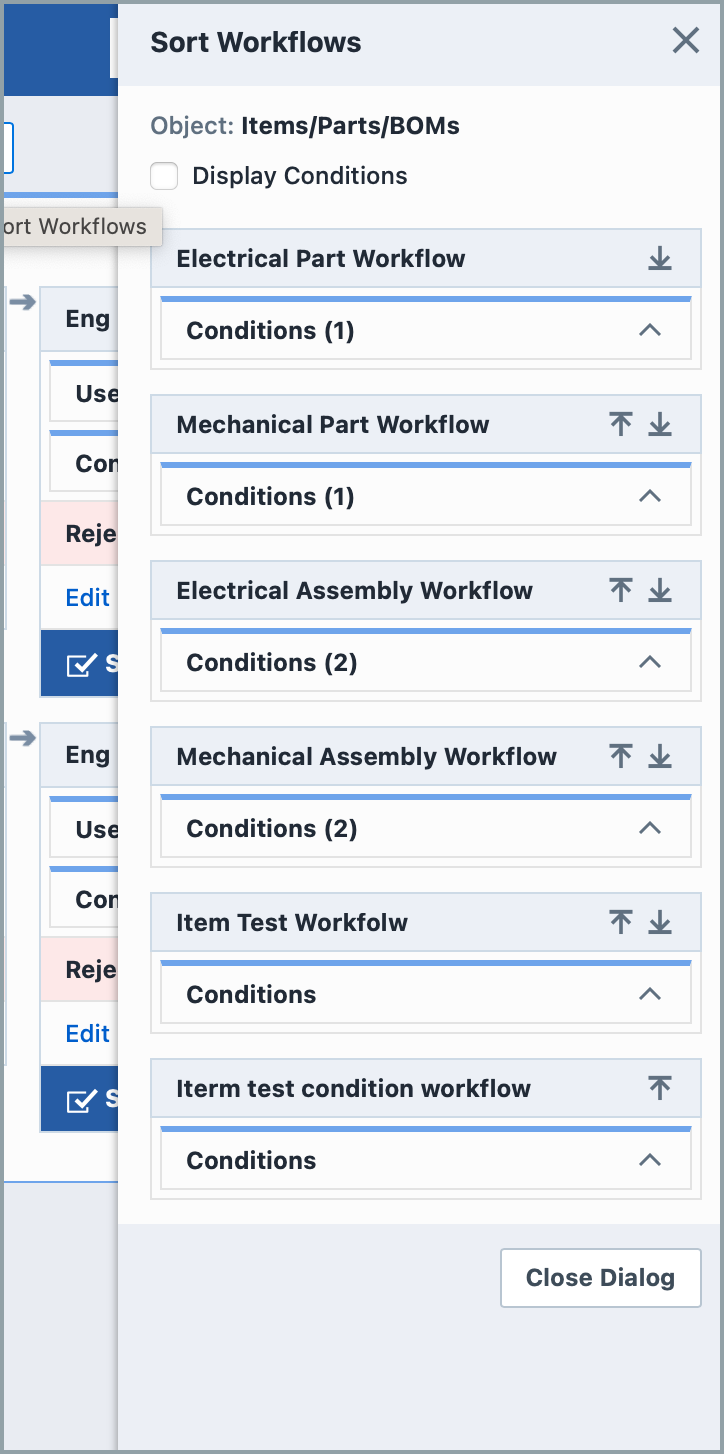
Users who incorporate complex multiple-path workflows should prioritize workflows with multiple specific conditions towards the top and place more general workflows with less conditions towards the bottom of the Sort Workflow panel:
Workflow Conditions
You can assign "conditions" to workflows and workflow stages. Conditions are object field values that help the workflow engine decide the best workflow and next stage (if multiple branches are available):
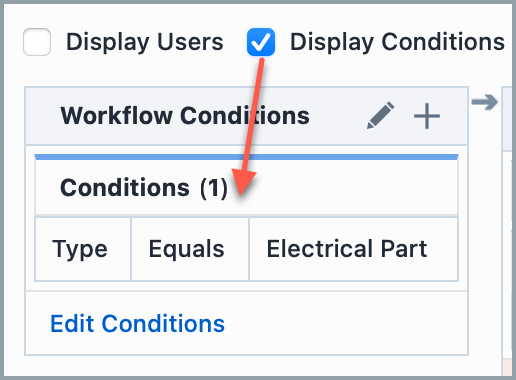
You can display the conditions by checking the Display Conditions toolbar option.
When viewing a specific workflow, UP and DOWN buttons can be used to move specific stages up or down at branching points in the workflow:
Affected Items Lifecycle Conditions
In Release 8.4, Empower added the ability to use Affected Item Lifecycle changes as a Workflow Condition. This feature works in teh same way as all other Workflow Conditions. Administrators with permissions can set the Lifecycle Options in Empower Administrator > Item/Part/BOM Options > Lifecycle
Stage Branching
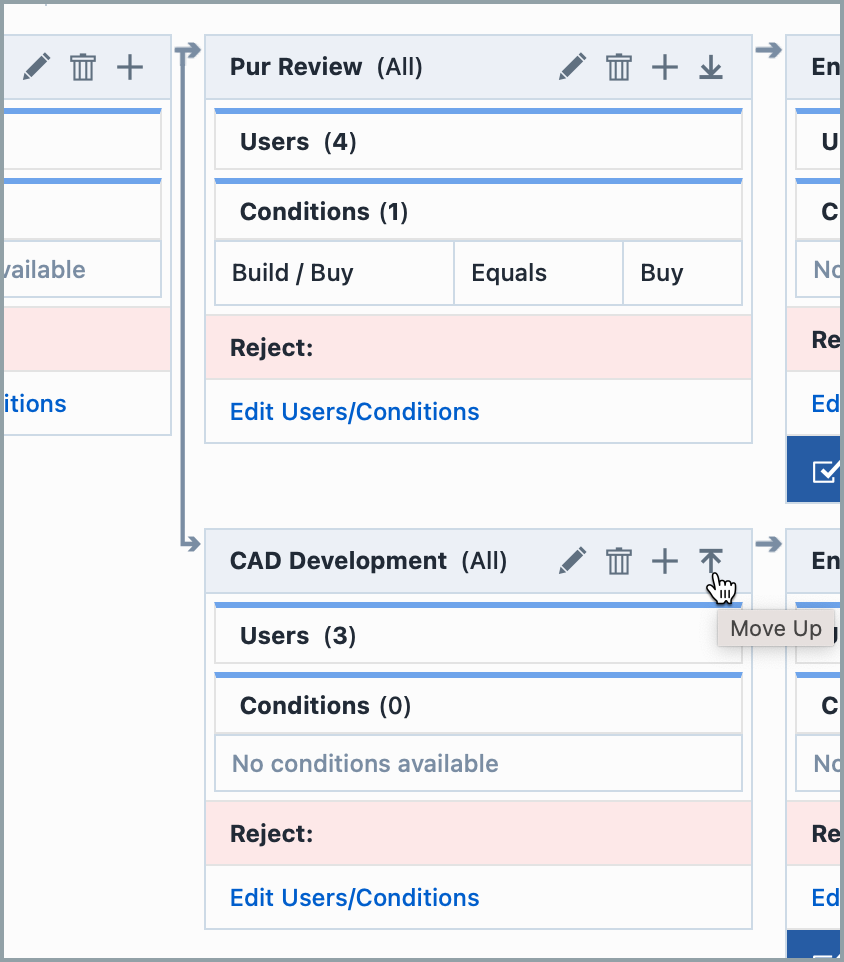
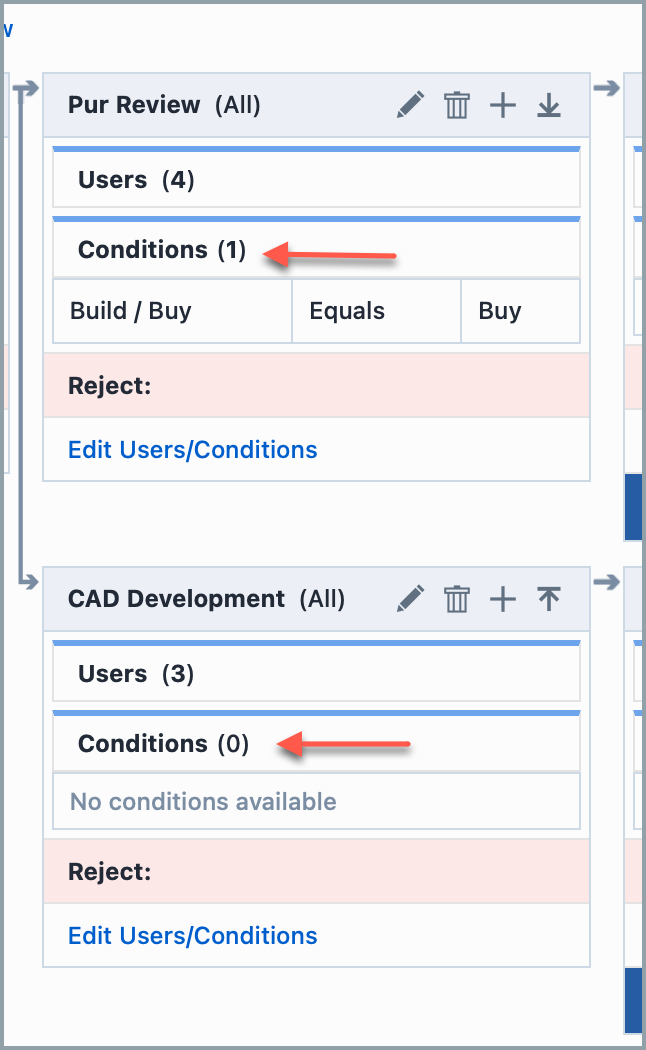
The workflow can have conditional branches that provides different stages/flows based on certain conditions.

In the above example, if the object had a condition where the "Build Or Buy Item" attribute had a value of "Build" then the workflow would follow the "PUR Review" stage branch. If that value was not found, the workflow would activate the "CAD Development" stage branch.
As each workflow stage is approved, the workflow engine will evaluate the object and stage order assigned to determine the next stage. If a branch is defined, the workflow (when assigned to the object) will indicate a branch and possible stages.
Workflow Stages
The workflow can contain any number of workflow stages. Each stage can have any number of users assigned. Only one stage can be active at any time. Once all required users have approved the object, the system will automatically activate the next stage. 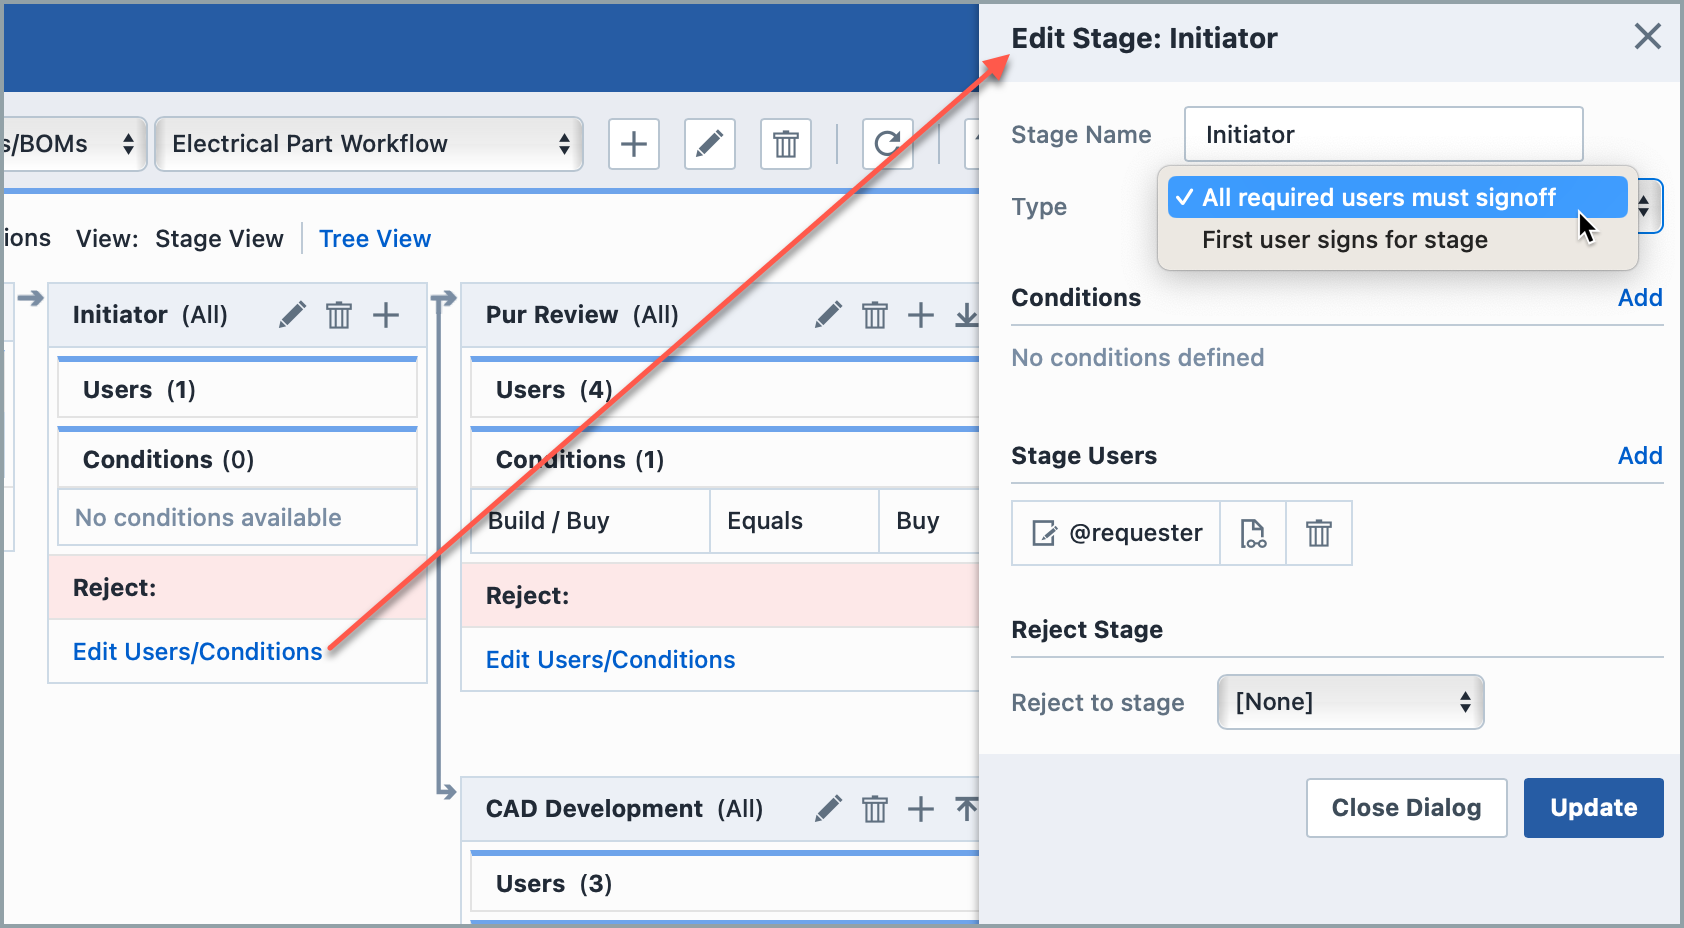
Each stage can be assigned as:
| Type | Description |
|---|---|
| All required users sign | All users on the stage that are required to sign must approve for the workflow to progress to the next stage |
| First user signs for stage | The first user on the stage that approves will automatically approve for all users on the stage and the workflow will progress to the next stage |
Stages defined on the Workflow Stages page will provide the default building blocks for the workflow. However, once a stage has been instantiated on a workflow, you will be able to change all aspects of the stage (name, type, and users). Each stage can also contain conditions when branching is available.
Creating Workflows
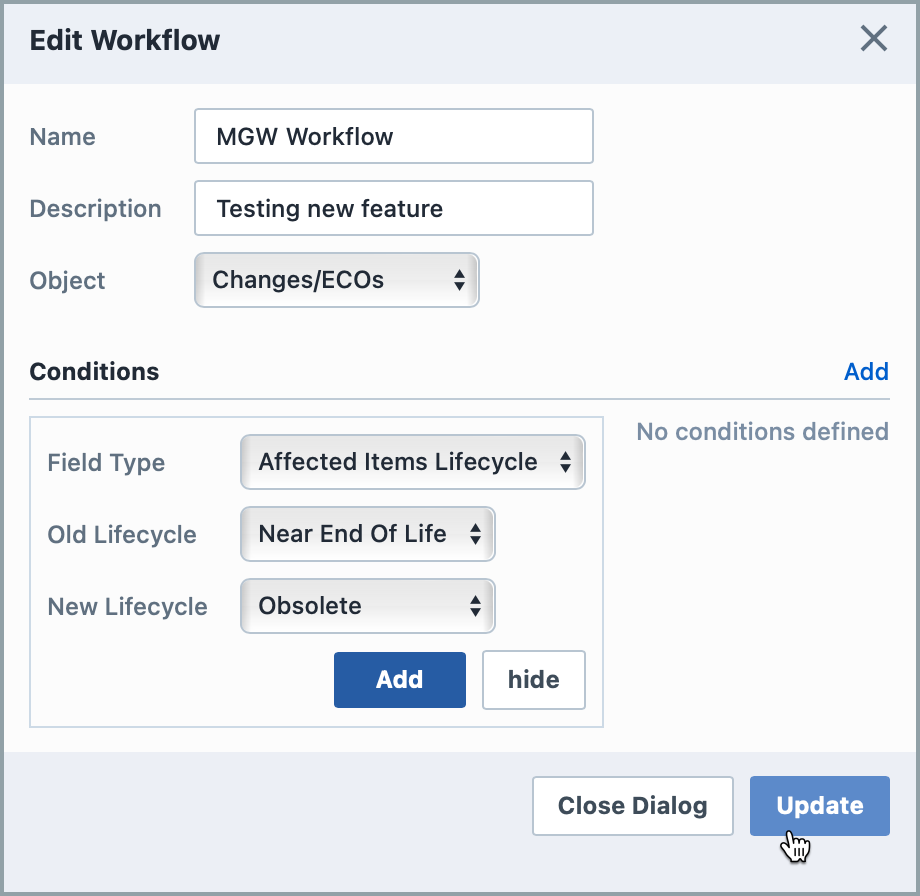
To create a new workflow, click the [+] toolbar button. This will display the Add Workflow panel.
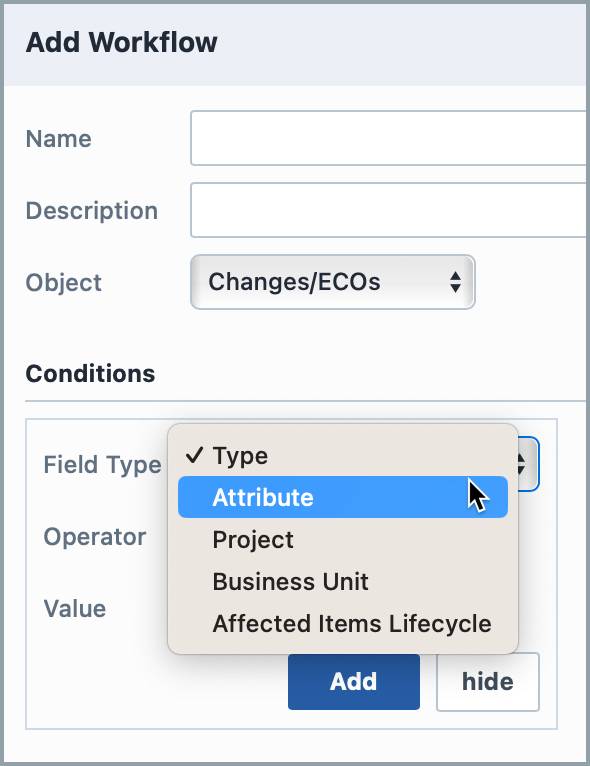
From the Add Workflow panel, you will be able to define a name and description. You must then select an Object type:

You can specify an initial condition by selecting a field/value condition:
Click the Add button to add the condition.
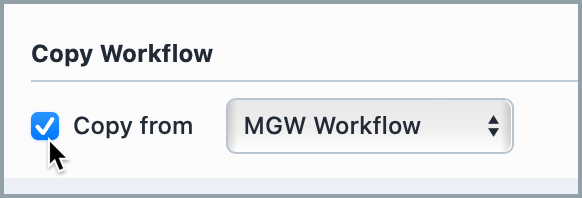
When creating a new workflow, you will be able to copy the settings from an existing workflow by checking the Copy Workflow option.
To create the new workflow, click the Add or Apply button.
Creating a Branch
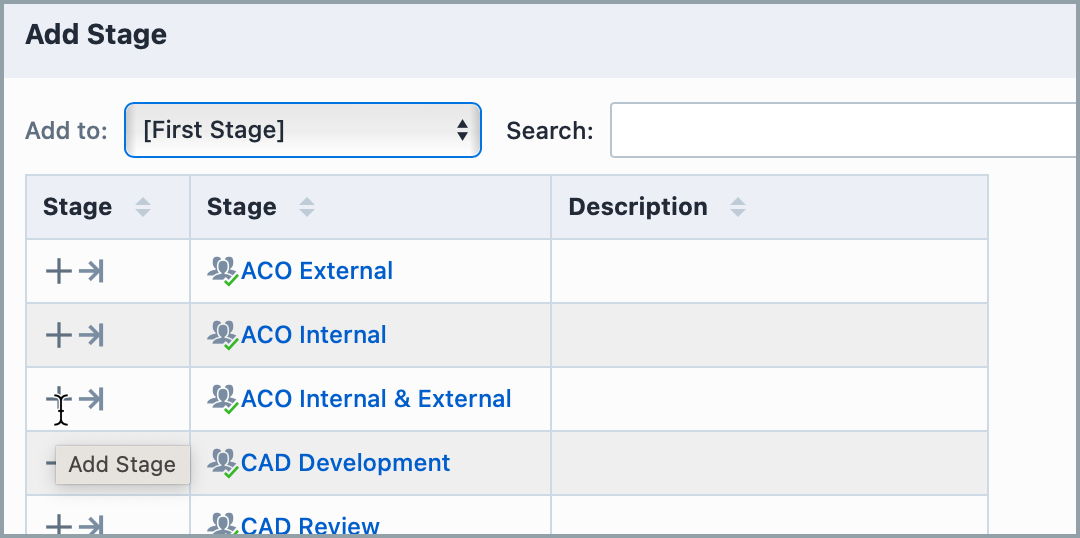
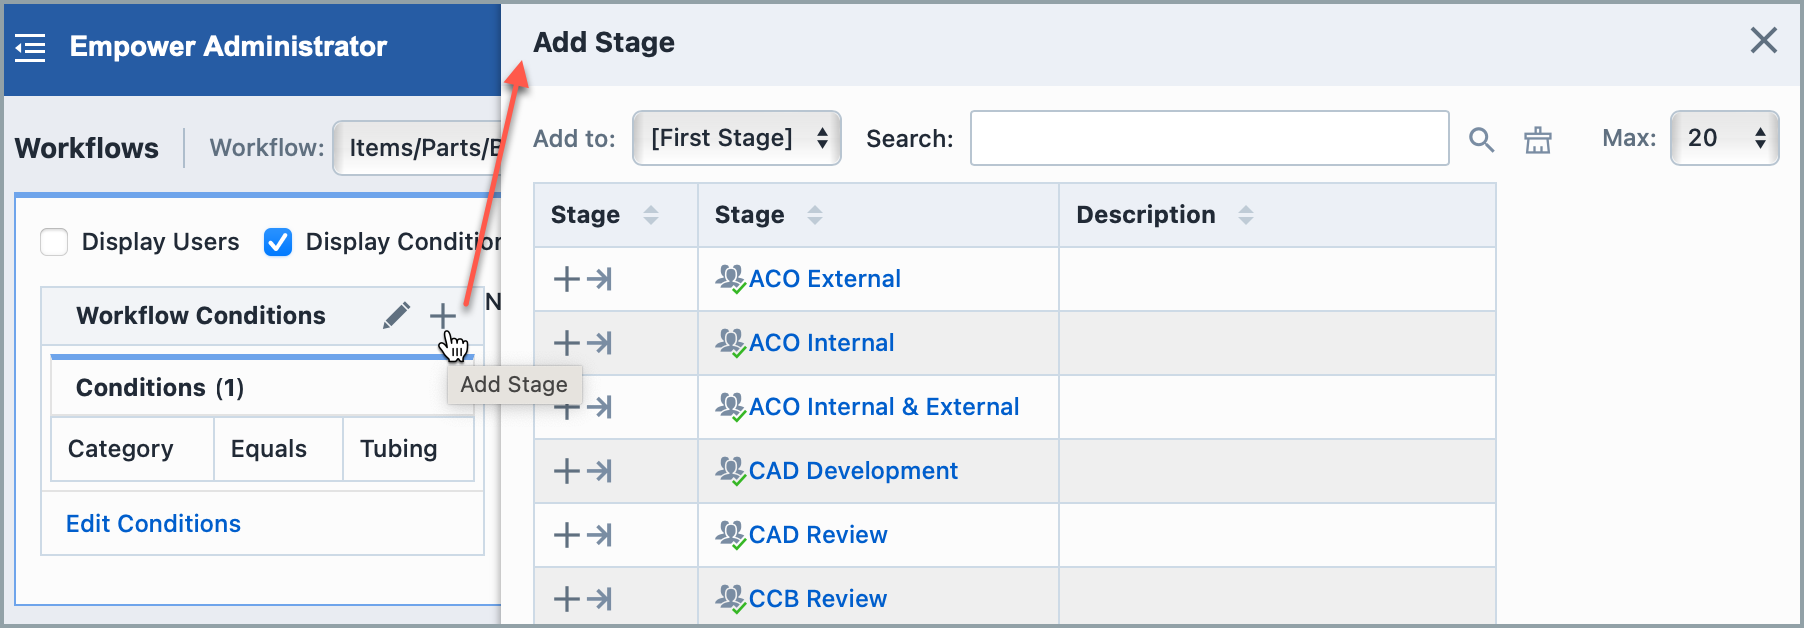
To add a branching condition, click the Add Stage icon for any stage where you wish to define a branch:
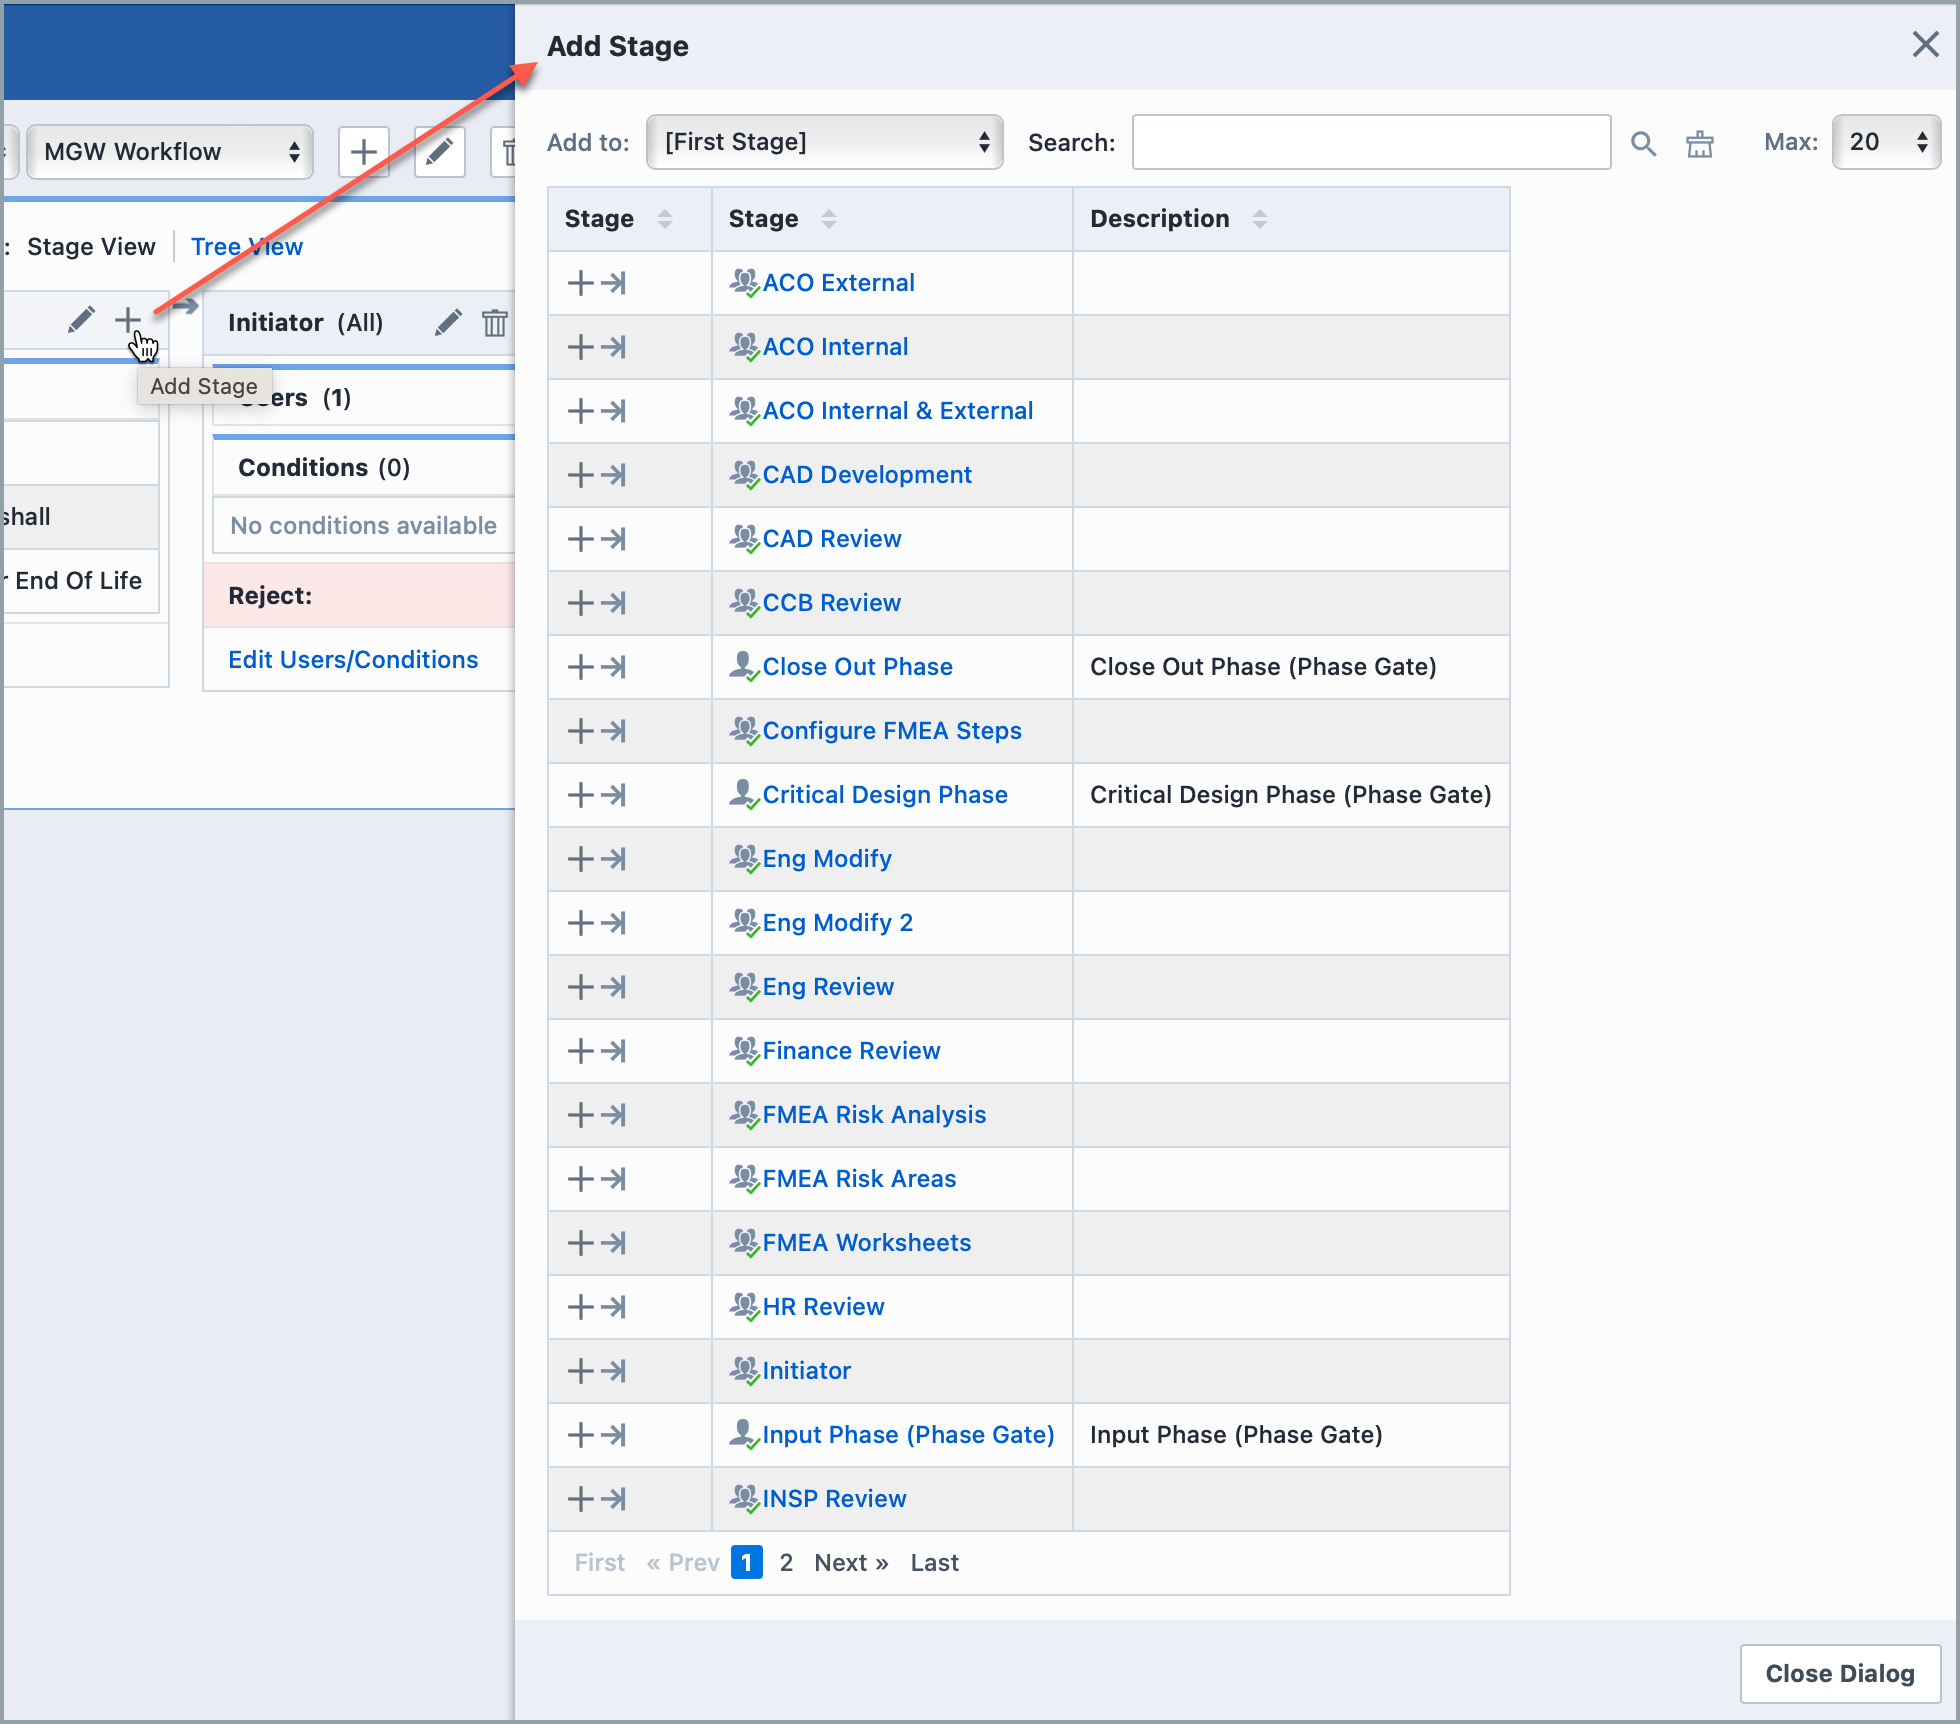
Notice that the Add To: list will display the selected stage. To add a branch, select the desired stage.
The workflow will update to display the branch.
When a branch is defined, you should also define field conditions that will dictate which branch will be activated under specific conditions.
Note: you should always have a branch that has 0 conditions which will represent the default branch.
Modifying Stages/Flow
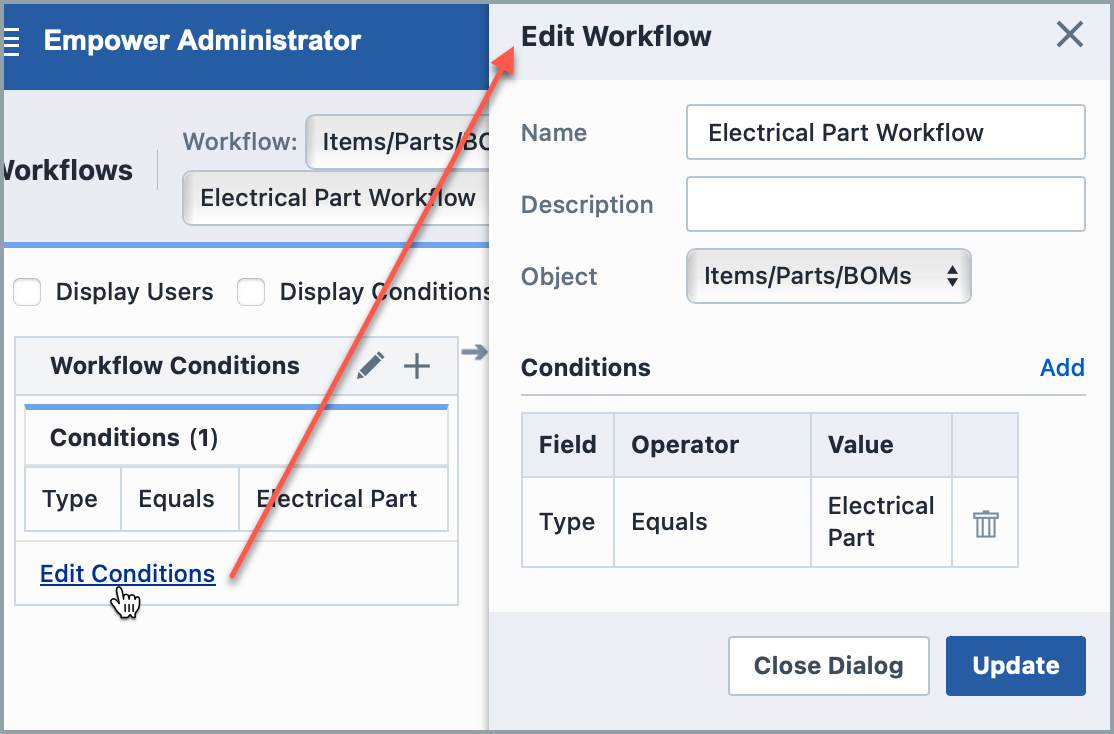
Once a workflow has been created, a Workflow Conditions panel will appear with the initial conditions listed.

You can modify the conditions by clicking the Edit Conditions links. From the Edit Conditions dialog box you can add and remove conditions.
To add a stage you can click the Add Stage link or header icon.
To add the stage, click the stage name hyperlink.
You can also use the Add and Apply buttons.
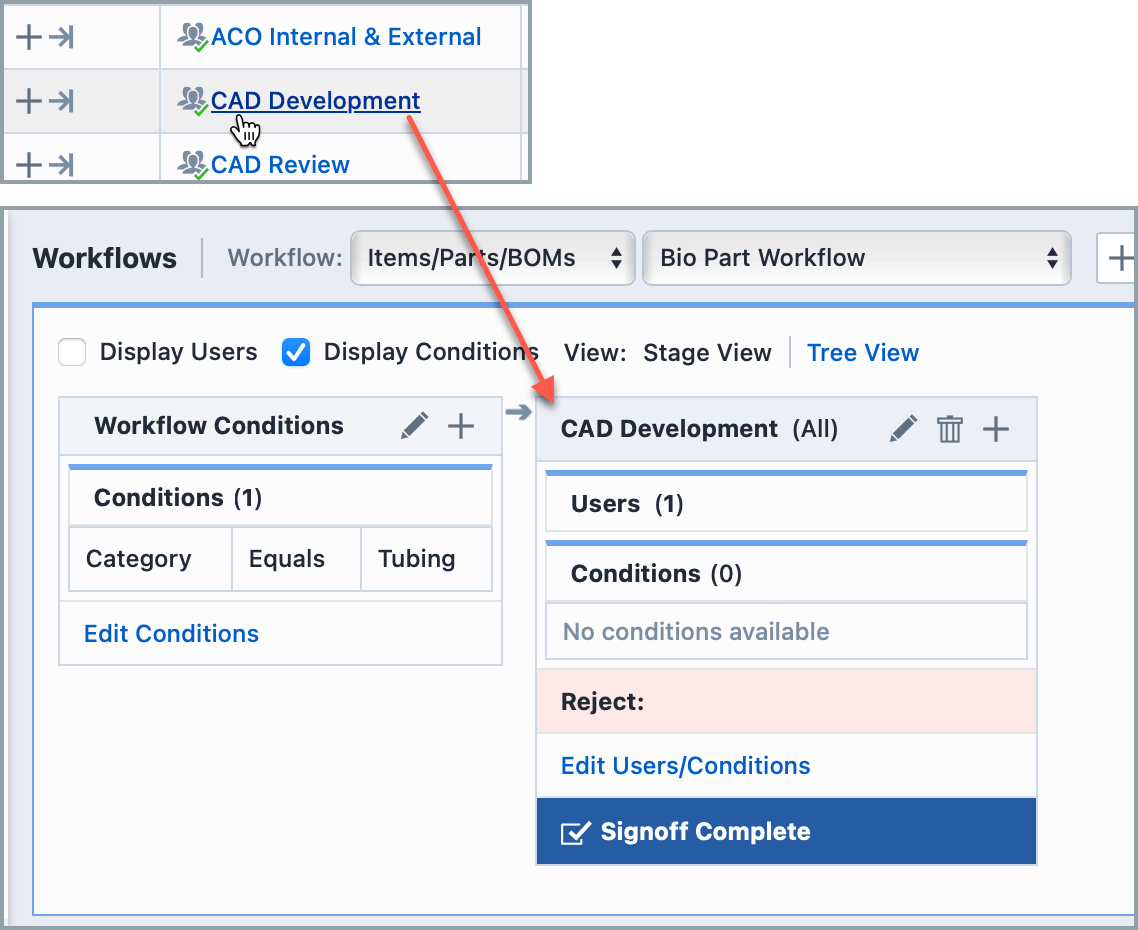
Once a stage has been added to the workflow, you can modify the type, name, and conditions by clicking on the Edit Stage icon or Edit Users/Conditions link:
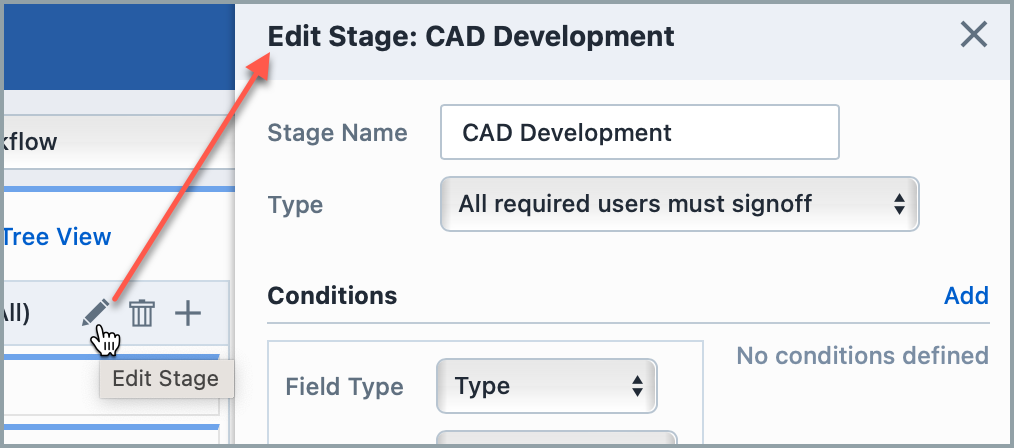
From the Edit Stage panel, you can modify the stage name, change the Type, modify conditions, and add users.
To add a user, click the Add as Required or Add As Reviewer button.
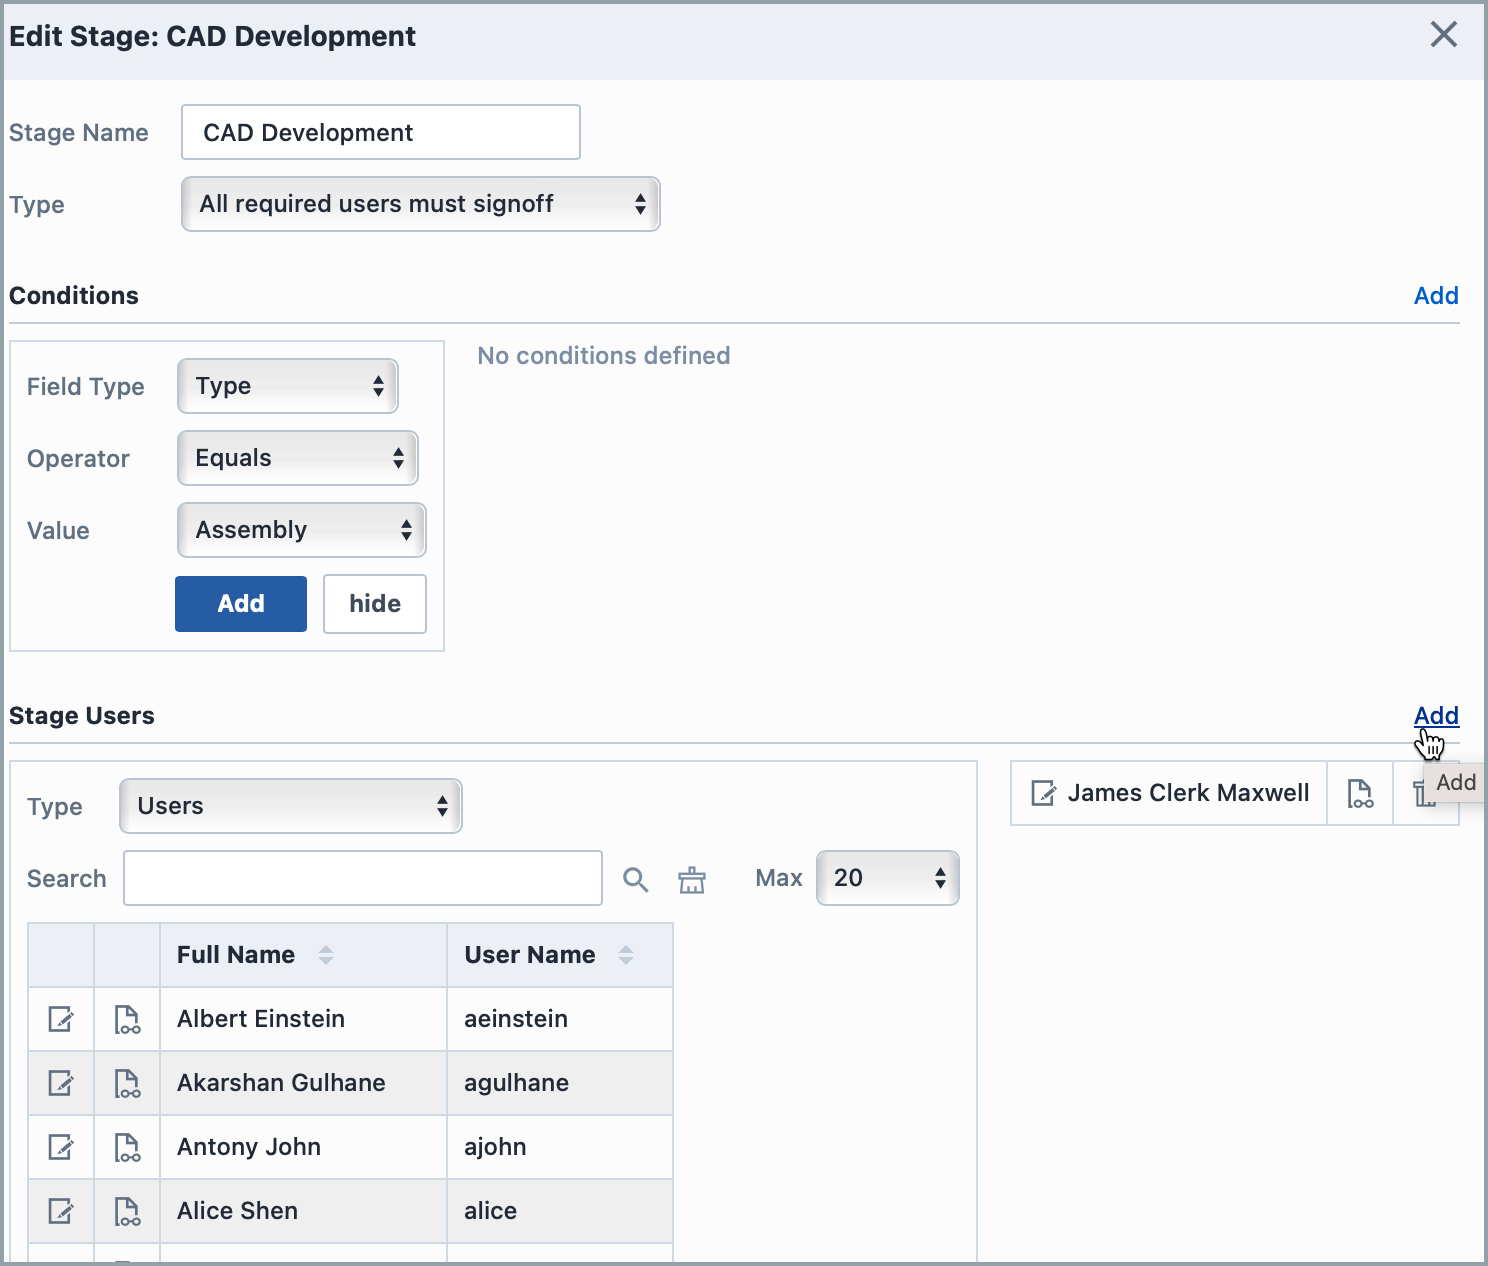
You can change the user between Required and Reviewer by clicking the type icon.
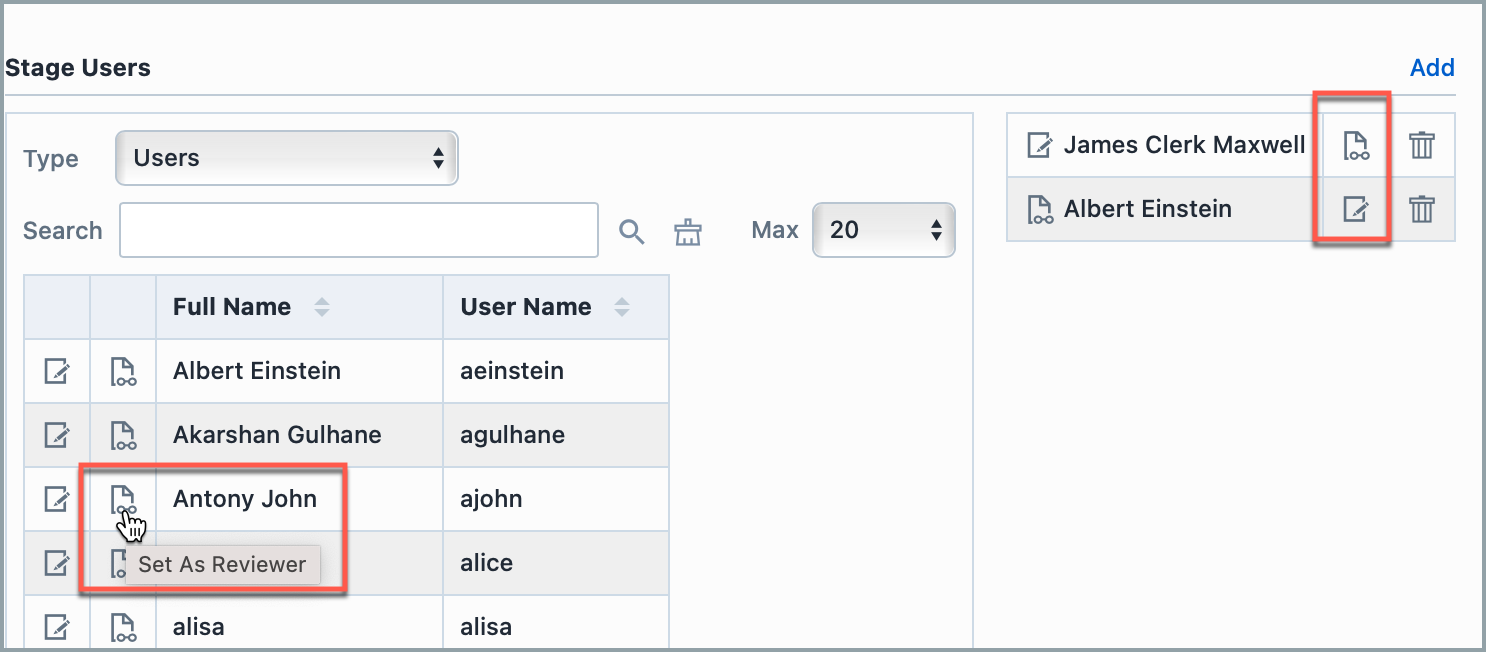
You can remove user by clicking the Delete icon.
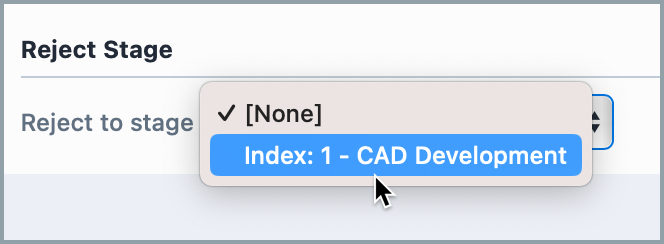
To set a rejection stage, select the stage in the Reject Stage list:
To add subsequent stages, you can click the Add Stage header icon.
To add a branch, add a stage to any existing stage that contains a subsequent stage.
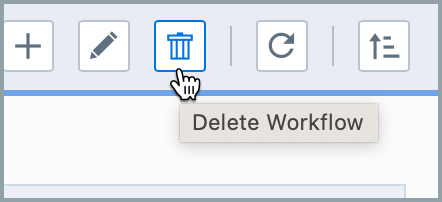
Deleting a workflow
Note: Deleting the workflows from the Administrator configuration does not impact any objects in Desktop where that workflow has been used in the past. When you delete a workflow here, you are removing the 'template' that is used when the workflow is initially assigned. Deleting a Workflow completely removes the template from the database and would need to be recreated manually if it was needed again in the future.
To delete a workflow:
- Select the desired workflow from the 'workflow' drop down menu.
- Click on the 'x' to open a delete window.
- Click on 'delete workflow' to delete it.