Users
Users
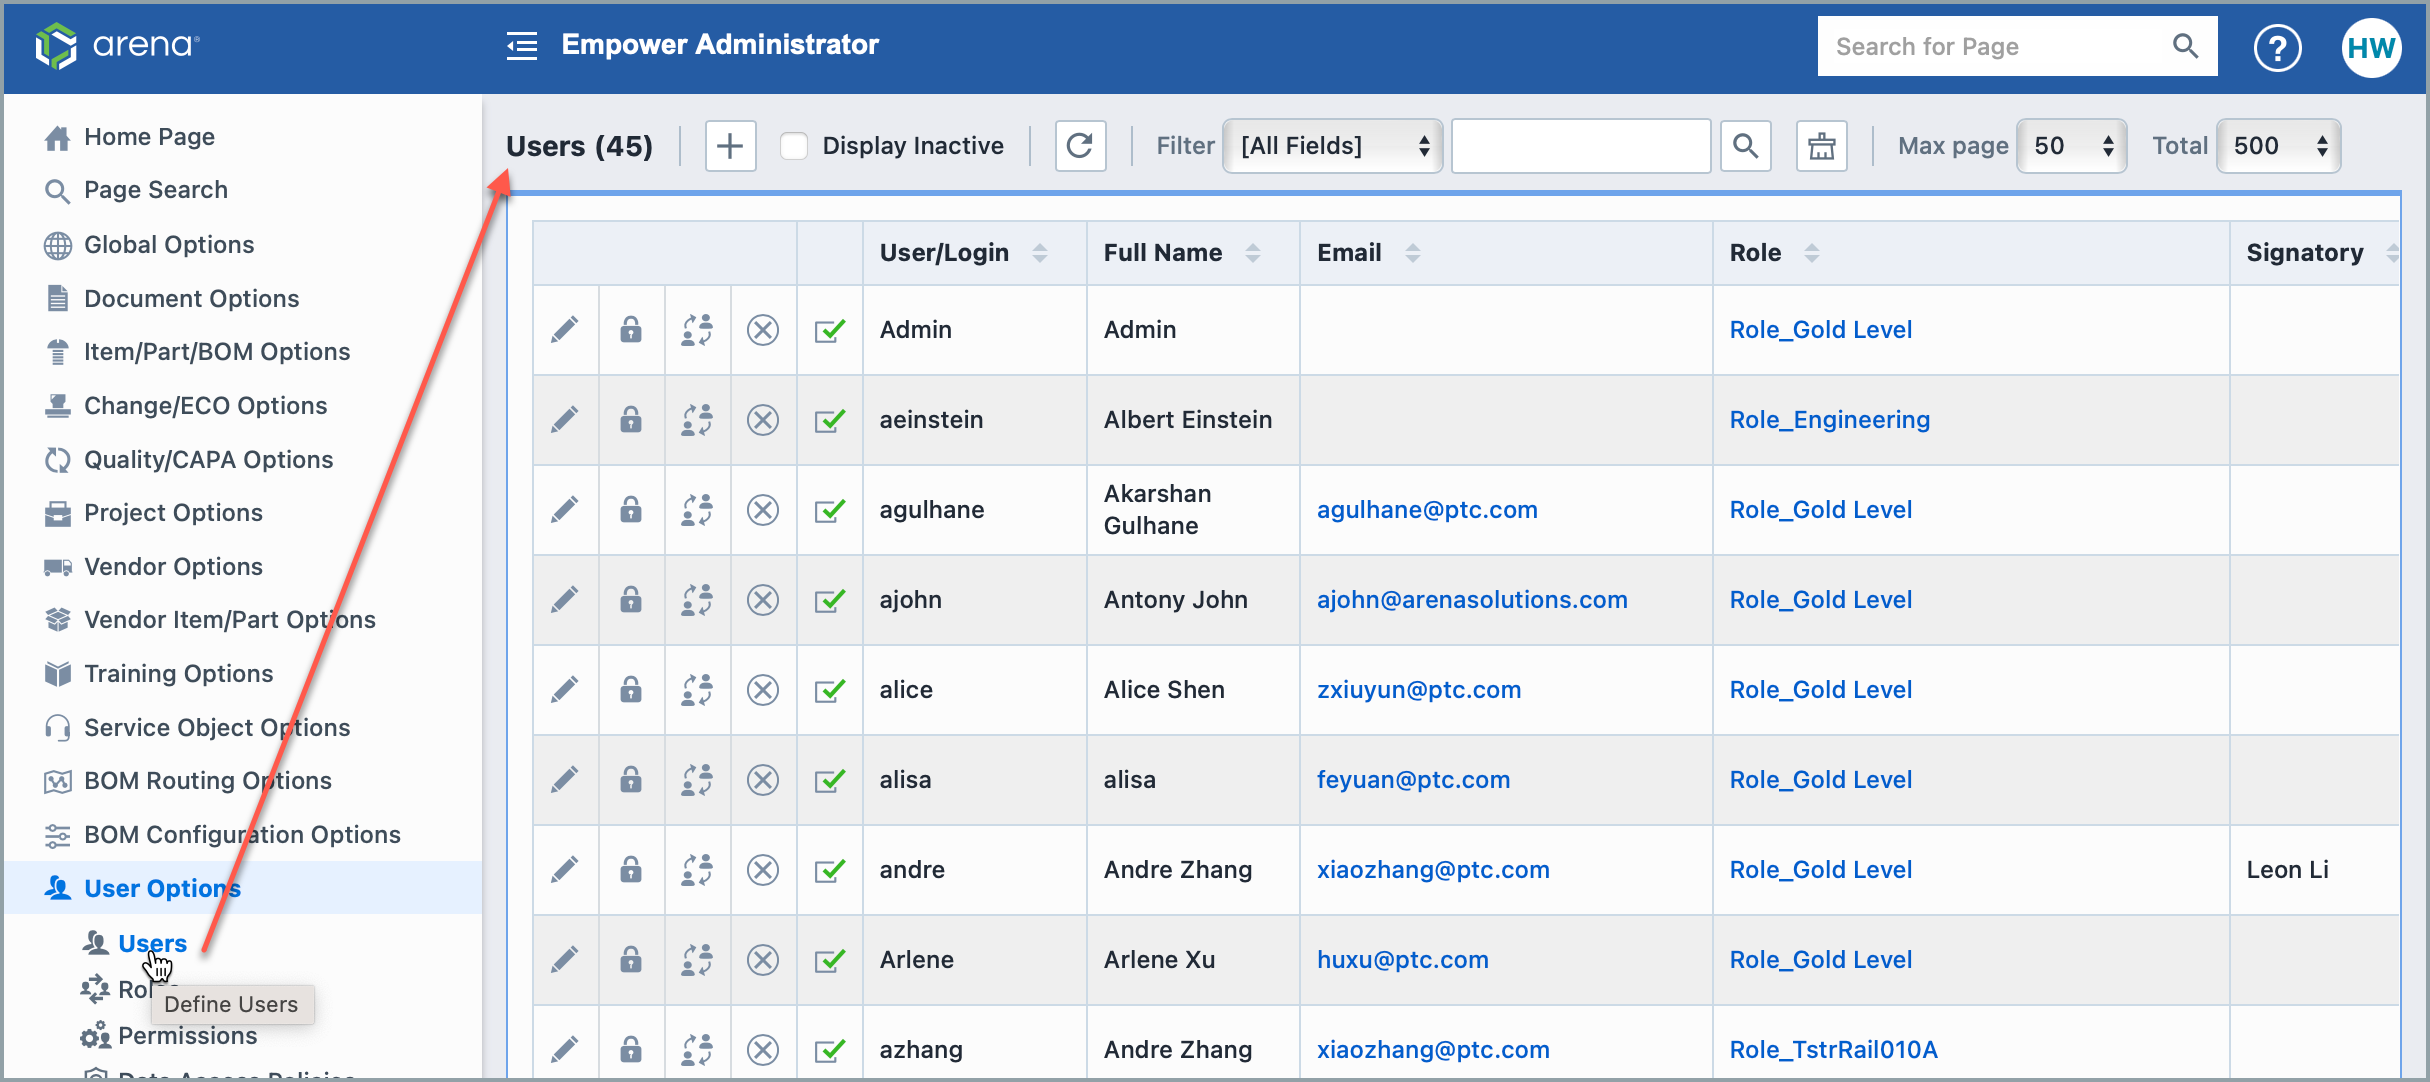
Empower Administrator > User Options > Users
Overview
The Empower Administrator contains all the mechanisms to create, control, and manage database users. The database administrator creates user logons with passwords, permissions, and email information. Users can be added to groups that define their permissions.
Empower administrator’s default log-on is set to:
- User Name: admin
- Password: admin
CAUTION: It is highly recommended that the end user change this setting after installation.
The User page allows you to perform the following user tasks:
- Add/Edit/Remove Database Users
- Set/Chage/Reset users' passwords
- Set a user's email address
- Define a user's database permission group
- Assign a user to a Business Unit
- Assign Authorized Signatories
User Information
The Users list displays users based on the Search Filter and results page. It contains the following fields along with any others defined in User Options > Custom Fields:
| Field | Description |
|---|---|
| Status (indicator) | Displays a user's account status (Active, Disabled, or Locked) |
| User/Login | User's login name |
| Full Name | User's full name, this is the name that will appear whenever a user is listed |
| Email address of the specified user | |
| Permission | Database permission group for the specified user |
| Signatory | User who can sign off on this user's behalf |
| Admin | Displays whether or not the user has Administrative privileges |
| Comment | General Comment about a user |
| Business Unit | User's business unit |
| [Custom Fields] | Custom user fields |
Adding Users
To add a new database user, click the Add button. This will invoke the Add User panel.

From the Add User dialog box you can specify the following fields:
| Field | Description |
|---|---|
| User Name/Login | Specify the user's login name |
| Full Name | Specify the user's full name |
| Specify the user's email address | |
| Comment | User comment |
| Business Unit | Select the user's business unit |
| Signatory | Specify a user who can sign on this user's behalf |
| Login Password | Select the user's default login password (note: users can change their passwords) |
| Signoff Password | Select the user's default signoff password (note: users can change their passwords) |
| Permission Group | Select the user's permission group |
| Administrator Login | Check if user will be allowed to login to the Administrator |
| Copy from | Checking the Copy from box and selecting a user from the dropdown menu will copy the user preferences of the selected user to the new user that is being created. All of the existing user’s preferences are copied to the newly created user except for user profile, bookmarks, search lists, and quick links. |
Once all fields are set, click the Apply or Add button to create the new user.
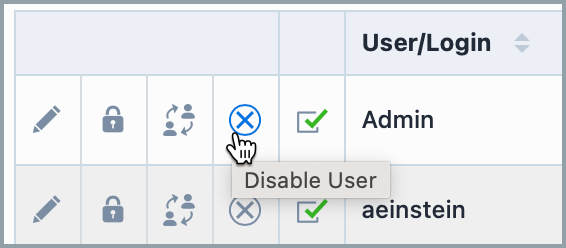
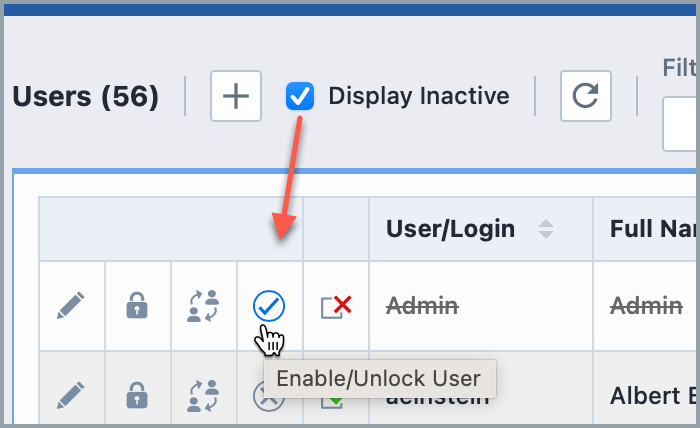
Enabling/Disabling Users
Database user status can be:
| Status | Description |
|---|---|
| Active | User can login to system and execute enabled operations |
| Inactive | User cannot login to system all signoff activity will be disabled for this user however all historical events will be maintained for all users |
| Locked | User attempted login with invalid password. The user account will need to be unlocked by an administrator or the user will have to wait the allotted time before attempting to login again |
The status indicator will display each user's status.
For locked and disabled users, click on "Display Inactive" and then unlock and activate the user by clicking the Enable/Unlock icon.
Modifying Users
To modify a database user, click the Edit icon in the Actions column. This will invoke the Edit User panel.
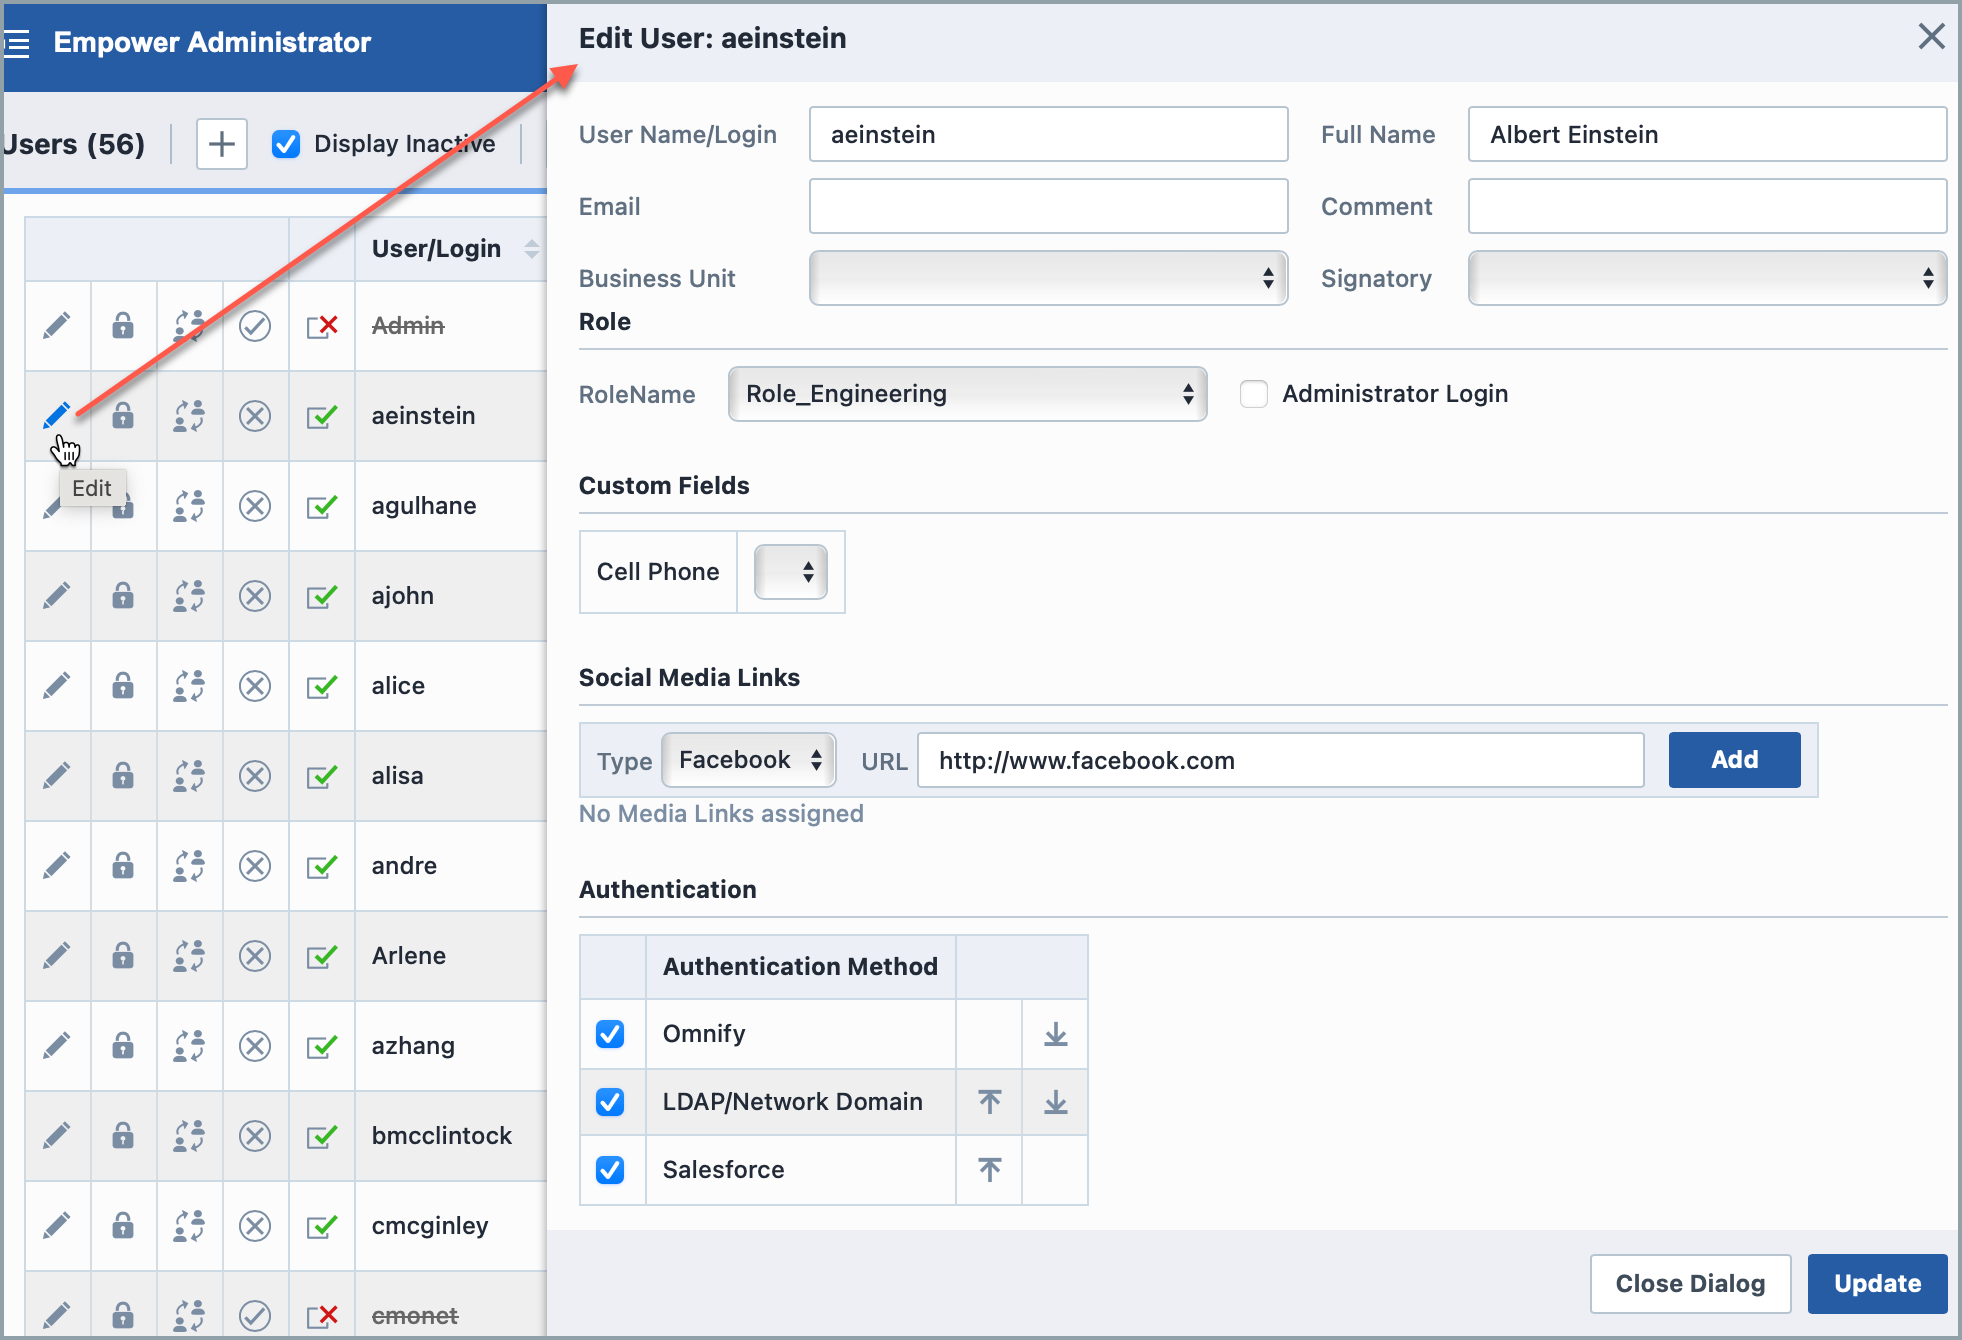
From the Edit User panel you can modify the following fields:
| Field | Description |
|---|---|
| User Name/Login | Specify the user's login name |
| Full Name | Specify the user's full name |
| Specify the user's email address | |
| Comment | User comment |
| Business Unit | Select the user's business unit |
| Signatory | Specify a user who can sign on this user's behalf |
| Permission Group | Select the user's permission group |
| Administrator Login | Check if user will be allowed to login to the Administrator |
Note: when editing a user, you will not be able to modify the user's passwords (See below). Once all fields are set, click the Update button to save the changes.
Passwords
Empower supports various password retrieval options. Refer to the Password Policies section for more information.
To reset user passwords or security questions, click the Passwords/Security icon in the Actions column. This will invoke the Passwords/Security panel.
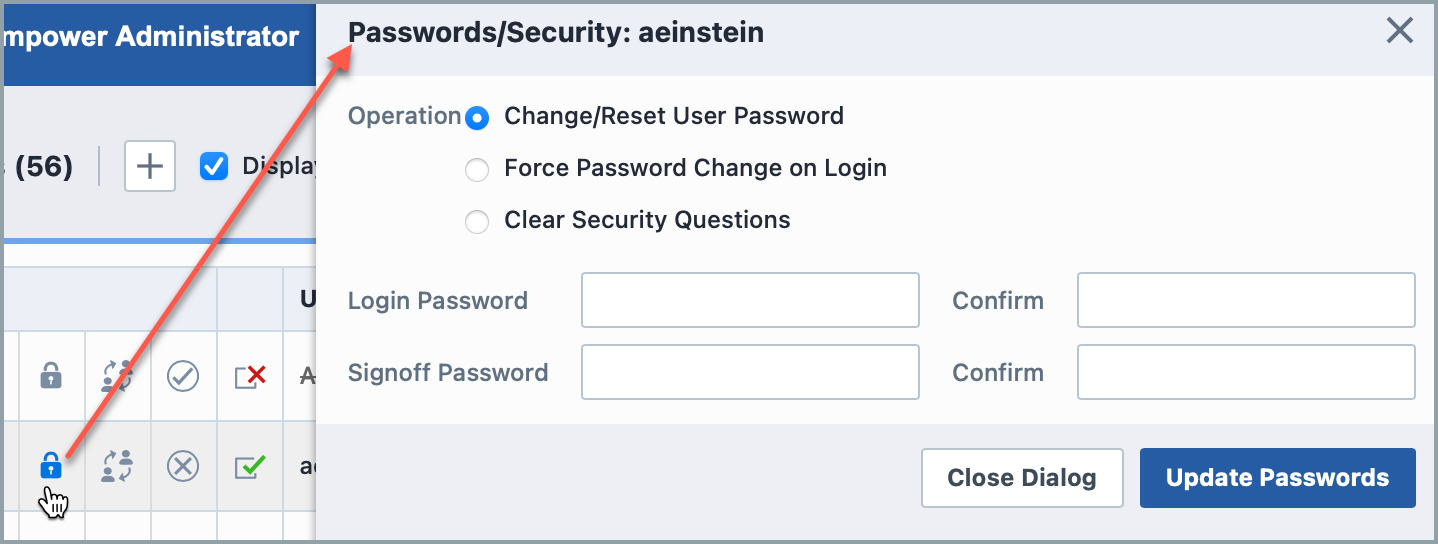
The panel provides the following operation:
| Operation | Description |
|---|---|
| Change/Reset User Password | Allows you to change the user's login and signoff passwords |
| Force Password Change on Login | Allows you to force the user to change their passwords upon their next login |
| Clear Security Questions | Clears the user's security questions. The user will be forced to create new questions/answers upon their next login. |
To change a user's password, select the Change/Reset User Password operation. You will then be able to assign new login and signoff passwords.
To force the user to change their password during their next login, select the Force Password Change on Login operation:
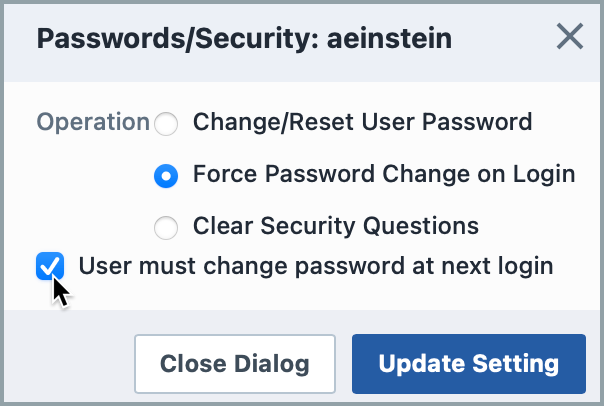
You must then check the User must change password at next login option and click the Update Setting button.
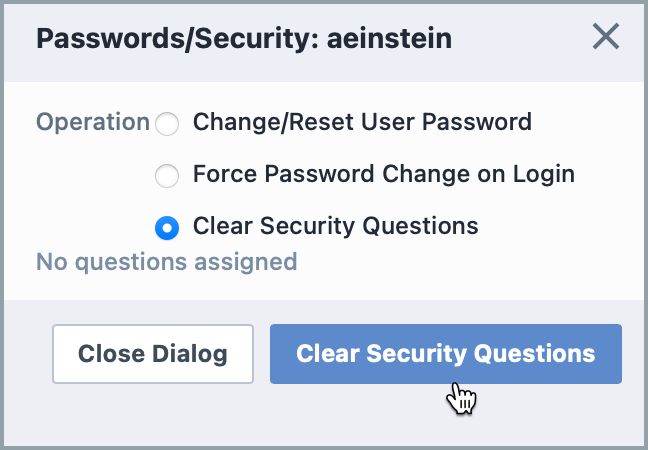
To clear a user's security questions, click the Clear Security Questions operation. This will display the user's assigned security questions:
To clear a user's security questions, click the Clear Security Questions button.
Replacing a User
The Administrator provides a "User Replace" utility which allows you to replace one user with another user on signoff lists, tasks, training, etc. To replace a user, click the Replace icon.

You can then select which areas/options you wish to swap the users.
To replace the user on the selection options/objects, click the Replace User button.