Object Statuses / Lifecycle
Object Statuses / Lifecycle
Overview
Note: In new versions, status of item has been changed to lifecycle.
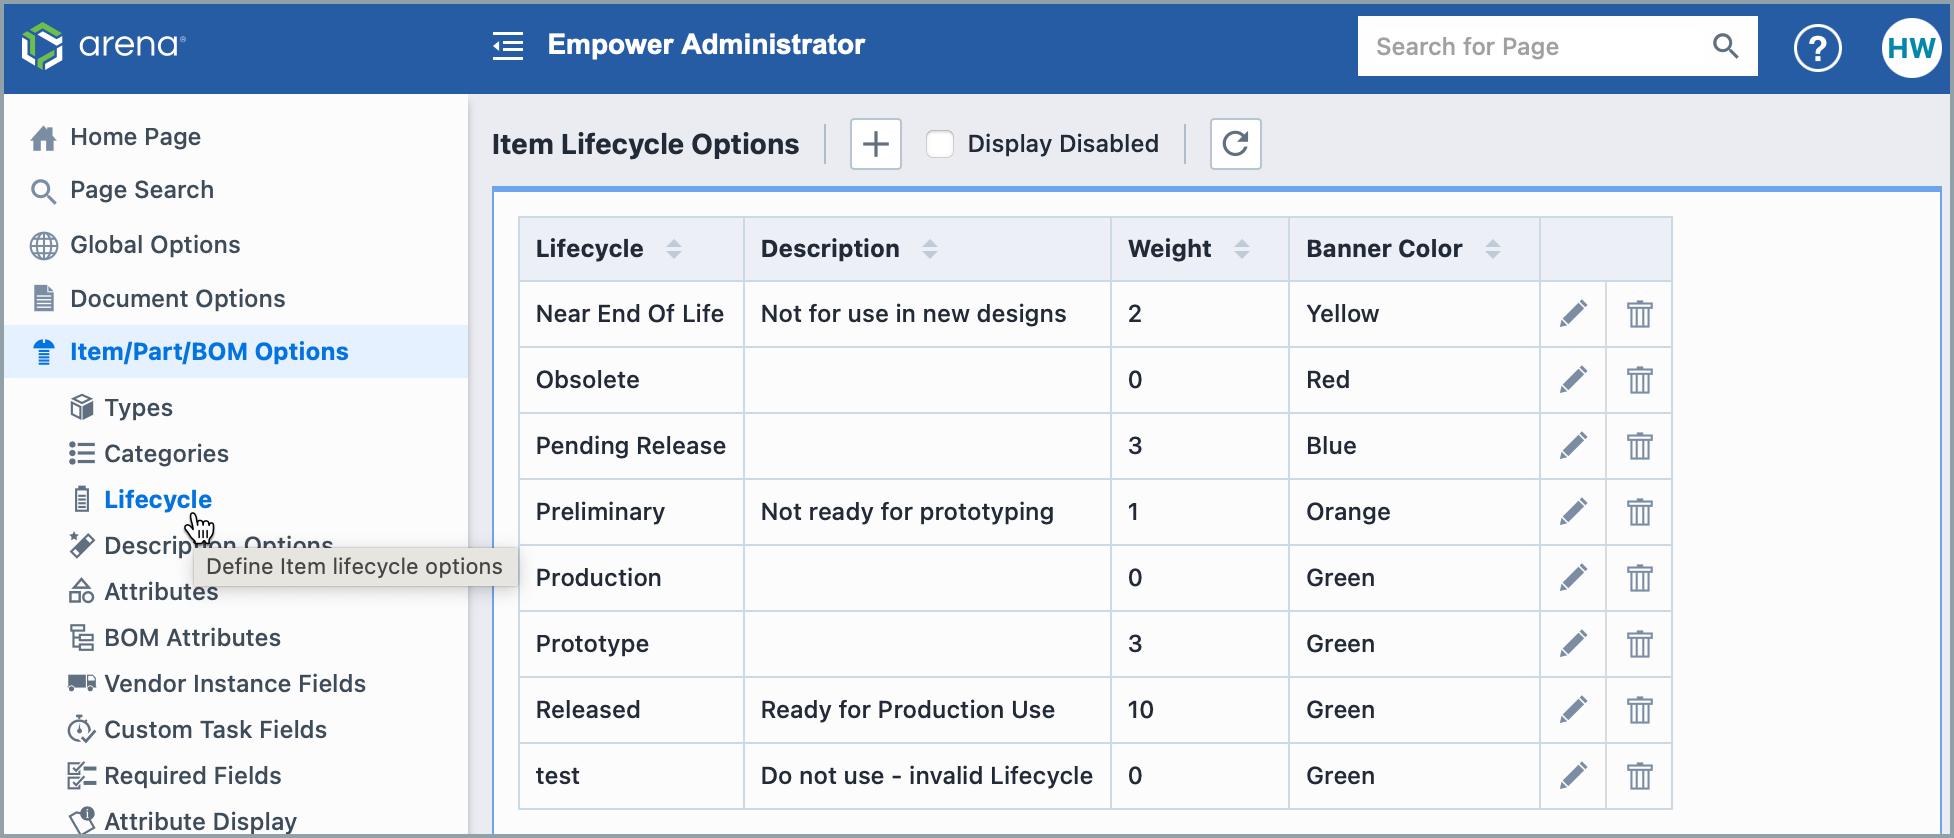
Lifecycle Options allow you to define a list of Lifecycles that are used to define and classify the life cycle of an object. The Lifecycle's description field will display when users hover over the i icon next to a Lifecycle Stage.
Empower Administrator > Item/Part/BOM Options > Lifecycle:
Status can be assigned to the following objects:
- Vendors
- Vendor Items
- Training
- HelpDesk Ticket
Lifecycle can be assigned to the following object:
- Item
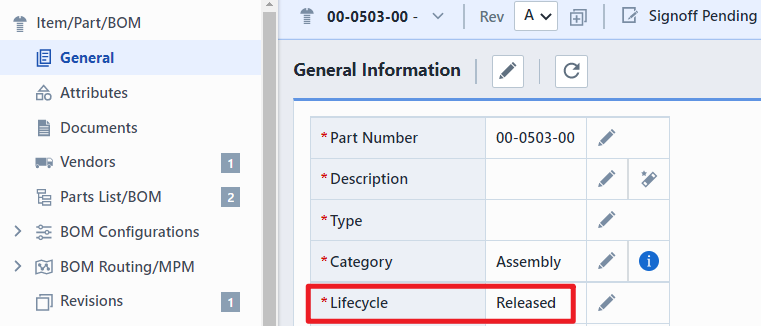
Item Lifecycle assignment can be viewed and assigned on the General Page of the object form.
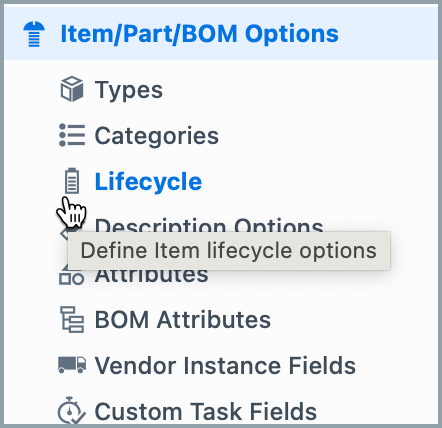
Item Lifecycle can be modified under the object specific section in the Administrator.
Statuses/Lifecycle can be used as search and report criteria.
Statuses/Lifecycle can be used when defining process rules such as: signoff workflows, required fields, part number schemes, etc.
Lifecycle Weights
Item, Vendor Item, and Vendor Status fields can contain a "weight" property. The "weight" is a numeric value that the system will use to apply various rules. Lifecycle weight value is assigned when adding or modifying the lifecycle options.
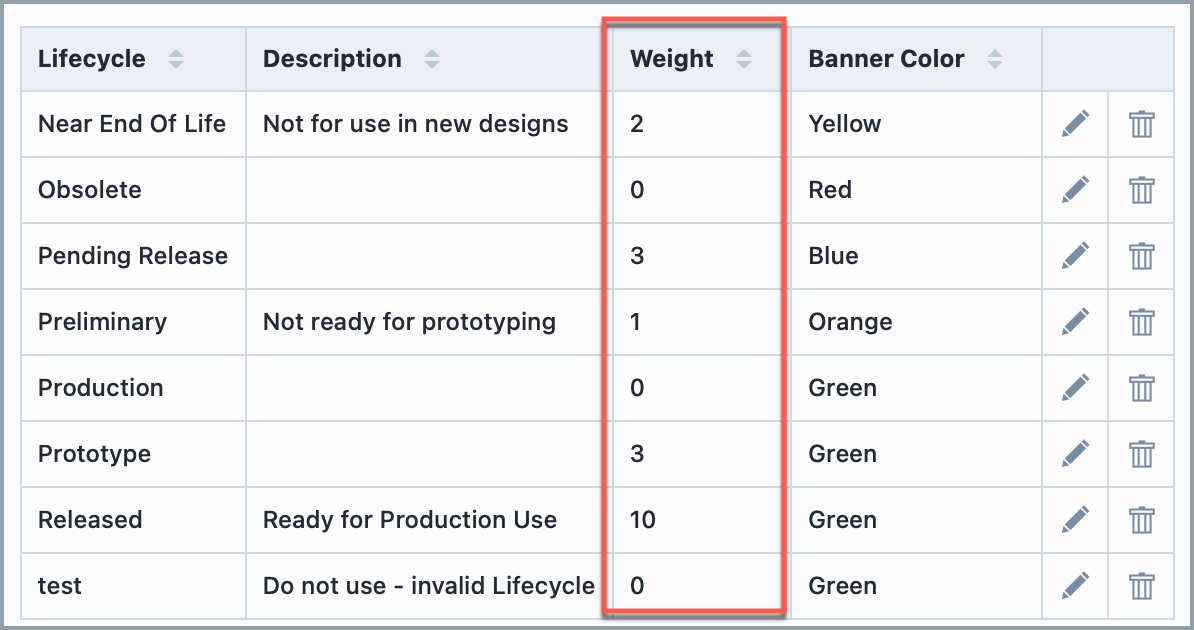
The weight value can be used to determine which BOM child items can be assigned to their parent BOM items in Empower Administrator > Global Options > Rules/Options
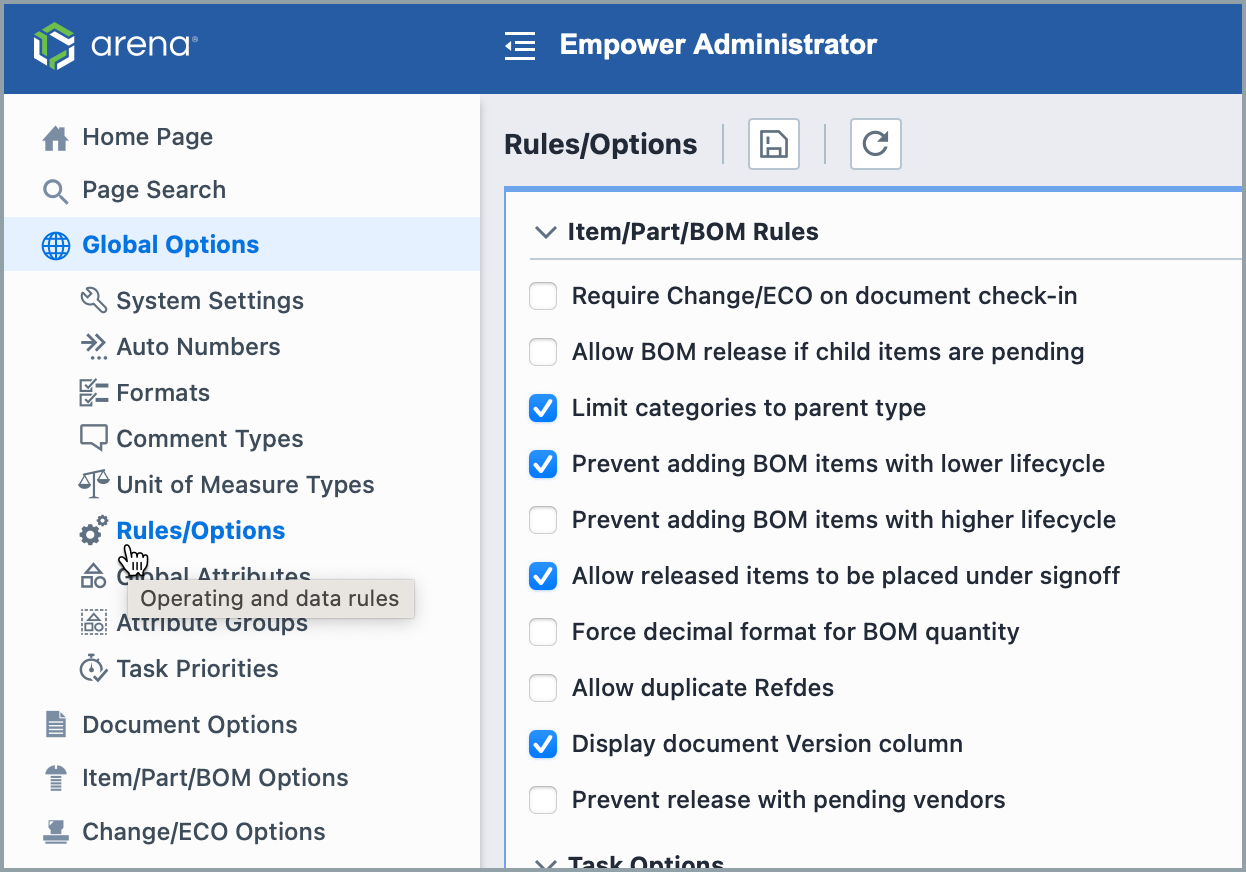
When items are added to a BOM, the system will evaluate the lifecycle weight of the parent item against the lifecycle weight of the child item and determine if the assignment will be allowed.
Adding Lifecycle
To add an object lifecycle, click the Add toolbar button. This will present the Add Lifecycle panel:
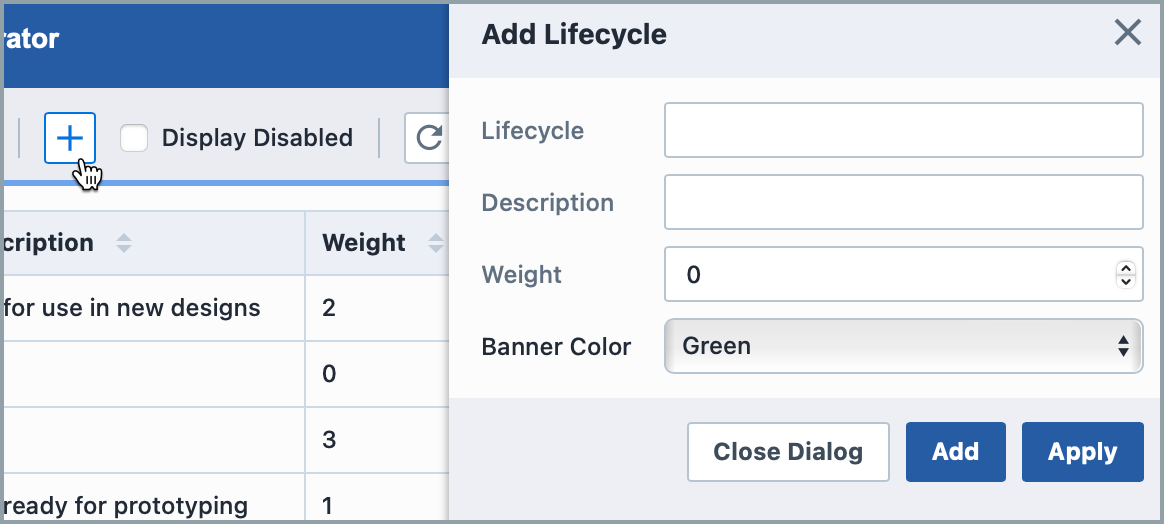
When defining a lifecycle, you will set the name, description, and weight (numeric value).
Once all fields/options are set, click the Apply or Add button to create the lifecycle.
Editing Lifecycle
To modify a lifecycle, click the Edit icon on the list.
This will invoke the Edit Lifecycle panel:
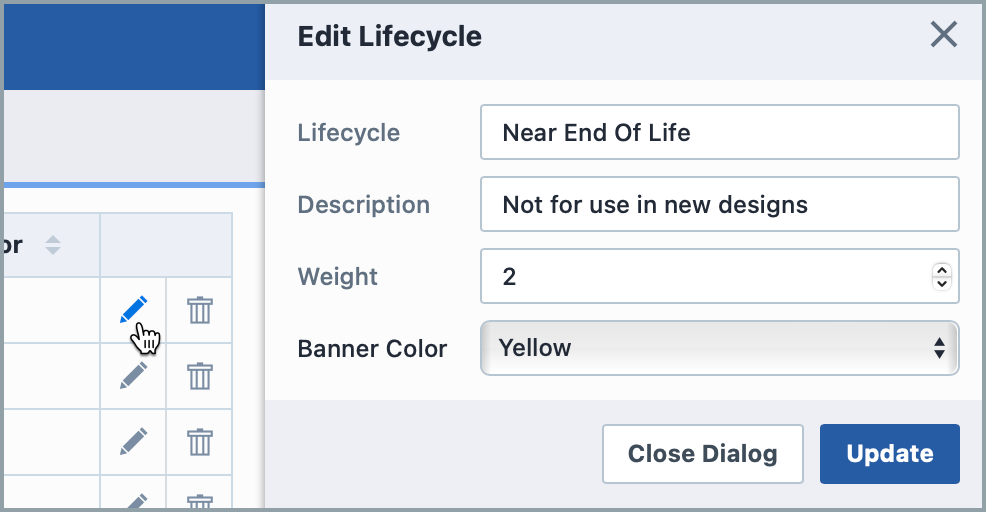
Once the desired changes are made, click the Update button to save the changes.
Banner Color
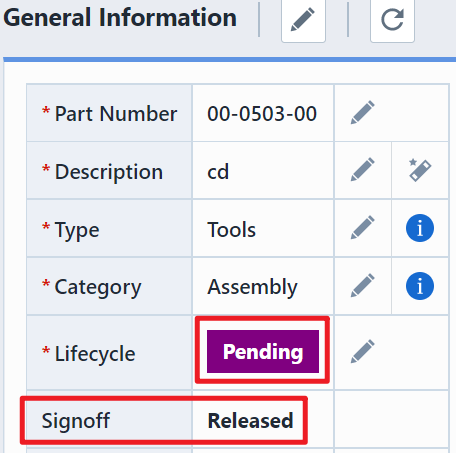
If the Signoff status is Released, the banner color you set will be shown in Empower Desktop.
For example, you can set the banner color of lifecycle Pending as purple.
Removing Lifecycle
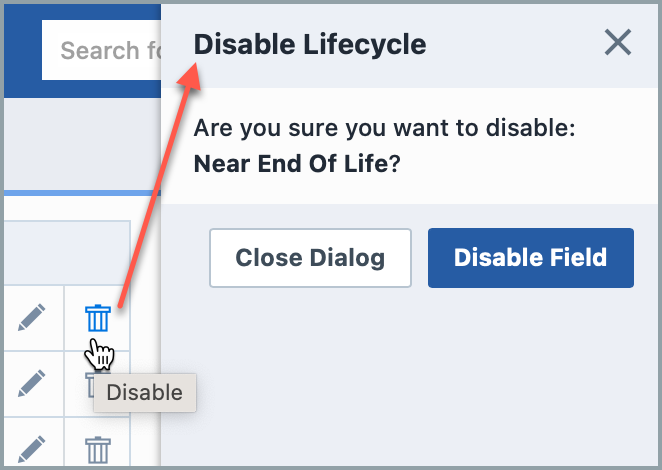
To remove a lifecycle, click the Delete icon on the list.
You will be asked to verify the removal:
Enabling Lifecycle
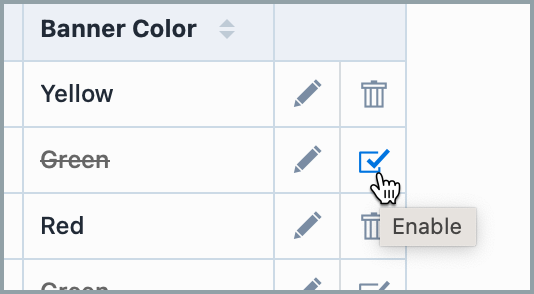
Deleting a lifecycle will "disable" the record in the database. You can view disabled entries by checking the Display Disabled option.

You can activate/enable the lifecycle by clicking the Enable icon.
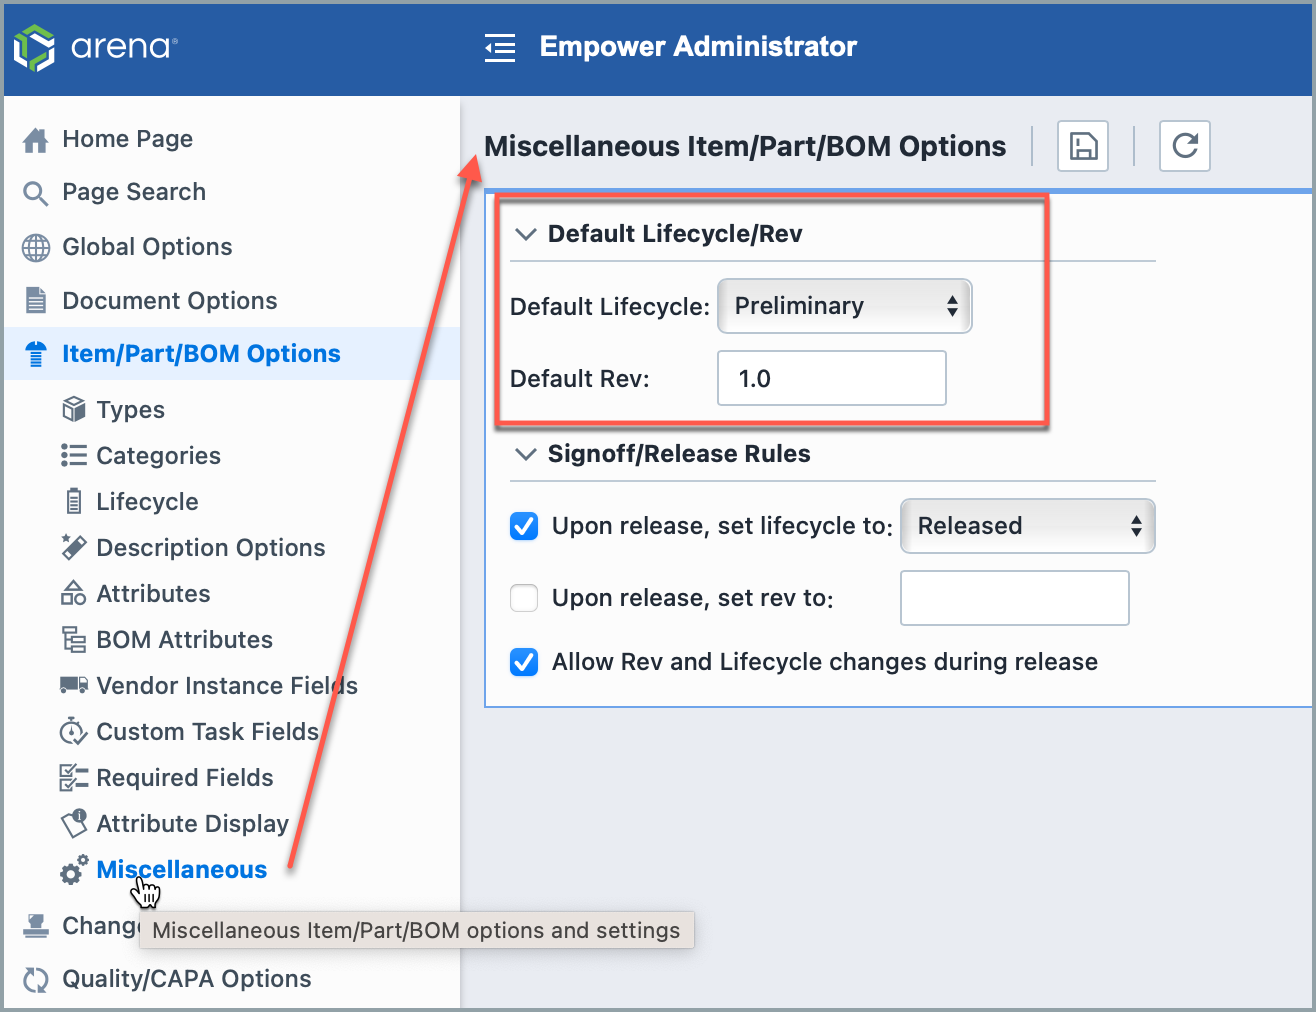
Default Status/Lifecycle
If the default lifecycle/status of an Empower's object can be set, it will appear in the Miscellaneous tab.
