Roles
Roles
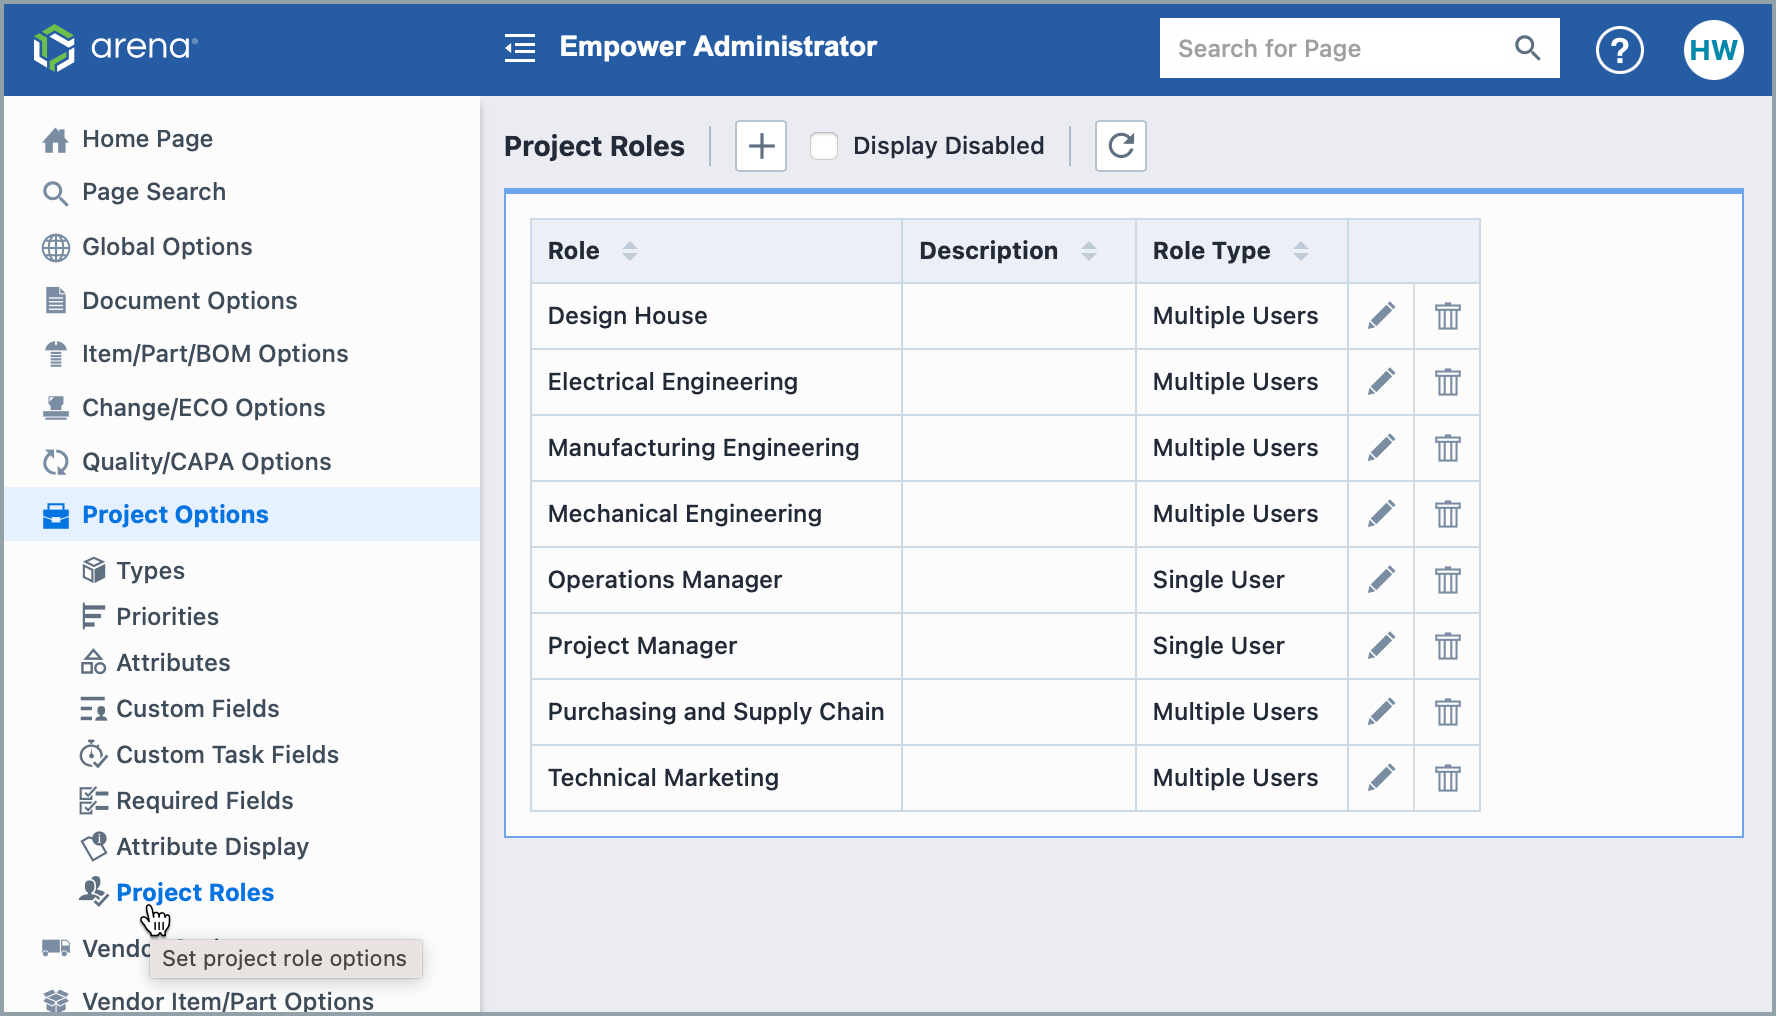
Empower Administrator > Project Options > Project Roles
Empower Administrator > Quality/CAPA Options > Roles
Overview
Both Project and Quality/CAPA have a Roles option, their functions are similar. This article takes Project's as an example.
Project Roles are used to identify a specific user or users who own a particular set of responsibilities for a given project. In addition to being used for classification and reporting purposes, project roles can be used to automatically assign users to a given workflow:
Project Roles are assigned and viewed on the Roles page of the Project form (Desktop):
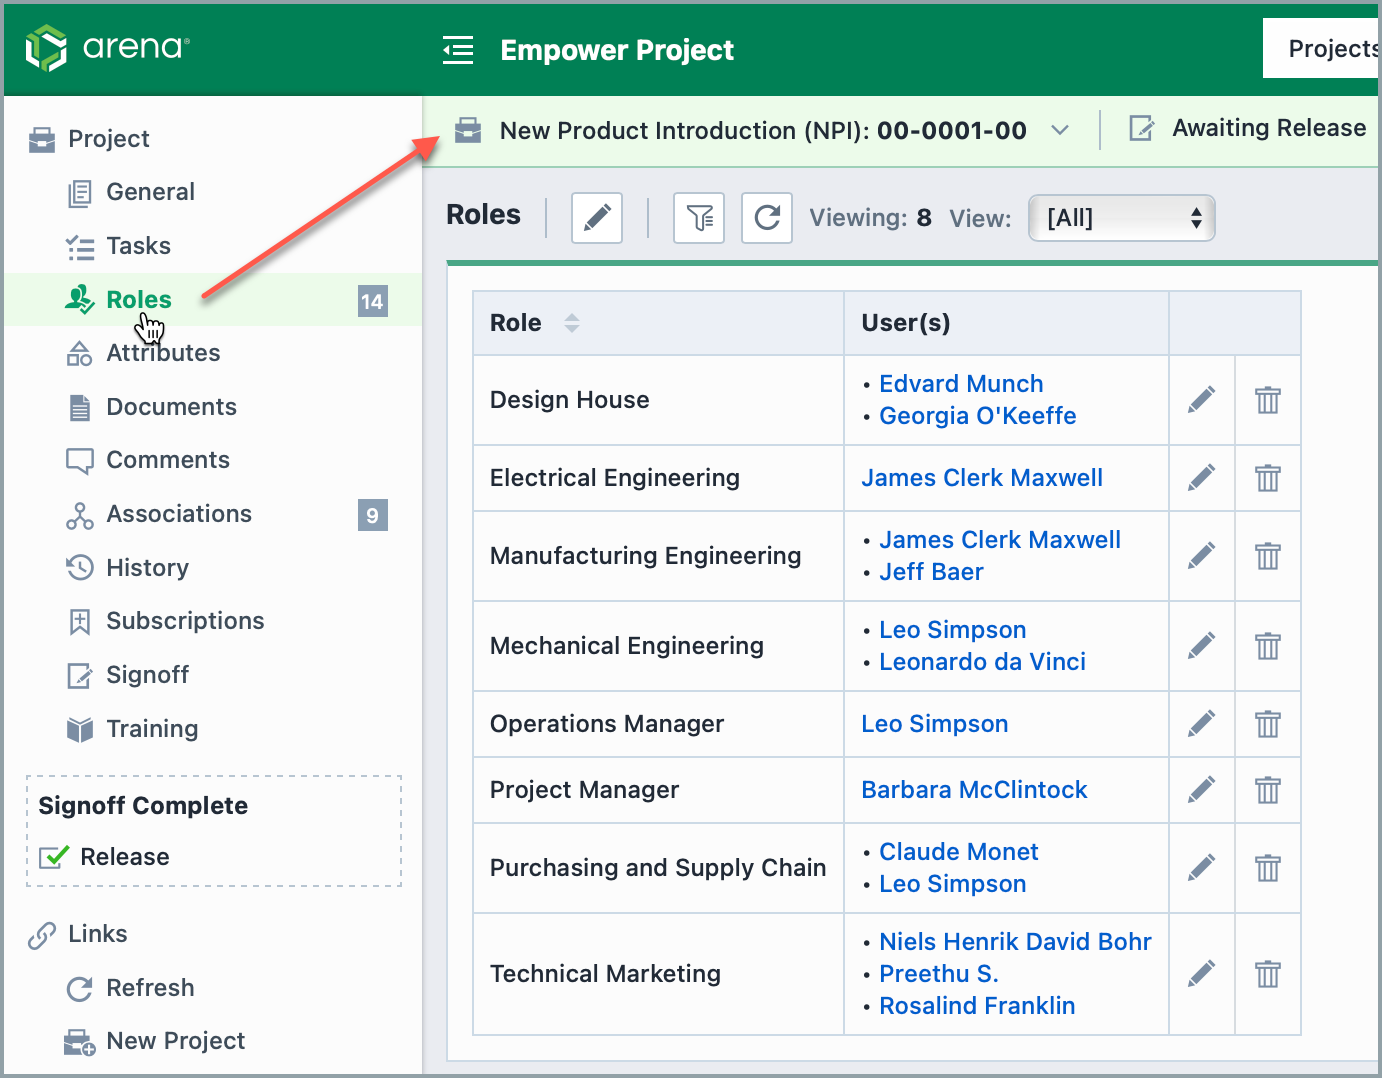
Roles are assigned to users on a per Project basis. Project Roles can be used to automatically assign users to signoff workflows. When defining users for signoff stages you can use Project Role indicators. For each Role defined in the Administrator, a Project Role indicator will be listed among the users when assigning signoff users:
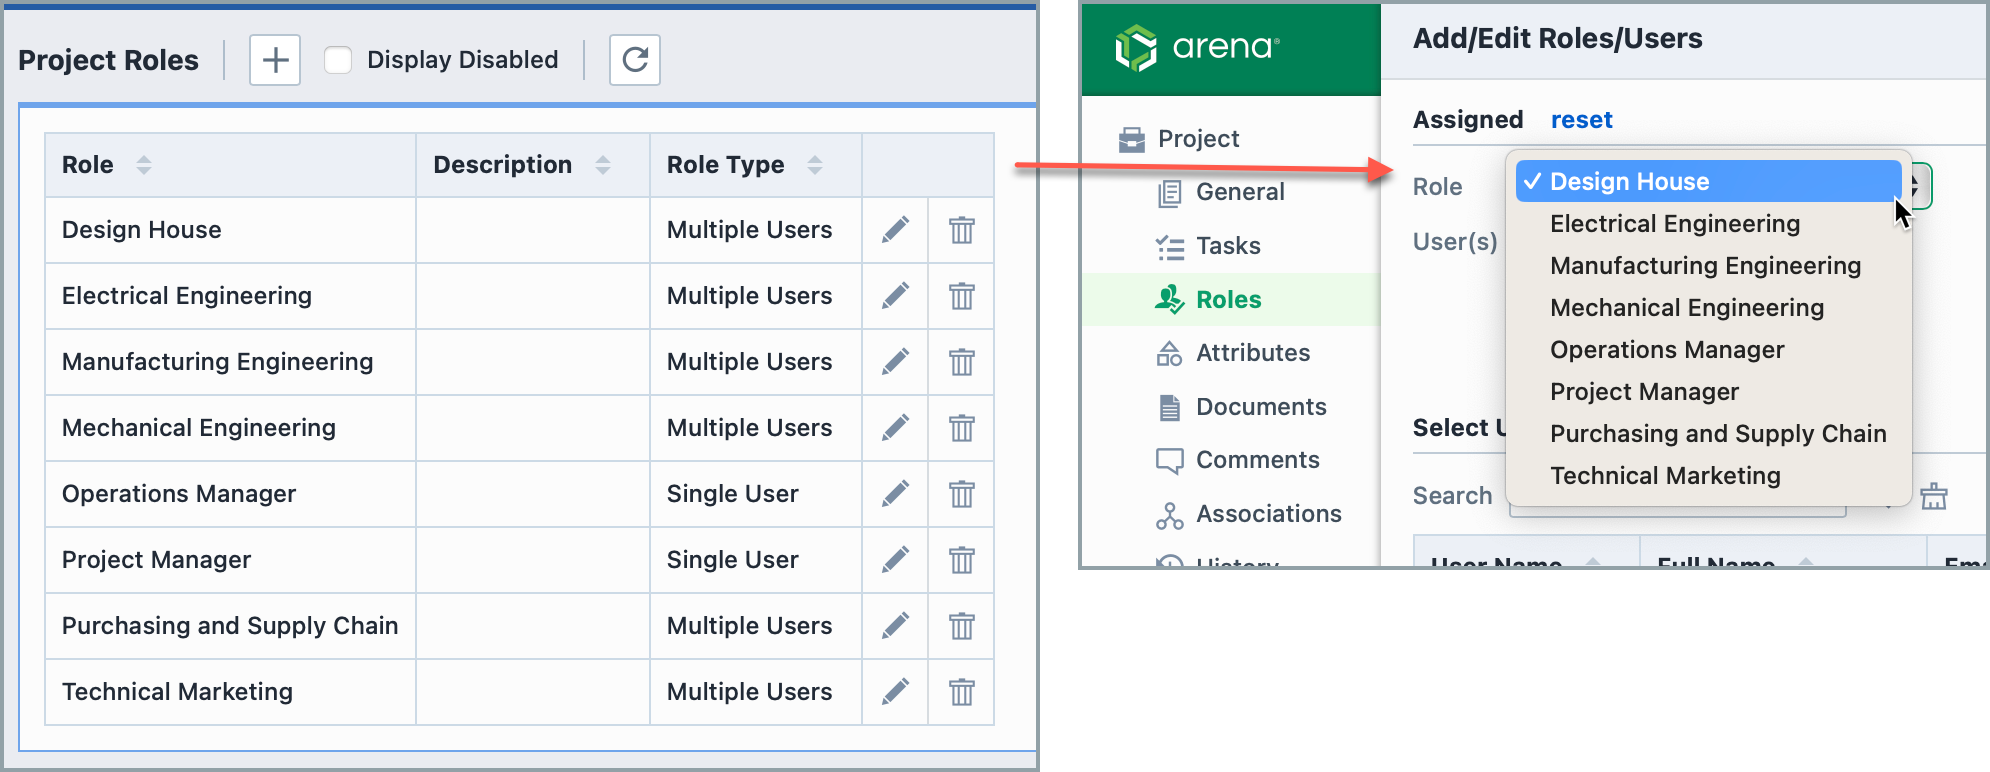
When Desktop assigns workflow users for a given object, it will detect Project Role indicators, and then attempt to determine the appropriate users based on the projects assigned to that item.
Adding Roles
To add a role, click the Add toolbar button. This will present the New Role panel.
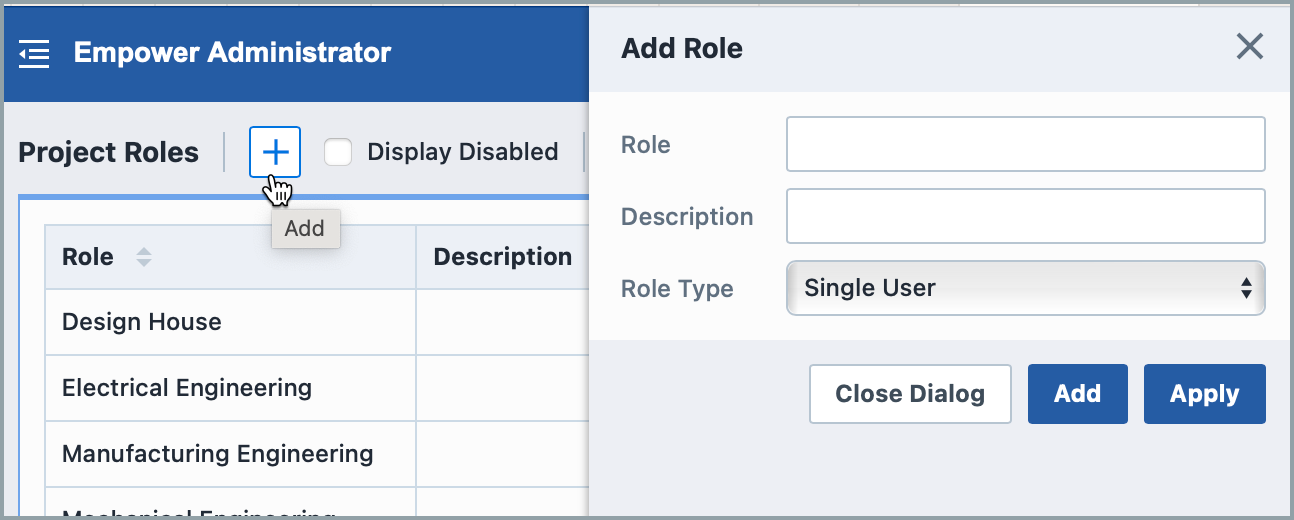
When defining a role, you will set the following:
| Option | Description |
|---|---|
| Role | Specify the priority name |
| Description | Specify a description of the priority |
| Role Tyle | Specify whether the field can be assigned a single user or multiple users |
Editing Roles
To modify a role, click the Edit icon on the list. This will invoke the Edit Role dialog box.
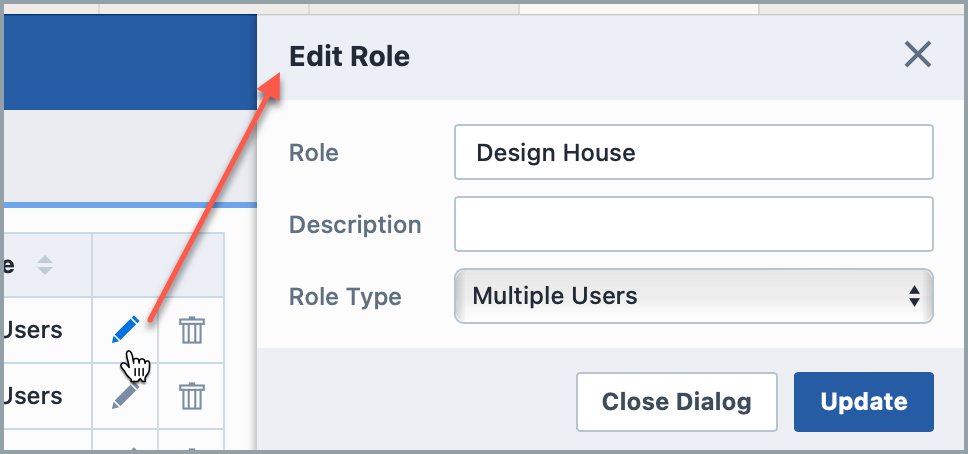
Once the desired changes are made, click the Update button to save the changes.
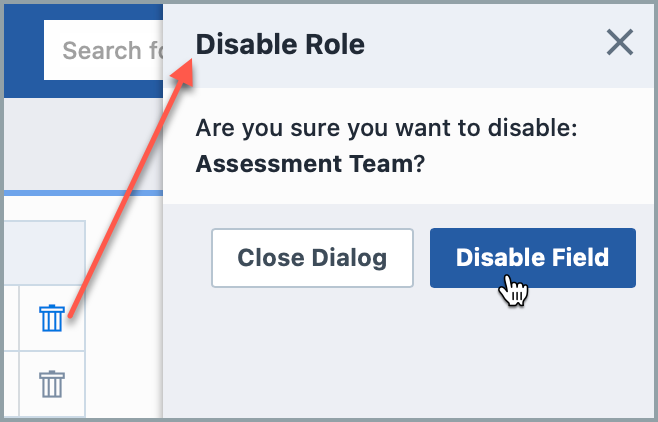
Disabling Roles
To disable an entry, click the Trash can icon on the list. You will be asked to verify your choice:
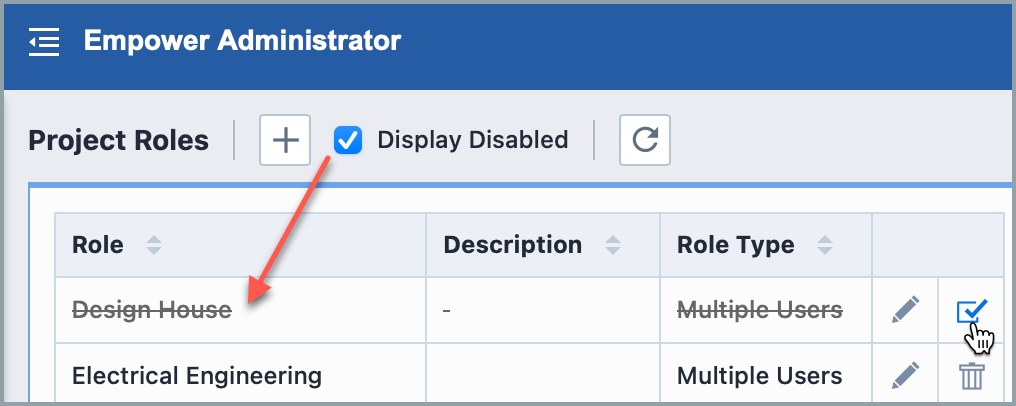
Enabling Roles
You can view disabled entries by checking the Display Disabled option.
To activate/enable the entry, click the Enable icon.