SAML SSO Configuration Guide
SAML SSO Configuration Guide
[toc]
FAQs:
Which SAML 2.0 profile does Empower adopt?
Empower adopts the most widely-used Web browser SSO profile.
What will Empower Login look like with SAML SSO enabled?
For users who have SSO access
- User navigates to any pages that require login.
- Empower redirects the browser to Login page.
- User enters email address as the Username, then clicks the Continue button, Empower will redirect the browser to the SSO Login page.
- User enters email address and password to sign in the SSO service; in the meantime, MFA may also be required depending on Identity Provider’s settings.
- The browser returns back to Empower site; if the SSO user is also an authorized Empower user, then Empower will automatically sign this user in.
For users who don’t have SSO access
- User navigates to any pages that require login.
- Empower redirects the browser to Login page.
- User enters username/email address as the Username, then clicks the Continue button, Empower will show the built-in Login page.
- User enters password to sign in.
What do you need to do before configuring Empower SAML SSO?
- Get the metadata of your SAML Identity Provider.
- Determine the entity id of Empower (Service Provider), default Entity ID is
https://<empower-url>/Saml2
How do you enable SAML SSO for Empower Application?
Pre-requisites:
- Empower Website must be SSL enabled.
- Users who need to log in using SAML SSO must have valid email addresses in Empower.
Steps to enable SAML SSO
- Make sure you are accessing Empower application over HTTPS.
- Navigate to Server Home | Configure Server | Application Settings
- Configure it under SAML SSO Options section.
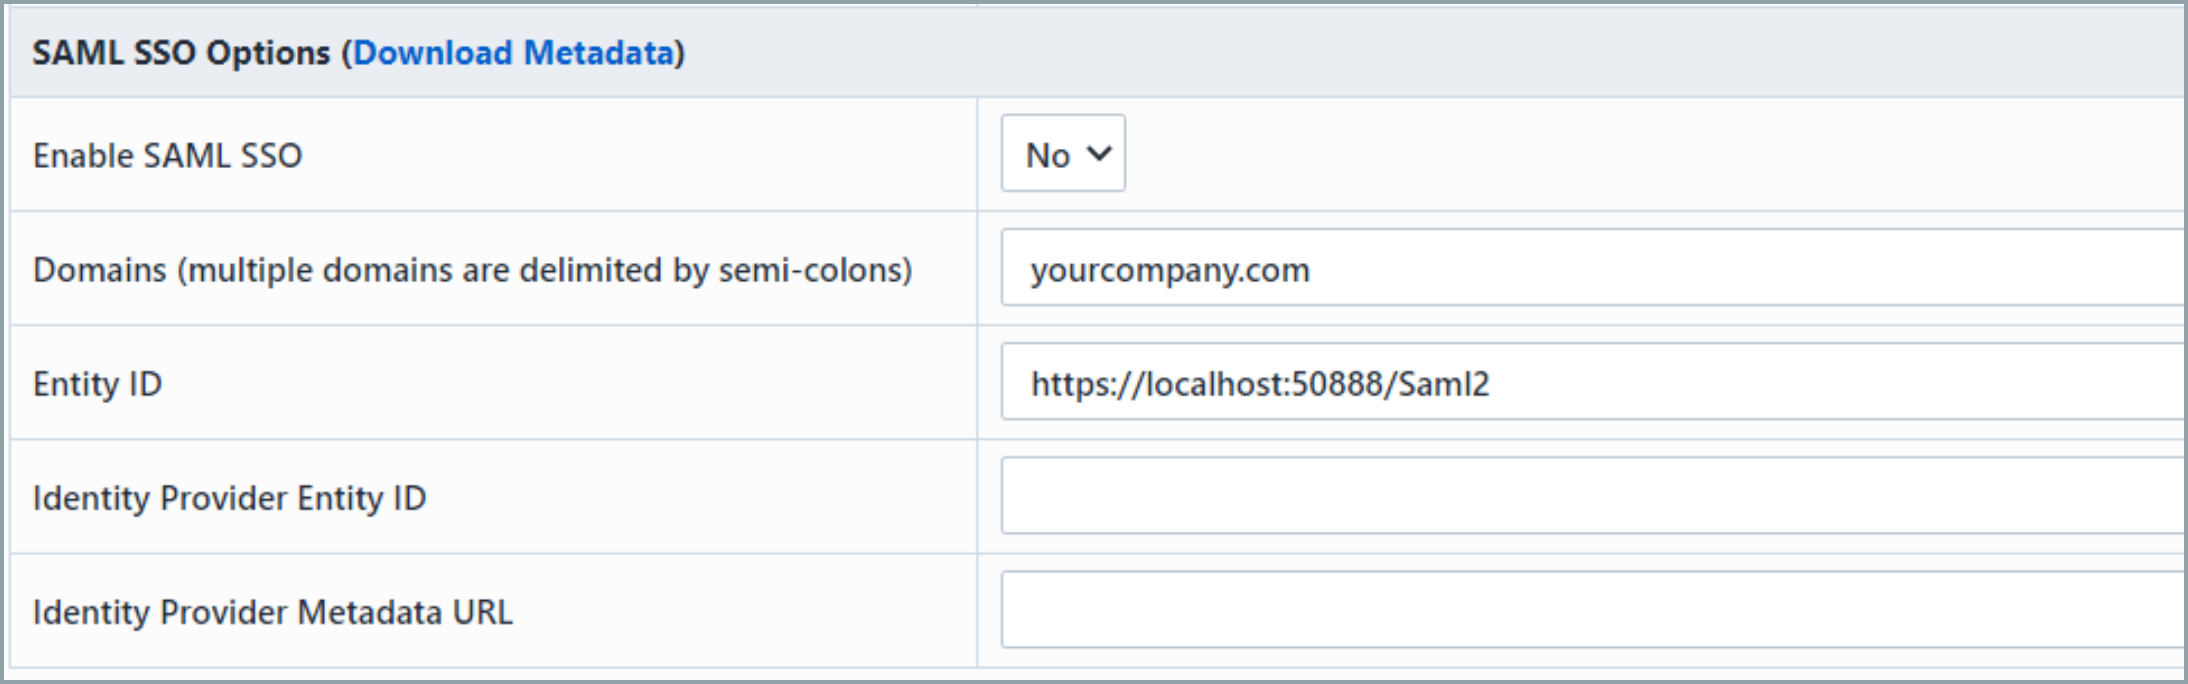 3.1 Enter your corporate domain to Domains, multiple domains are delimited by semi-colons. Empower uses this setting to determine whether to perform an SSO login for a specific user.
3.2 Enter the Entity ID of Empower (Service Provider).
3.3 Enter the Identity Provider’s Entity ID and Metadata URL of the Identity Provider. The metadata URL could also be a path to the metadata file. Such asC:/SAML2/IdP_Metadata.xml,~/App_Data/IdP_Metadata.xml - Download Empower’s metadata by clicking the Download Metadata link next to the header SAML SSO Options.
- Register Empower application as a Service Provider in your SAML Identity Provider. Refer to your SAML Identity Provider website for details.
- Turn on the SSO by setting the option Enable SAML SSO to Yes, and test the SSO Login.