Overview/Form
Overview/Form
Empower includes an Engineering Change Order (ECO) processor to facilitate formal changes to any item in the database. When generating a Change/ECO you can identify the following:
General Change Information
- Change Number, Type, Priority, Reason, Description, etc.
Affected Items
- Rev Changes, Disposition, Effective Dates
Actions
- Redlines, Data Changes
Attribute
- Define additional information/parameters for the Change
Documents
- Rework Instructions, Schematic/PCB Redlines, etc.
Comments
- User notes
User Signoff List/Workflow
- Workflow stages and users
When the Change/ECO is initiated and pending, the Actions/Redlines of the Change represents "proposed" changes. Once a Change/ECO is approved (and then released) the ECO processor will automatically perform the proposed changes to the affected items.
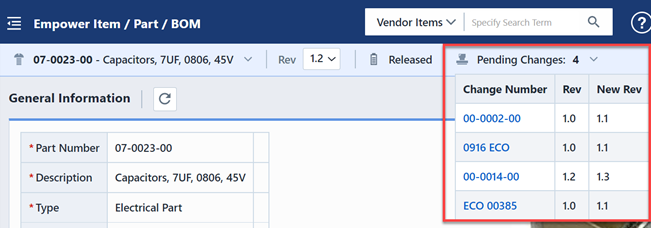
While the change is initiated/pending, the Affected Items will be locked from interactive editing by any user. Optionally, you can raise additional Changes against the affected item. Each affected item, when opened, will display the Under ECO indicator in the banner.
Clicking the indicator will display a menu that lists all pending Changes raised against the item. Including the proposed revision changes.
Change Processing
The following list outlines how Changes/ECOs are processed in Empower.
- Change is initiated by a user
- Change Information is filled out
- Change Type, Assign Number, Reason, Description
- Affected Items are assigned
- Rev Changes, Disposition
- Redlines are defined
- BOM, Vendor, Document, Attribute Changes are defined
- Signoff Users are defined
- Must Sign, Reviewers
- Emails Sent
- Users Sign (Approve/Reject) Change
- Once all Users have Approved the Change now becomes a "Release Candidate"
- User with appropriate privileges releases the Change
- Defined Redlines are automatically applied to Affected Items.
- Users can implement a change once the change is released.
Initiating Changes
To create a Change/ECO, you must use the New Object Wizard.
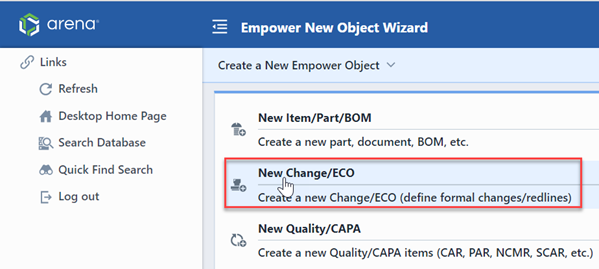
Refer to the New Object Wizard for more information on creating objects.
Change Types
Changes are defined by a Change Type, i.e.: ECR, ECO, ECN, MCO, Deviation, etc., and are set on the General Information Page of a Change/ECO.
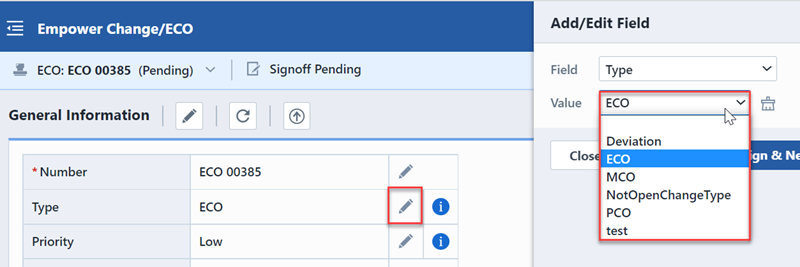
Change Type options are defined in the Empower Administrator. Change Types can have different numbering scheme, default signoff/workflow, revision options, default reason, and default description fields.
Change Form
The Change/ECO form is used to display data about all Changes regardless of the Change Type.
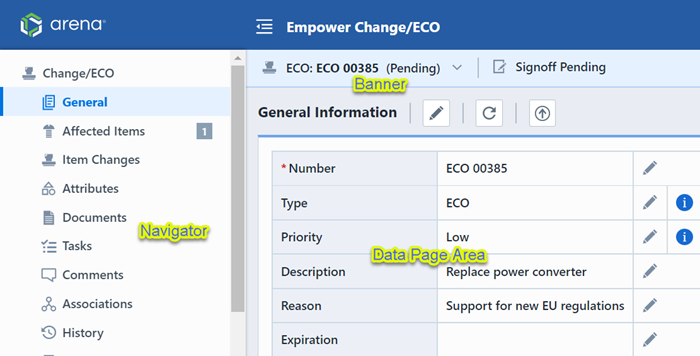
The Change Form contains three main areas:
| Area | Description |
|---|---|
| Change Banner | Displays Change Number, current page indicator, current status and is visible from all Data Pages |
| Data Page Navigator | Provides quick links to all available data pages |
| Data Page Area | Lists all data for the currently selected data page |
Change Banner
The Banner displays the following information:
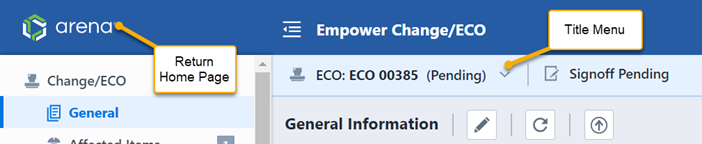
| Section | Description |
|---|---|
| Return Home | Clicking the icon will return you to the Desktop Home Page |
| Title Menu | Common Change/ECO functions. Refer to the Title Menu section for more information on the title menus. |
Data Pages
All Changes/ECOs contain the following data pages:
| Page | Data Contained |
|---|---|
| General | Change Number, Type, Priority, Reason, Description |
| Affected Items | Items/Parts/BOMs affected by the change, revision options, material dispositions |
| Item Changes | Changes/Actions to perform to the affected items |
| Attributes | Use parameters to define additional change information |
| Documents | Document links for ECO (Rework instructions, Markup drawings, etc.) |
| Tasks | Tasks assigned to resources |
| Comments | General user and signoff comments |
| Associations | Associated Changes and CAPA objects |
| History | List of changes that have occurred to the Change/ECO (User, Date, Tool Used) |
| Signoff | Users who are reviewing or are required to sign-off on this item |
| Training | Associated training items |
Releasing Changes
Once all required users have approved the Change/ECO it will then be available for release. To release a Change, select the General page or the Release button on the Navigator.
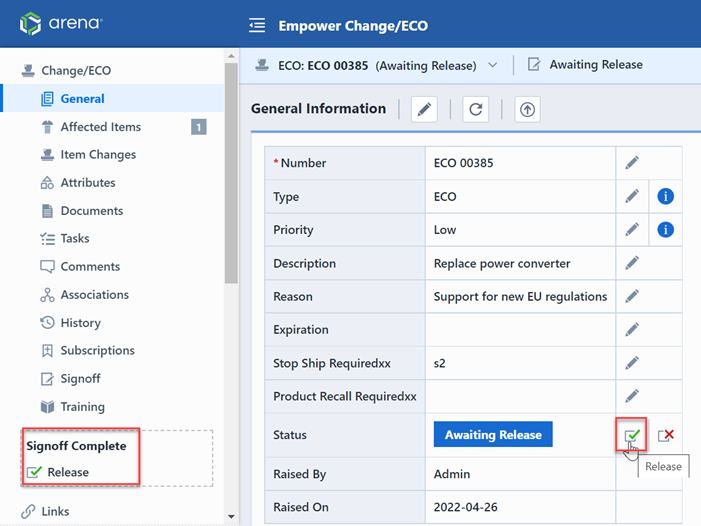
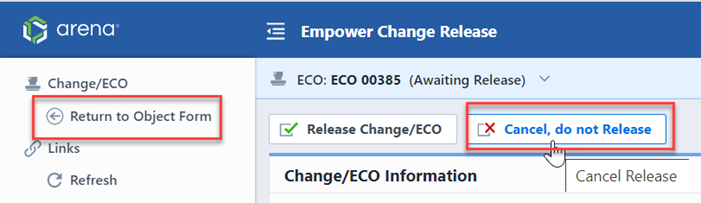
From the Navigator or Status Area of the General page, click the Release button. This will launch the Change/ECO Release form.
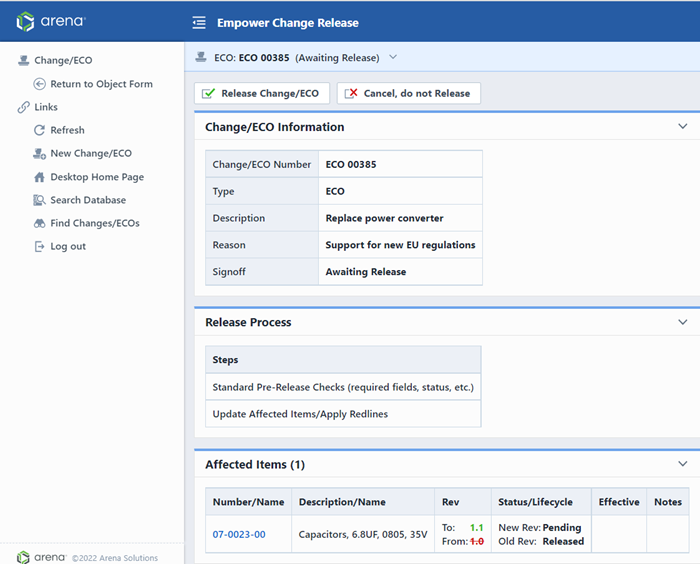
You can cancel the release form by clicking the Cancel toolbar button or Return to Change link. This will return you to the Change/ECO form.
The Release form will display the general and affected item information.
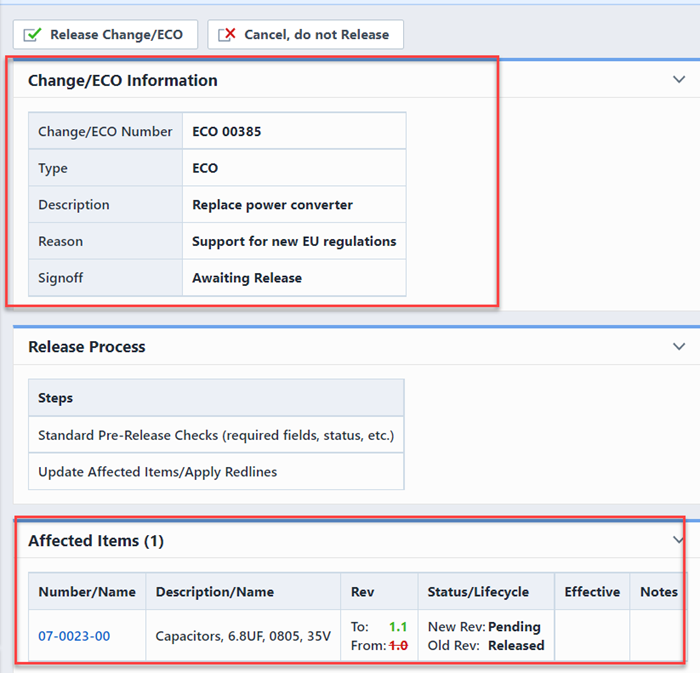
The Release Process list will display all steps that will be executed by the release action.
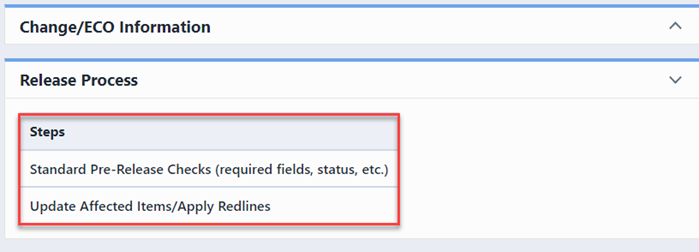
If you have a custom service such as an upload to an ERP system, there will be one more process included, eg: Upload Data to SAP.
To start the release process, click the Release Change/ECO button.
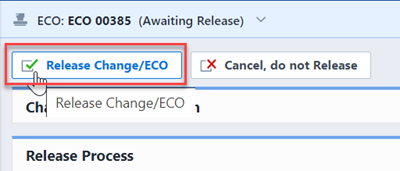
The Change/ECO verifier will execute various checks (Tasks, Status, Revisions, required fields, etc.). If any issues were found, the system will not allow you to release the Change/ECO.
If the verification and release was successful, the system will return you to the Change/ECO form.
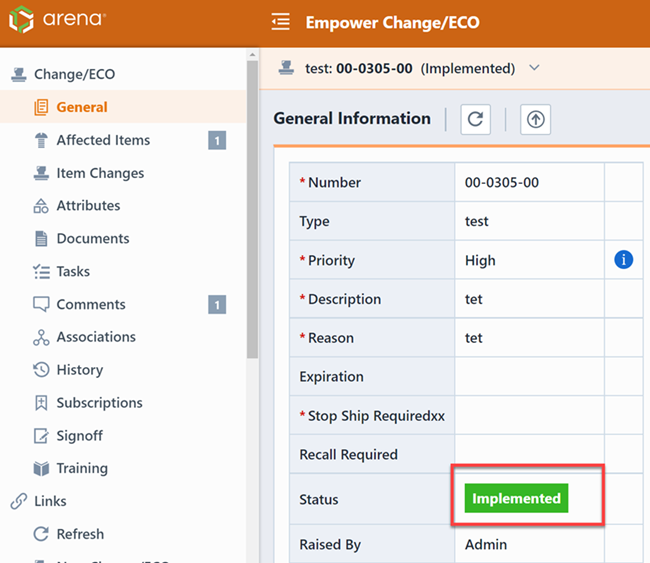
Implementing a Change
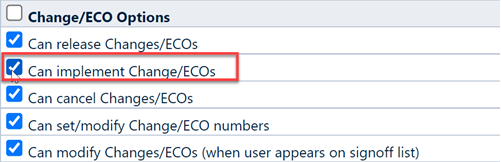
Empower Changes now support an Implemented status. Users can assign an Implemented status to a Change when the modifications in the released Change have been implemented. Administrators can now provide users with Silver licenses the ability to implement a Change. Administrators can enable this feature by checking the box next to Can implement Change/ECOs and saving the modified settings in the Permissions, User Options page of Empower Administrator.
The Implementation status is a new status that proceeds after the Released status. Implementation Status signifies that an approved Change has been implemented.
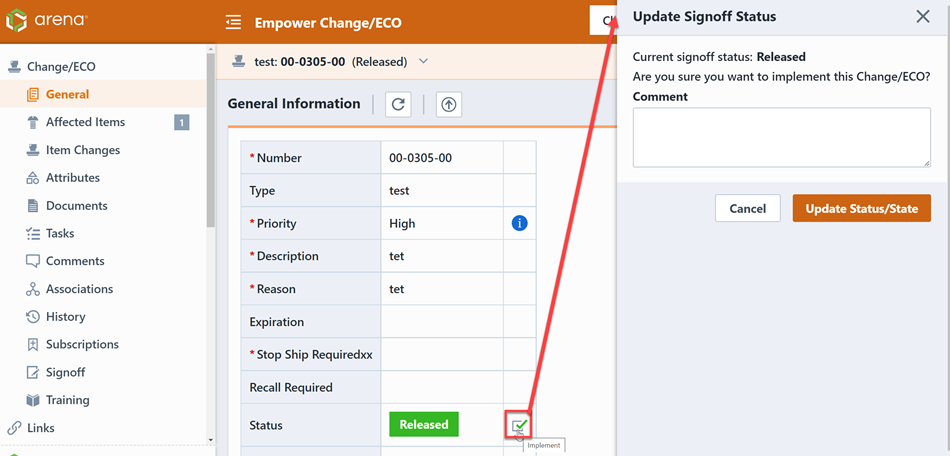
Navigate to the General Information page of a released Change that you'd like to move to the Implemented status. To imitiate implementation, click Implement, this will launch a Update Signoff Status panel.
Within the Comment field add some text on the nature of the Implementation. Click Update Status/State.
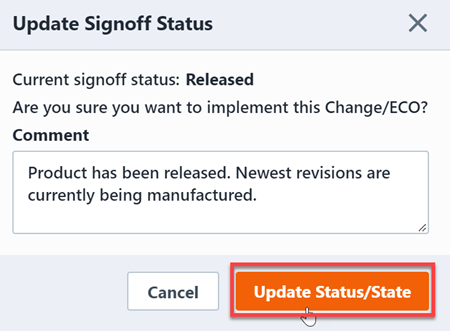
The Change/ECO is now updated into the Implemented state.