Item Changes
Item Changes
Overview
The Item Changes page lists all of the proposed changes for a Change/ECO. Changes can be defined:
- Automatically - On operations such as BOM Imports and Part Replace (Where Used Page)
- Interactively - Using the Redline Tool.
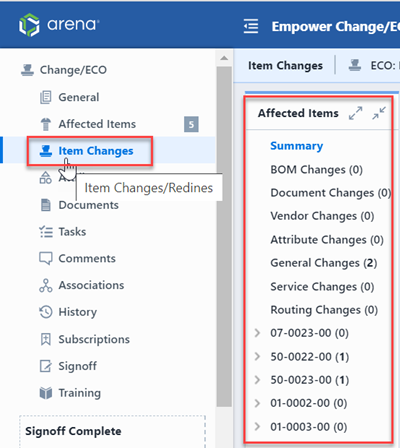
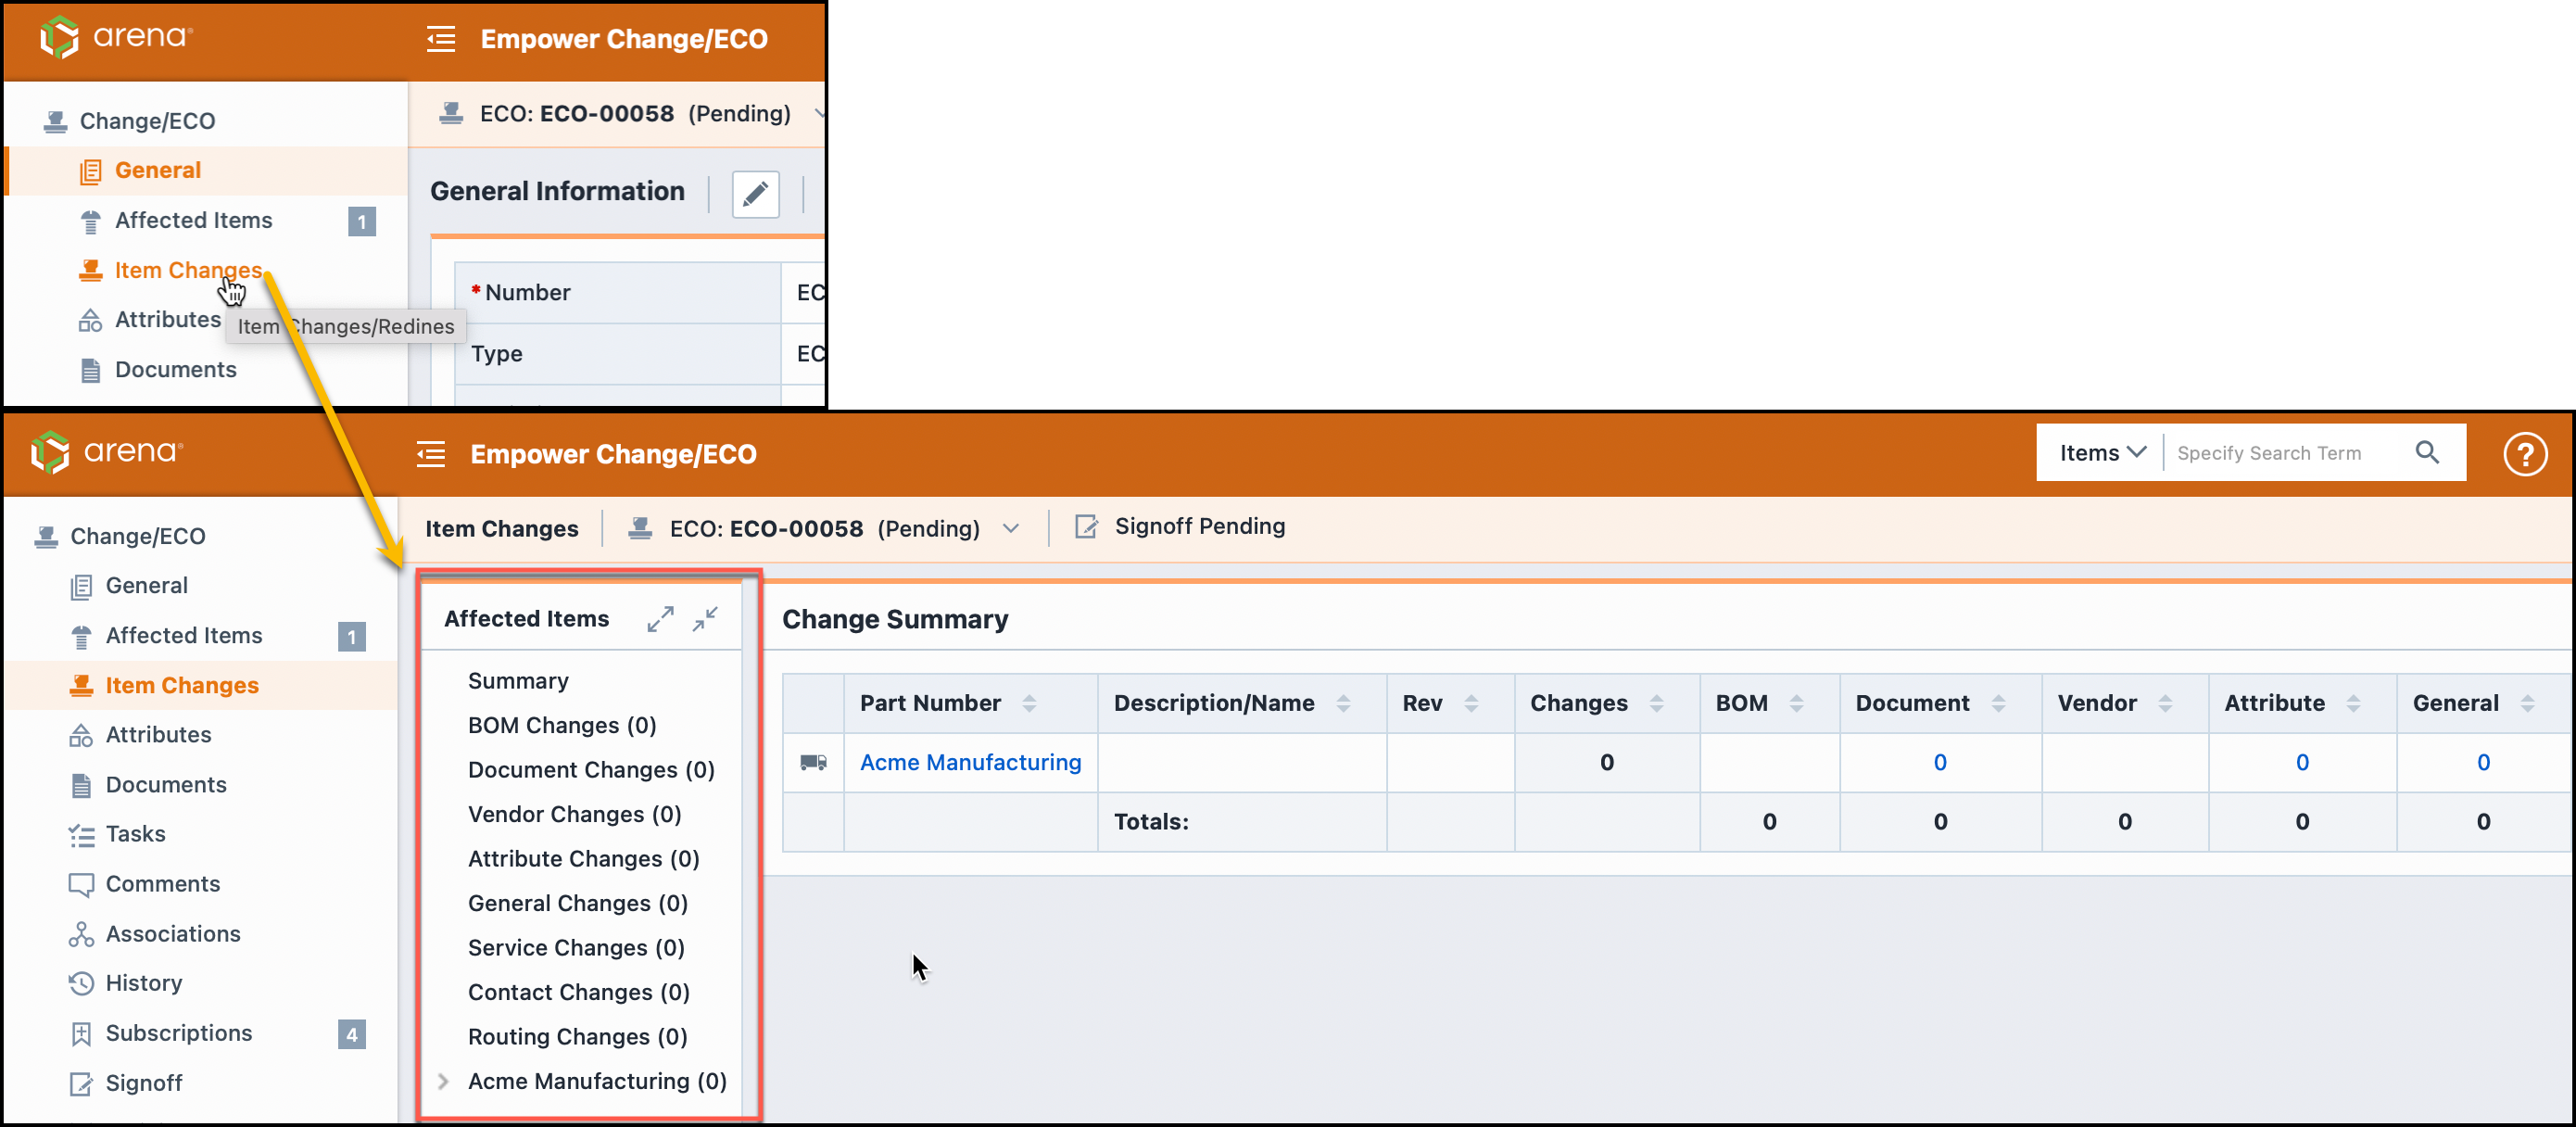
Item Changes Page
The Item Changes Page contains the following sections:
- Affected Items/Page Navigator - Tree navigation for summary and affected item redline pages
- Page Filter/Selection - Provides quick links to return to summary pages
- Summary/Redline Pages - Summary of specific redline page
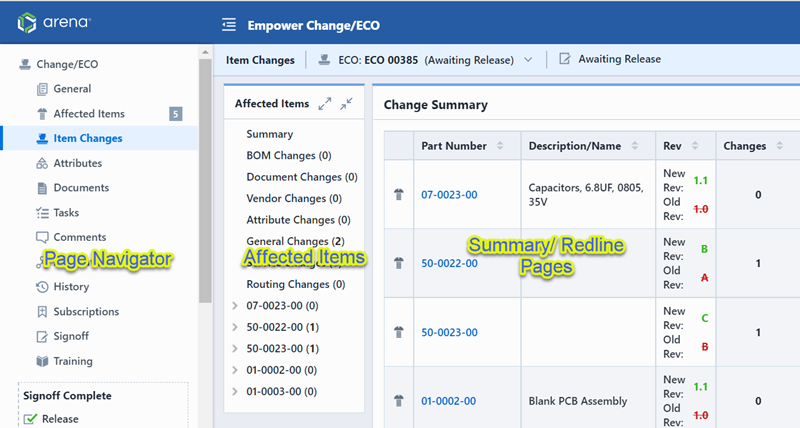
The Summary/Redline page area will update/change when the Affected Items/Page Navigator changes or a specific page is selected from a summary page.
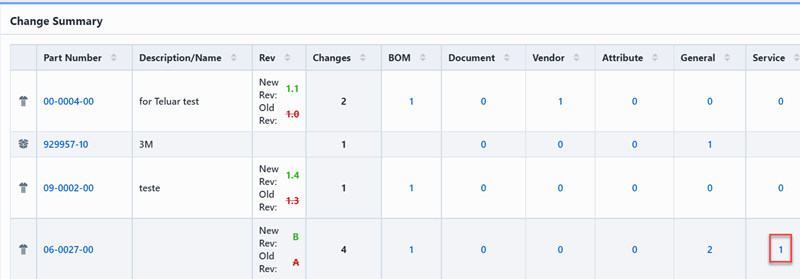
Summary Page
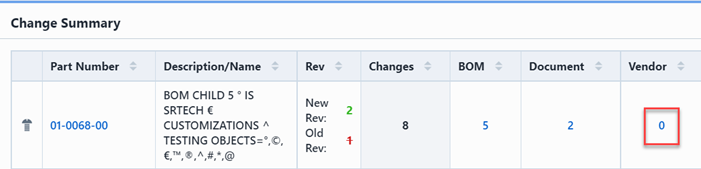
The Summary page displays all affected items and revisions as well as provides counts for all individual data changes.
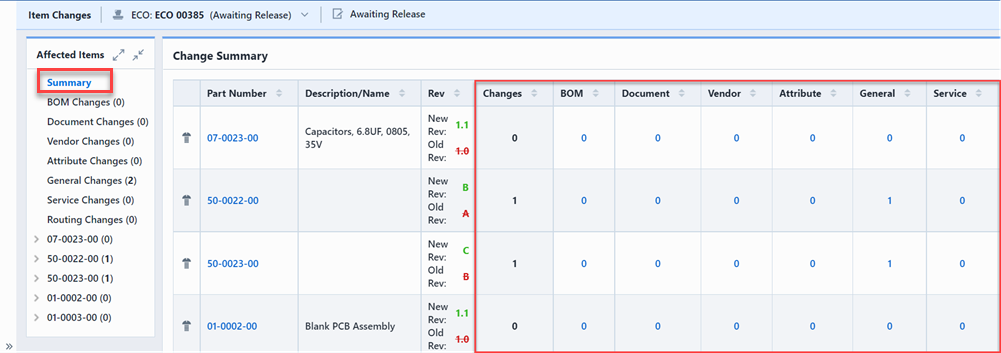
You can display the Summary page by selecting the Summary option from the Navigator tree.
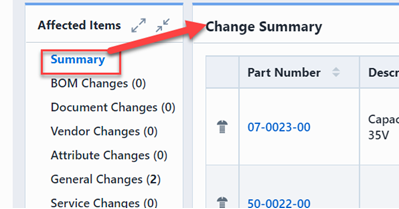
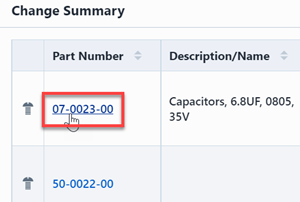
You can launch/open the affected items by clicking on the hyperlink in the Number column.
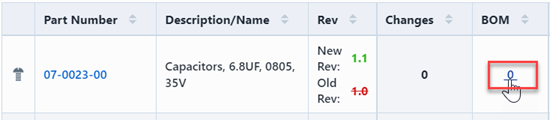
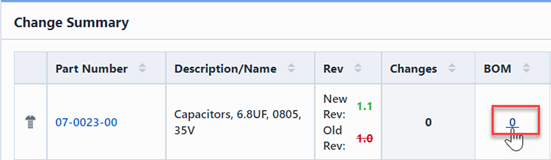
The Summary page provides a matrix for displaying the number of changes for each data set on the affected items.

The Changes column will display the total number of changes for each affected item.

Each change count will provide a specific hyperlink to open the redline page for any affected item.

Navigating Redline Pages
The Item Changes/Redlines form contains the following "Overview" pages:
| Page | Description |
|---|---|
| Affected Item Summary | Displays all affected items and revisions as well as provide counts for all individual data changes |
| All BOM Changes | Displays all BOM changes for all affected items. This page also provides "group edit" features for redlining BOMs on all affected items. |
| All Document Changes | Displays Document changes for all affected items. This page also provides "group edit" features for redlining Documents on all affected items. |
| All Vendor Changes | Displays Vendor changes for all affected items. This page also provides "group edit" features for redlining Vendors on all affected items. |
| All Attribute Changes | Displays Attribute changes for all affected items. This page also provides "group edit" features for redlining Attributes on all affected items. |
| All General Changes | Displays General changes for all affected items. |
| All Service Object Changes | Displays Service Object changes for all affected items. |
You can display these pages by selecting the desired page from the Page Navigator.
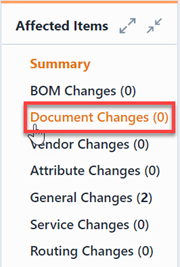
Each page will also contain a link in the upper right section that will return you to the summary page.

In addition to the "Overview" pages, the Item Changes/Redlines form also provides a "Redline" page for the following individual data sets:
Using the Page Navigator
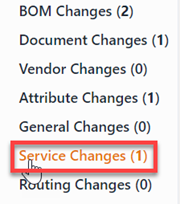
The Page Navigator will appear when the user selects the Item Changes page of the Change/ECO form.
The Navigator will contain links to all "Overview" pages. Clicking the link will display the selected page.
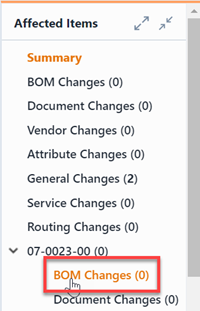
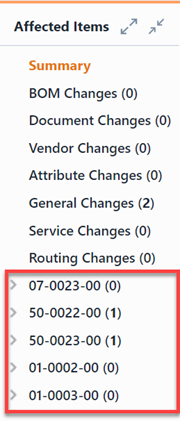
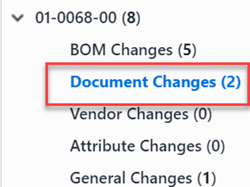
The Navigator will also list all affected items.
Expanding the item will display the "Redline" page links and change count for each section.
Clicking the General Changes/"Redline" page link will display the selected page.

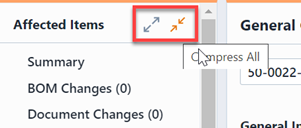
You can expand and collapse all affected items by clicking the Expand and Collapse links.
Note: Vendor Items will only contain redlines for Documents, Vendors, Attributes, and General information.
Using the Redline Tool
The Redline Tool is used to define all changes/actions to the affected items on a Change/ECO. Selecting a specific affected item redline link from the Page Navigator or Summary page will invoke the specific redline tool.
The Redline tool contains a specific data list for every type of data that can be modified on an item.
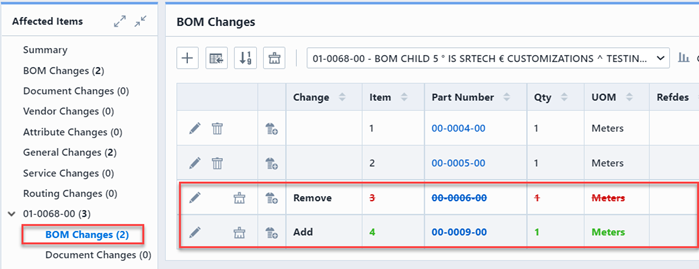
BOM Page/Changes
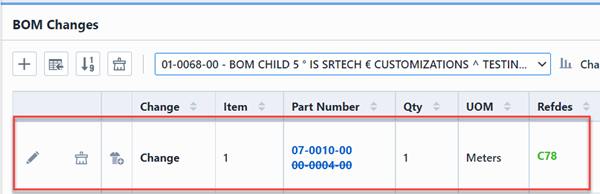
The Parts List/BOM Page allows you to add, modify and remove existing BOM items on affected items.
The Parts List/BOM Redline Toolbar contains the following commands:
| Icon | Command |
|---|---|
 | Add new BOM items |
 | Import BOM file. BOM Import will automatically determine changes between existing BOM and BOM being imported. |
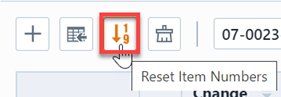
 | Reset Item Numbers |
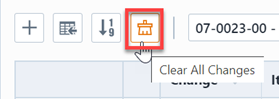
 | Clear all changes |
Each BOM item contains the following action hyperlinks (Actions column) to operate on the individual item/row:
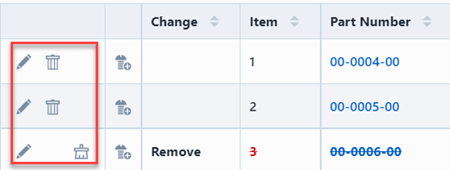
| Icon | Command |
|---|---|
 | Edit/Replace BOM item |
 | Remove BOM item |
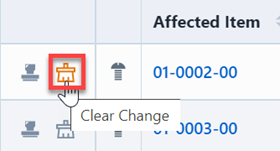
 | Clear item changes |
Attributes specified as BOM Display fields within BOM Options of User Preferences are included within the BOM Changes, Item Changes page of a Change.

You can select desired fields from the drop list to display in BOM Changes page.
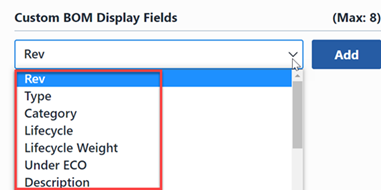
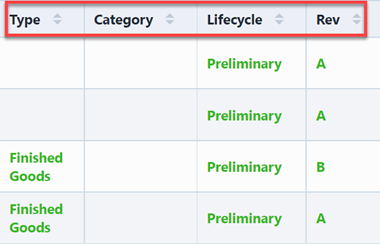
When you views a BOM Redline within a Change, the fields you selected will be included as columns in the BOM Changes page.
Adding BOM Items
To add BOM items click the Add button. This will invoke the Add BOM Item Wizard panel.
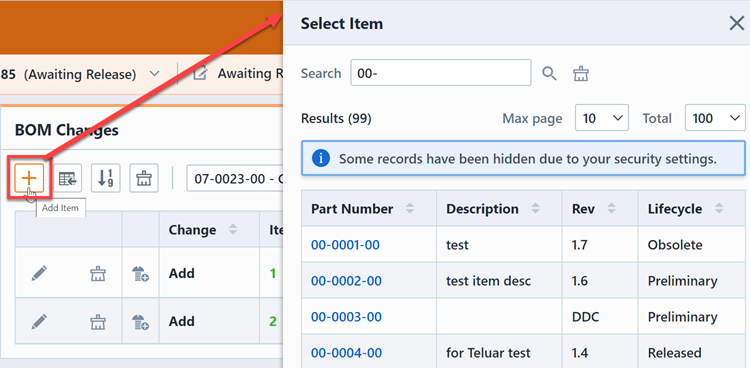
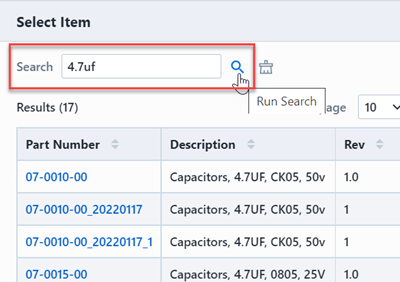
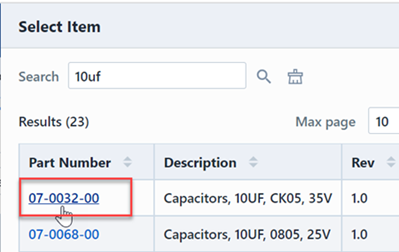
The first page of the wizard allows you to search for the items you wish to add. You can add multiple items at the same time by adding items to the Add buffer. Specify a search term.
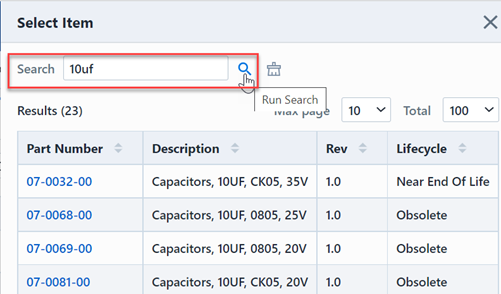
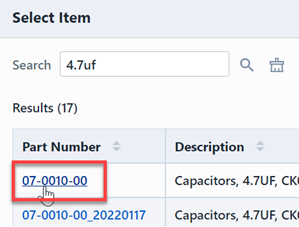
Click on the item hyperlink to add the item to the BOM.
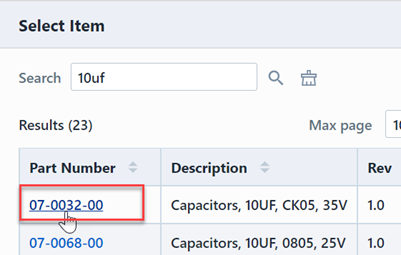
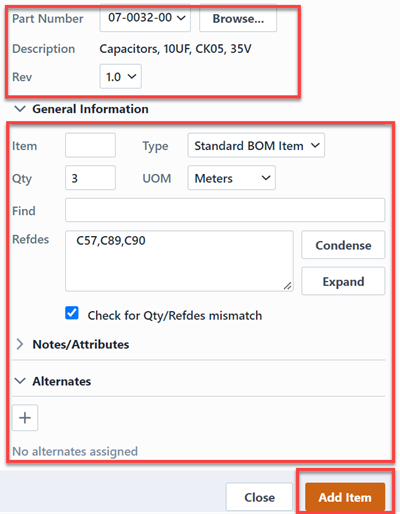
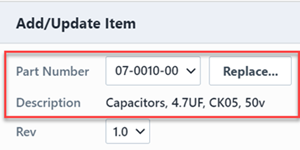
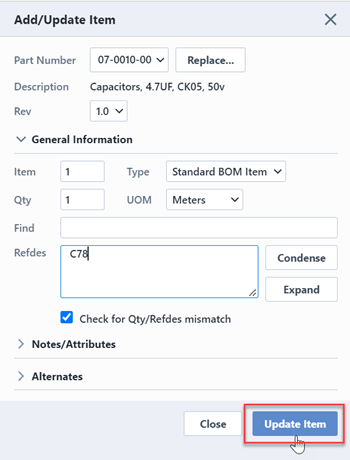
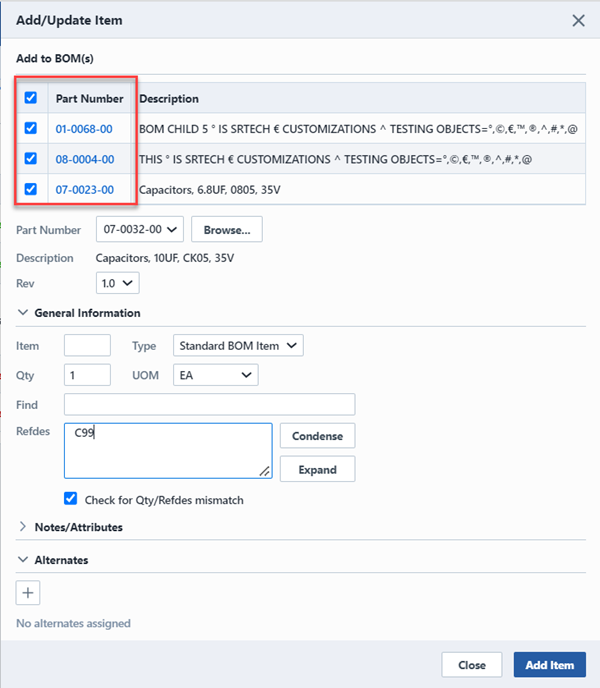
Once the item is selected, you will then be able to modify the BOM Item Properties.
| Field | Description |
|---|---|
| Item | Item/sequence number - the system will automatically assign or you can specify a numeric value |
| Type | Select either Standard BOM Item, Reference Item, or Disabled Item |
| Qty | Quantity (numeric or decimal values) |
| UOM | Unit of Measure - values defined in Administrator |
| Find Number | Find/Balloon/Drawing Reference number |
| Refdes | Reference designators |
| Note | Additional text/note field for BOM item |
| Alternate(s) | Alternate BOM items |
| Custom | Custom fields/attributes - define in Administrator |
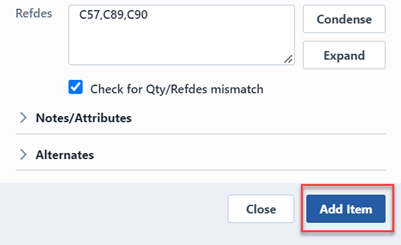
Once the desired properties have been assigned, click the Add Item button to add it to the BOM.

Editing BOM Items
You can interactively modify BOM items by clicking the Edit icon of the BOM item. This will display the Update BOM Item panel.
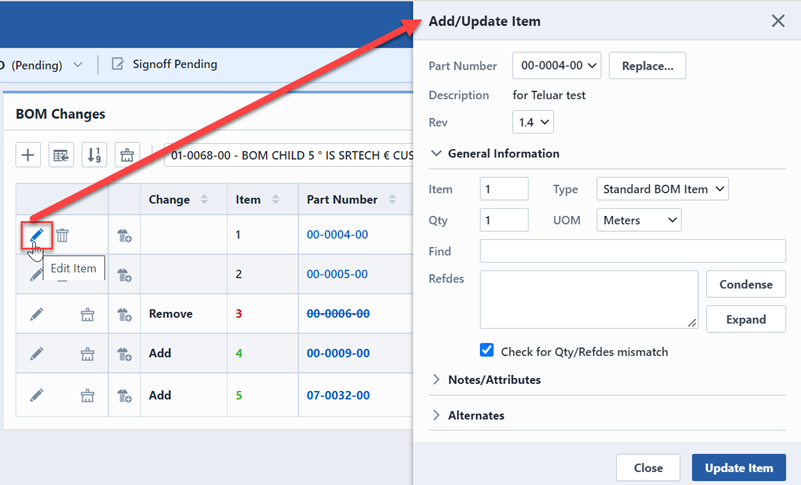
The Edit BOM Item dialog box allows you to assign all BOM Item properties (Qty, Refdes, UOM, Find, attributes, etc.).
To modify a BOM Item, specify the desired changes and click the Update Item button.
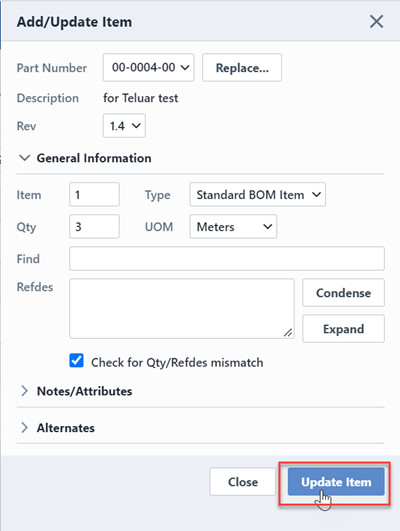
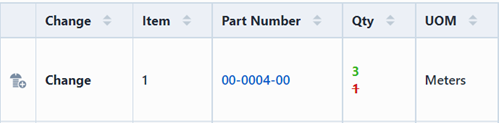
Field changes will appear in the BOM Redline form.
Replacing BOM Items
To replace a BOM item, click the Edit icon in the Actions column. This will display the Update BOM Item panel.
To replace the item, click the Replace... button.
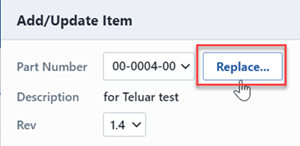
This will invoke the Select Item panel. You can search to find the replacement part.
Select the hyperlink of the desired replacement item to select it.
You will then be returned to the Update BOM Item panel, and the replacement part will be selected.
To replace the item on the BOM click the Update Item button.
Field changes will appear in the BOM Redline form.
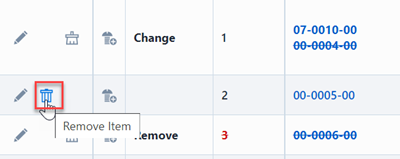
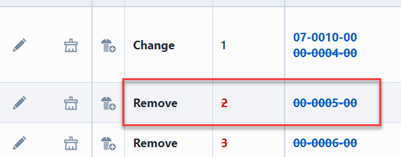
Removing BOM Items
To remove a BOM item, click the Remove icon in the Actions column for the BOM item.
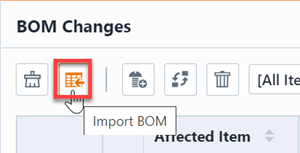
Importing BOM Changes
You can import BOM changes from a new BOM file directly into the Redline Tool. When importing a BOM, the system will automatically compare the current BOM with the BOM being imported to automatically set up the appropriate redlines/changes.
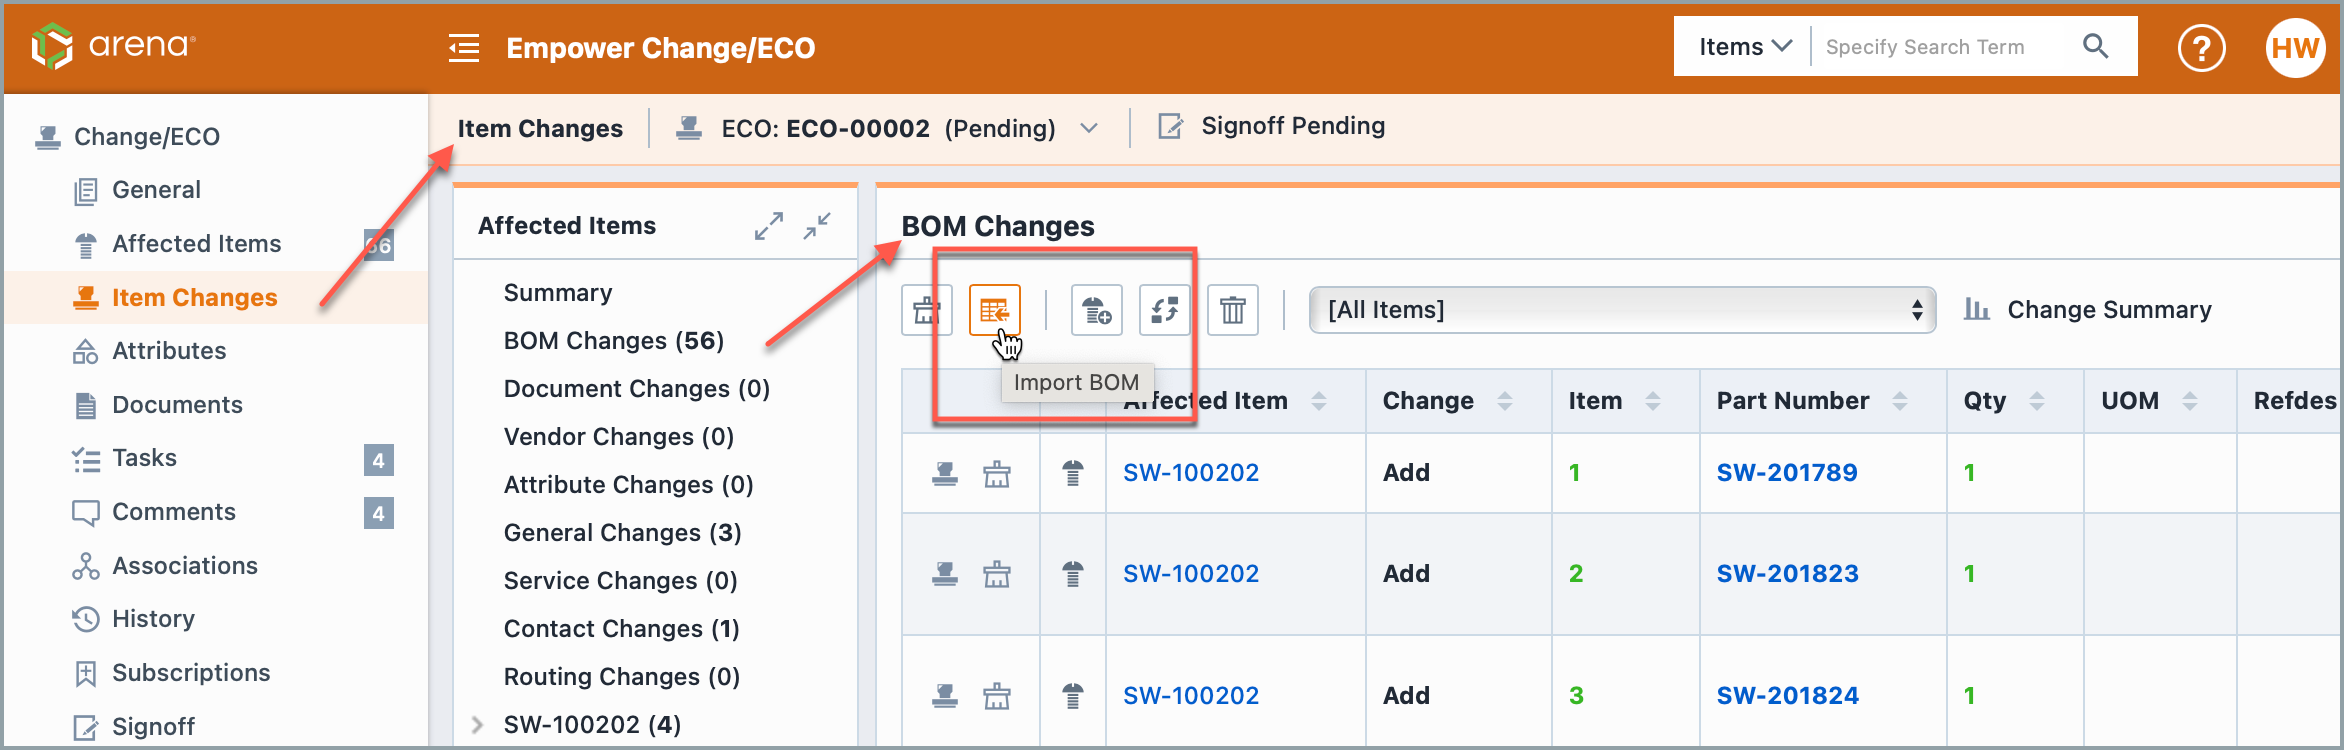
To import a BOM file, use the Import button from the Redline toolbar.
Refer to the Importing BOMs section for more information on using the BOM Import Wizard.
Clearing BOM Changes
You can clear individual BOM item changes by clicking the Clear icon in the Actions column for any item.
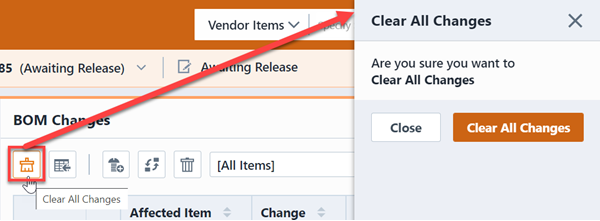
You can clear all BOM changes by clicking the Clear All Changes toolbar button.
Resetting Item Numbers
You can reset the item numbers for all BOM items, by clicking the Reset Item Numbers toolbar button. This will present the Reset Item Numbers panel.
From the Reset Item Numbers dialog box, you can specify a starting number and then click the Renumber button to set the redlines.
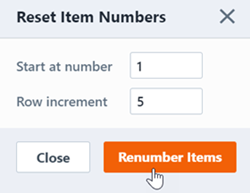
Note: this will update the item numbers on all BOM items. You can modify individual item numbers using the Editing BOM Items techniques described above.
Bulk Editing BOMs
You can perform the following "group edits" to multiple BOM items:
| Buttons | Command |
|---|---|
| Add BOM Items | Allows you to add BOM items to multiple affected items. The system will only add items that do not already exist on the specified BOMs. |
| Remove BOM Items | Allows you to remove BOM items to multiple affected items. |
| Replace BOM Items | Allows you to replace a BOM item with another part number on multiple affected items. The system will only replace items that already exist on the specified BOMs. |
To perform any of the group edits, you must select the BOM Changes page using the Page Navigator.

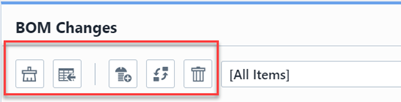
The All BOM Changes toolbar contains buttons to perform the various group editing functions.
Updating Single Lines on Multiple BOMs
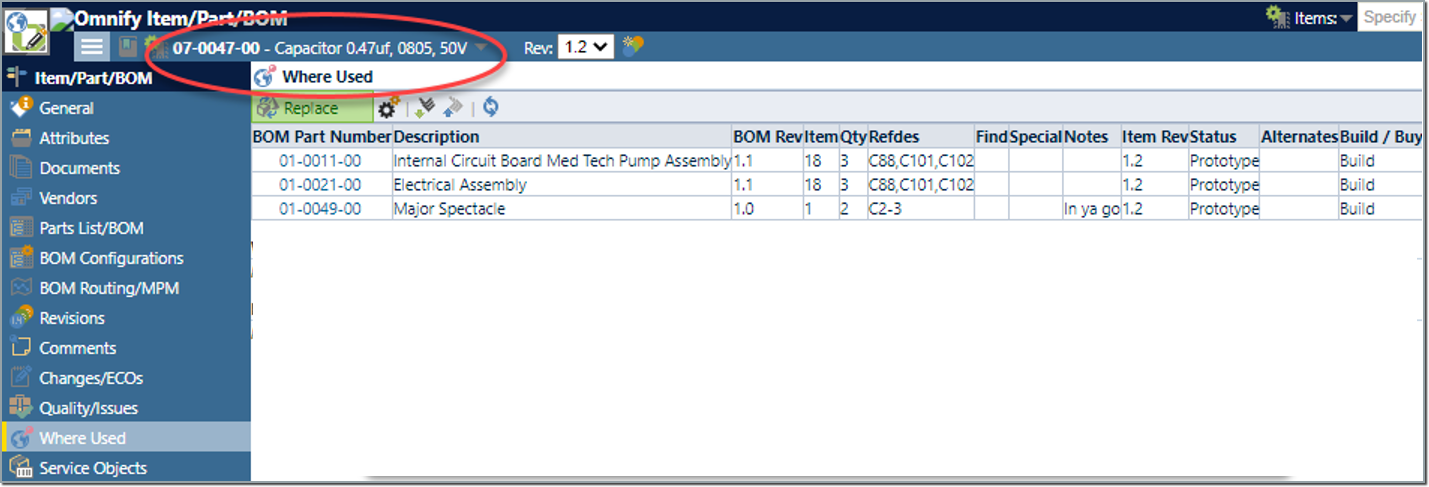
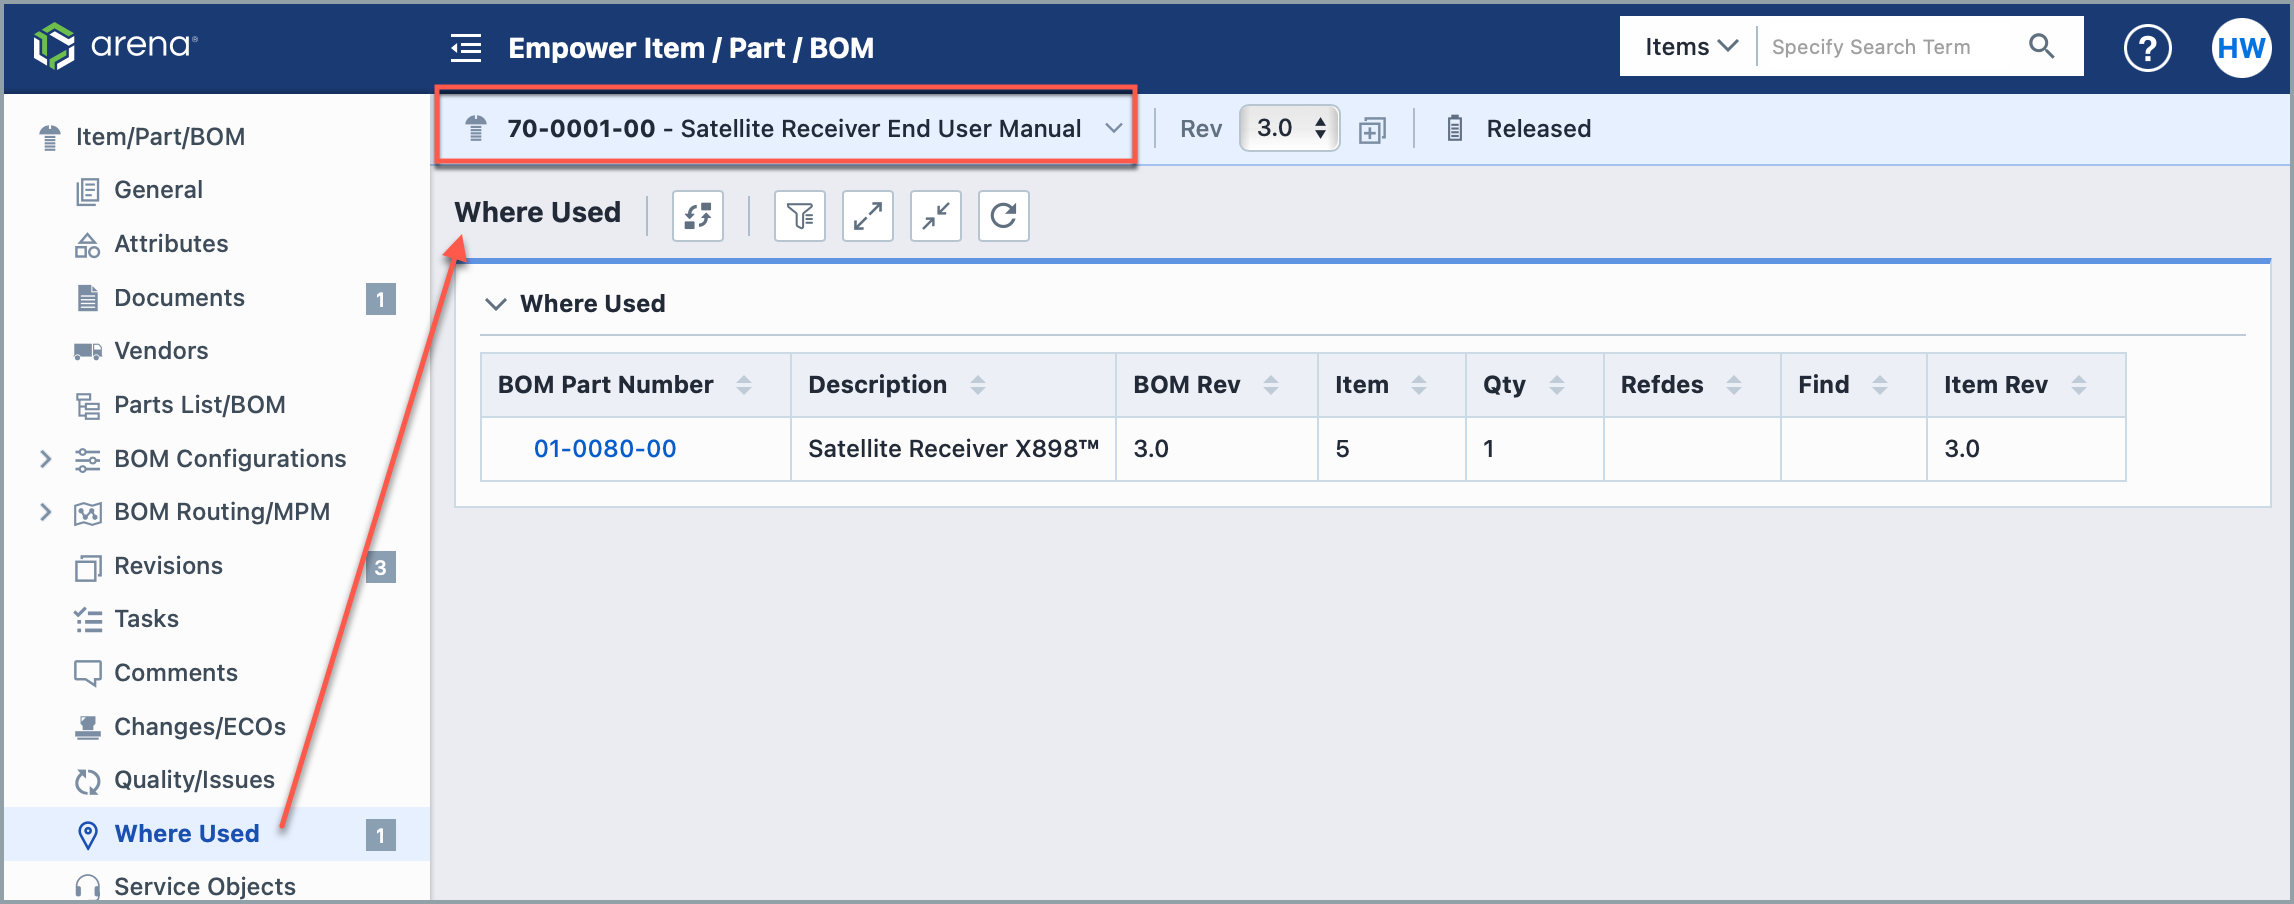
You may find that you need to make a minor revision to a common component Item in many or all of the Where Used Locations. To change an item's information everywhere it is used:
- Open the component Item to the Where Used Page and copy data from the table into a spreadsheet. This will become your import source file.
- Prepare your import source file: Eliminate unwanted columns and rows. Update with your desired data values. Then save in CSV format.
- Start Uploading your import: Open the target Change form and navigate to the Item Changes > BOM Changes info page. From tehre, click import. From here, you will be able to import to multiple Parent BOMs and it will add them to Change automatically.
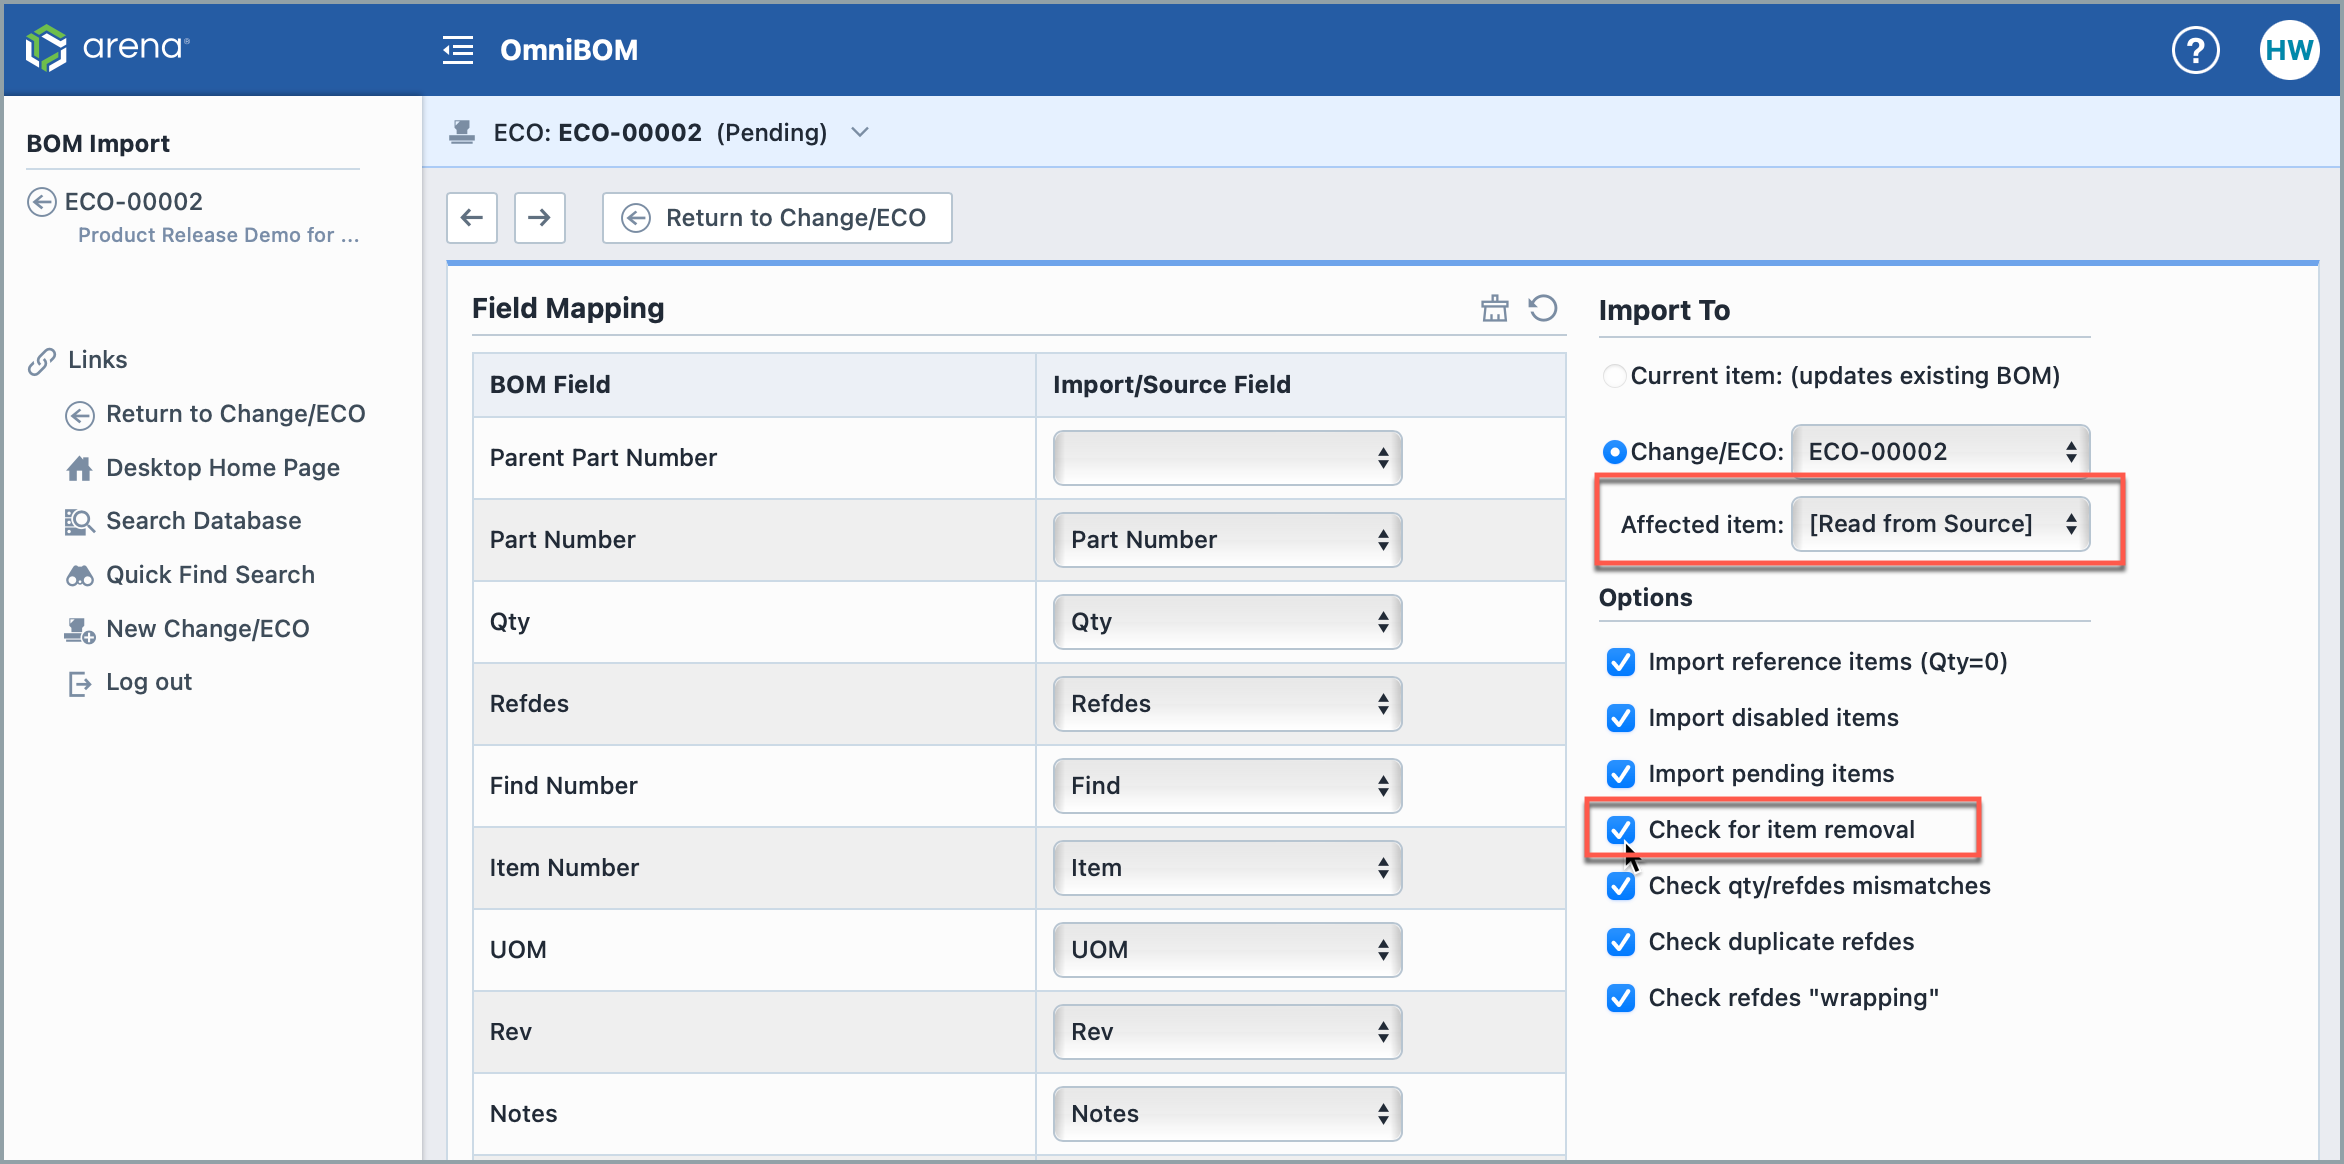
- Set your Field Mapping and Options.
- Import To: Select [Read from Source]. Each row of BOM data will be imported to the Affected Item identified in the Parent Part Number column of the source file.
- Options: 'Check for item removal MUST be unchecked for single BOM lines to be updated or appended on an existing BOM.
- Click Next. Review for expected single line changes:
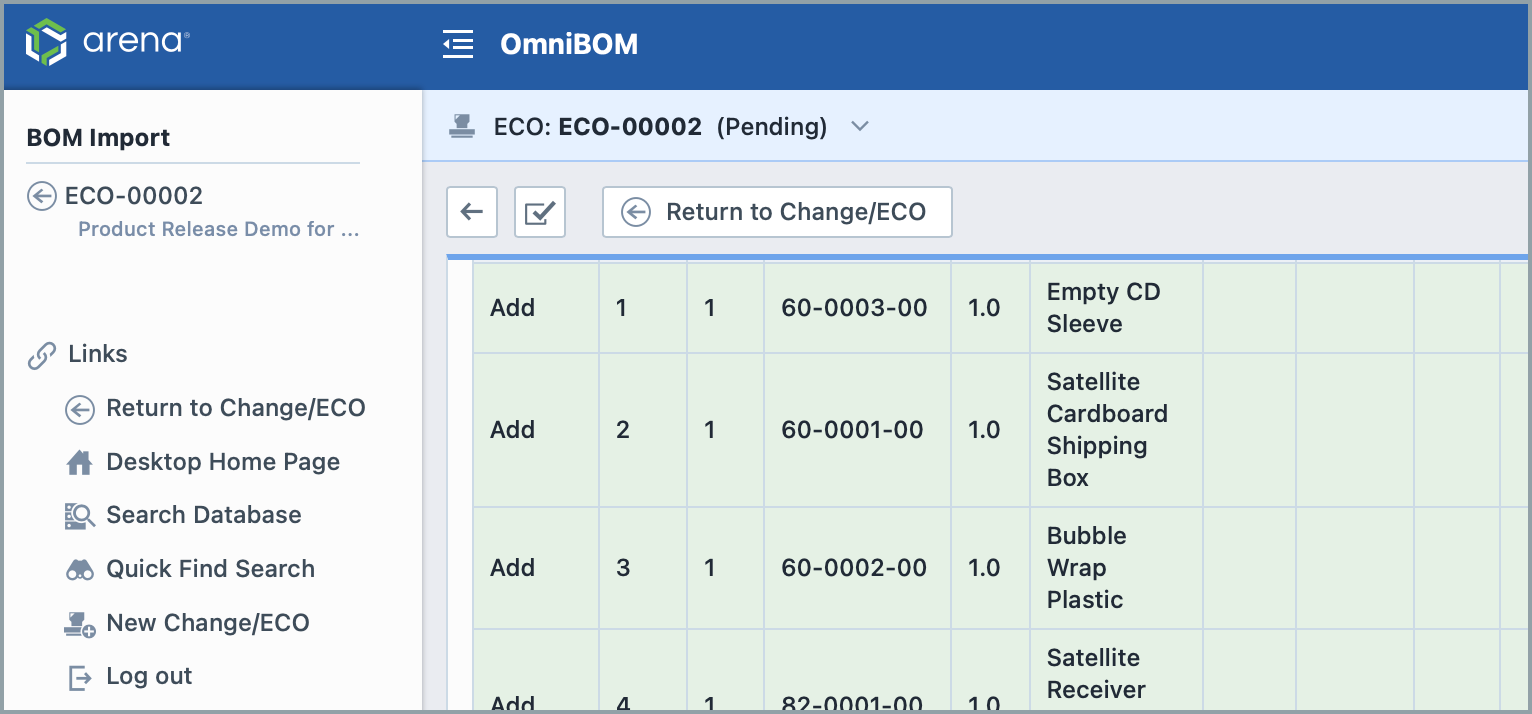
- Click Finished. Review the expected changes in the context of the existing BOM and notice that no other BOM lines are affected.
Clearing BOM Redlines
To clear all BOM Changes click the Clear All button. This will display the Clear Changes panel.
Adding BOM Items
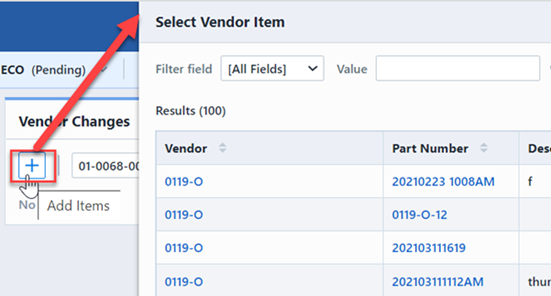
To add a BOM item to multiple affected items, click the Add Items toolbar button. This will display the Select Item panel.
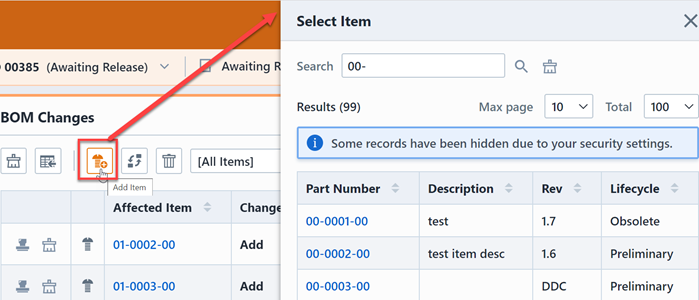
From the Select Item penal you will be able to search and select the desired items similar to what is discussed in the Adding BOM Items section.
Click the Item to select the replacement part. This will display the Add BOM Item panel. You will be able to select which BOMs the item will be added to as well as define item properties.
Removing BOM Items
To remove a BOM item from multiple affected items, click the Remove Item toolbar button. This will display the Remove BOM Item panel.
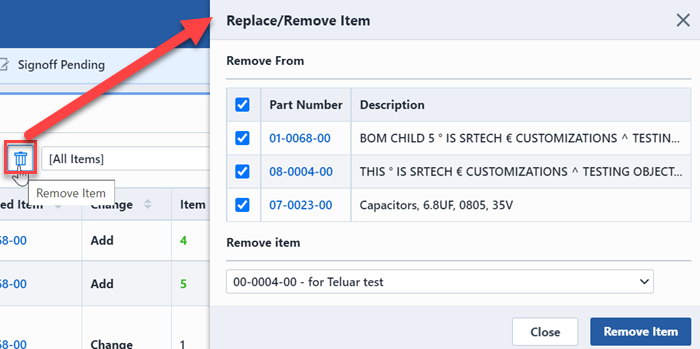
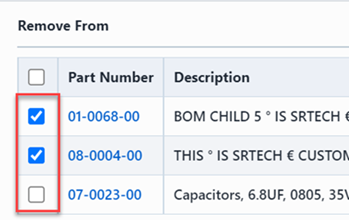
From the Remove BOM Item panel, you will be able to select the BOMs you wish to modify.
You can then select the child part number for the item to be removed and click the Remove Child Item button to assign the redlines.

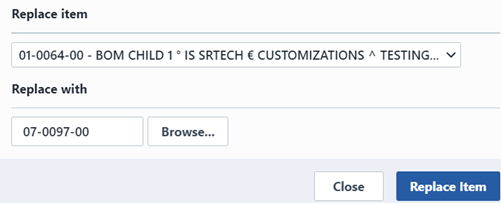
Replacing BOM Items
To replace a BOM item on multiple affected items, click the Replace Items toolbar button. This will display the Replace BOM Item dialog box.
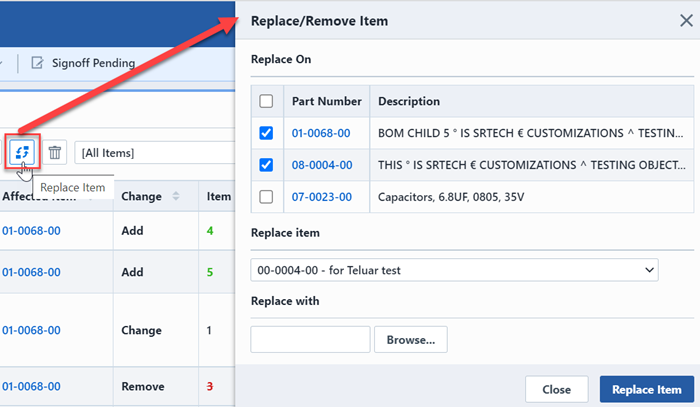
From the Replace BOM Item dialog box, you must first select the BOMs you wish to modify.
You can then specify the part number for the item to replace (Replace Part Number field) as well as the replacement part (Replace with Item field) and click the Replace Child Item button to assign the redlines.
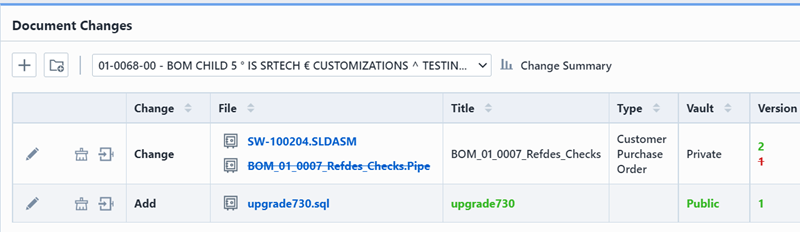
Document Changes
The Documents Redline Page allows you to add, remove, and Check-In documents on affected items.
To invoke the Document Redline tool, select the Document Changes option from the Summary page or Page Navigator.

Adding Documents
To add a document to the list, click the Add button from the documents toolbar. This will display the Add Document dialog box.
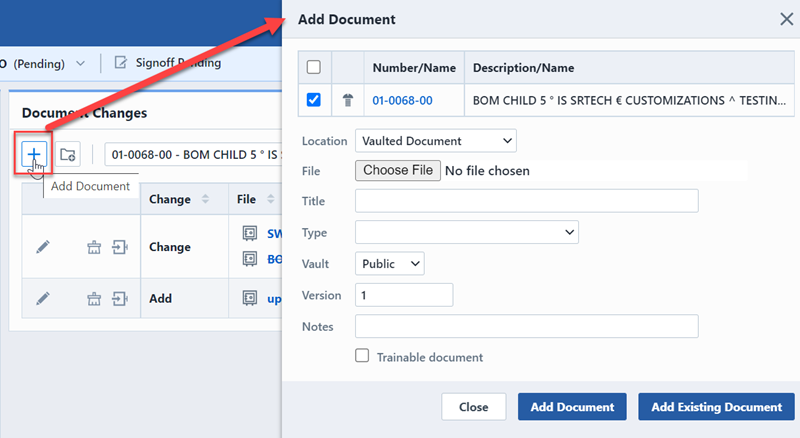
Refer to the Document Management section for more information on assigning documents. Once all document properties are set, click the Add button to assign the document redline.
Checking-In New Document Versions
For existing vaulted documents, you will be able to check-in new versions of documents. To check-in a new document version, click the Check-in icon in the Actions column.
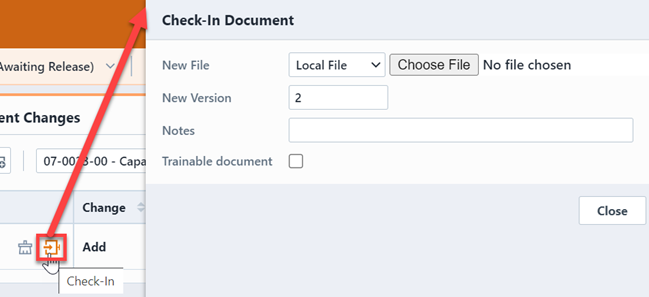
From the Check-in a New Version dialog box, you can specify the new document and version number.
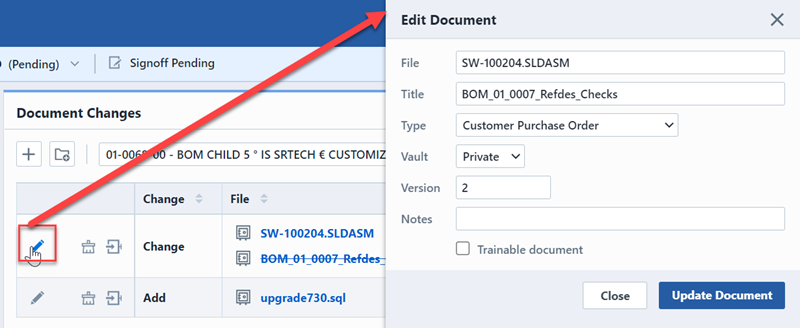
Editing Existing Documents
To modify the properties of any document on the list, click the document's Edit hyperlink icon. This will display the Edit Document panel.
Vendor Changes
The Vendors Redline Page allows you to add and remove existing vendor parts on affected items. To invoke the Vendors Redline tool, select the Vendor Changes option from the Summary page or Page Navigator.
Adding Vendor Items
To add a vendor item, click the Add button on the Vendor Redline page toolbar. This will display the Add Vendor/Supplier Item dialog box.
From the Add Vendor/Supplier Item dialog box, you will be able to search to find the desired item.
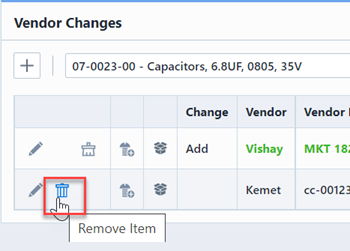
Removing Vendor Items
To remove a Vendor Item click the Remove icon in the Actions column of the Vendor Item.

How to modify vendor information from a change order form
- From your Change Form, go to the left navigation bar and click “Item Changes”
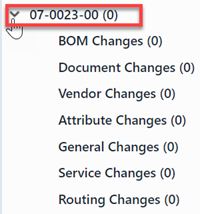
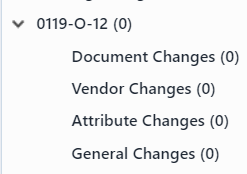
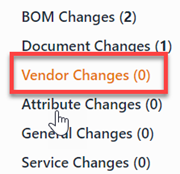
- Click on the caret next to your vendor in the “Affected Items” pop-out menu:
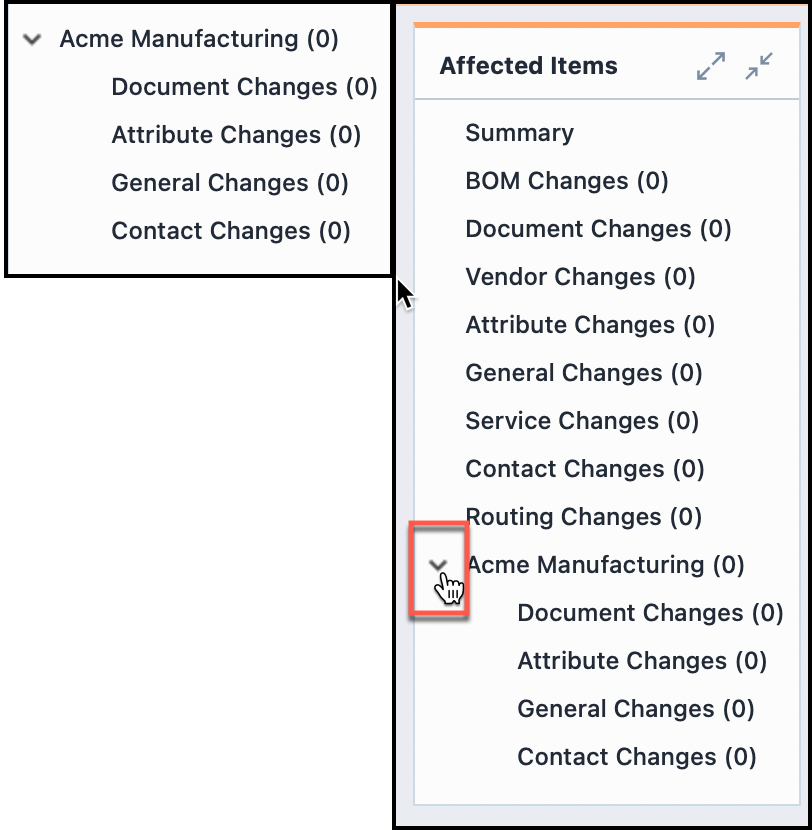
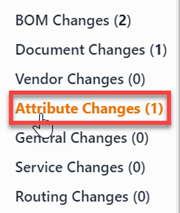
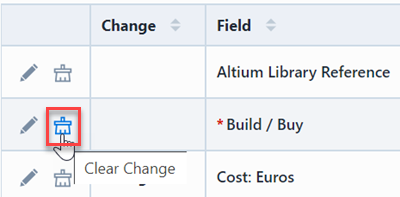
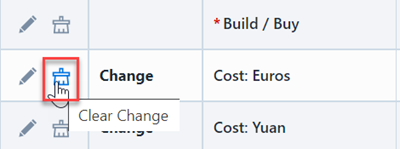
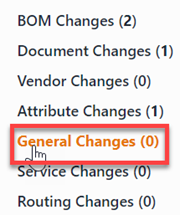
- From here, click on your desired type of change. From the generated window, you can add (+), delete (trashcan), or modify (pencil) anything related to your vendor:
| Window | Image |
|---|---|
| Document Changes | 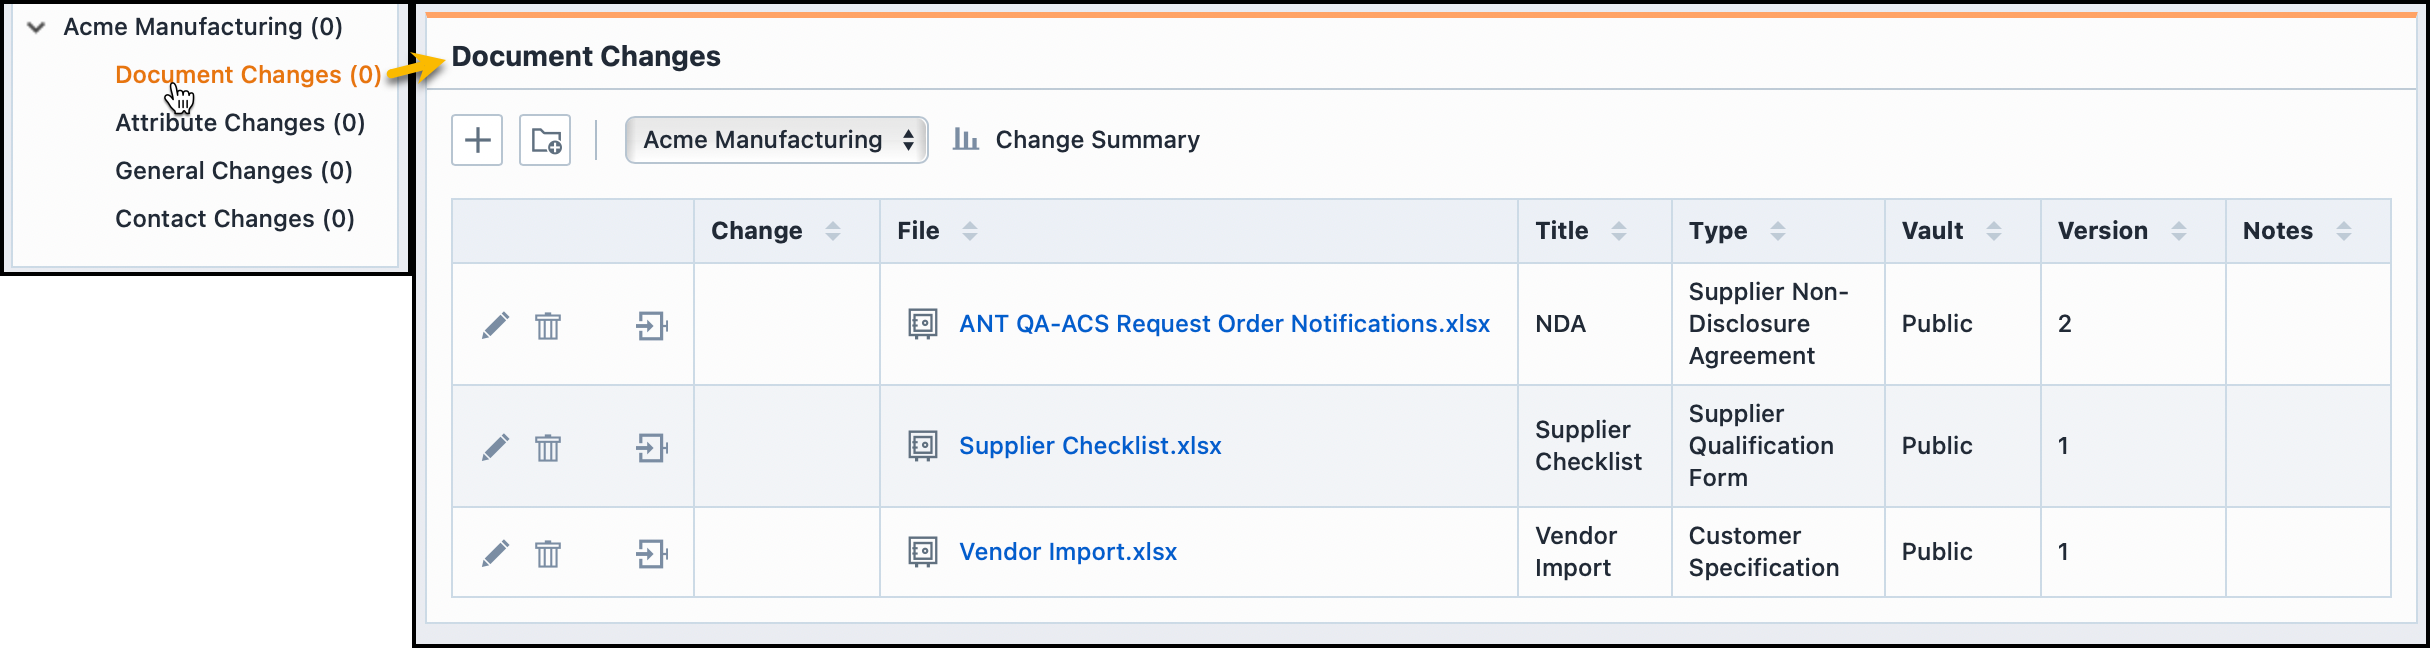 |
| Attribute Changes | 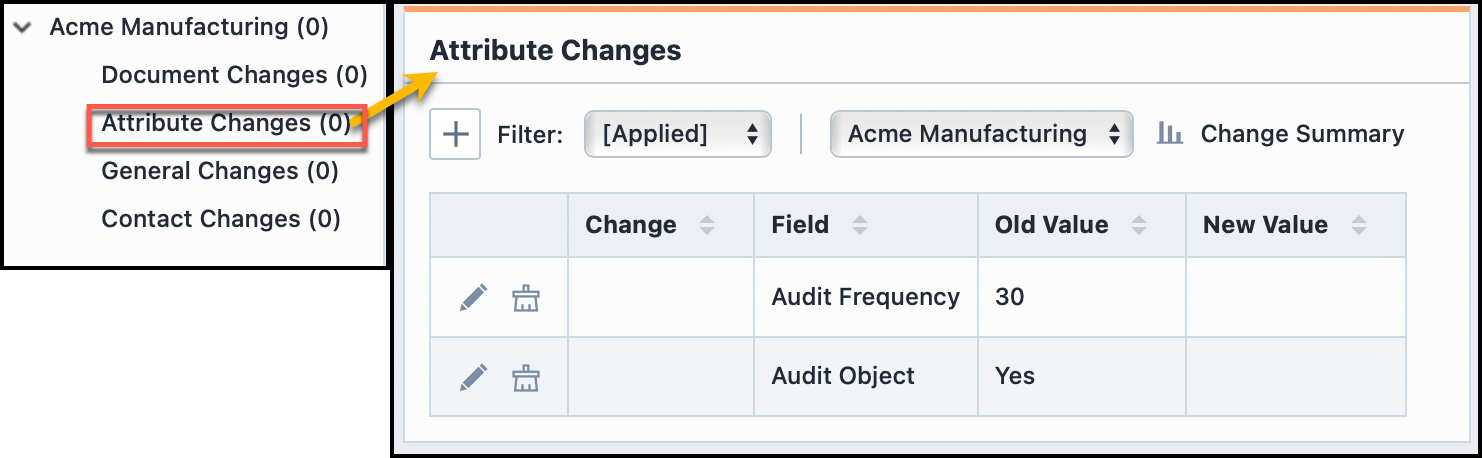 |
| General Changes | 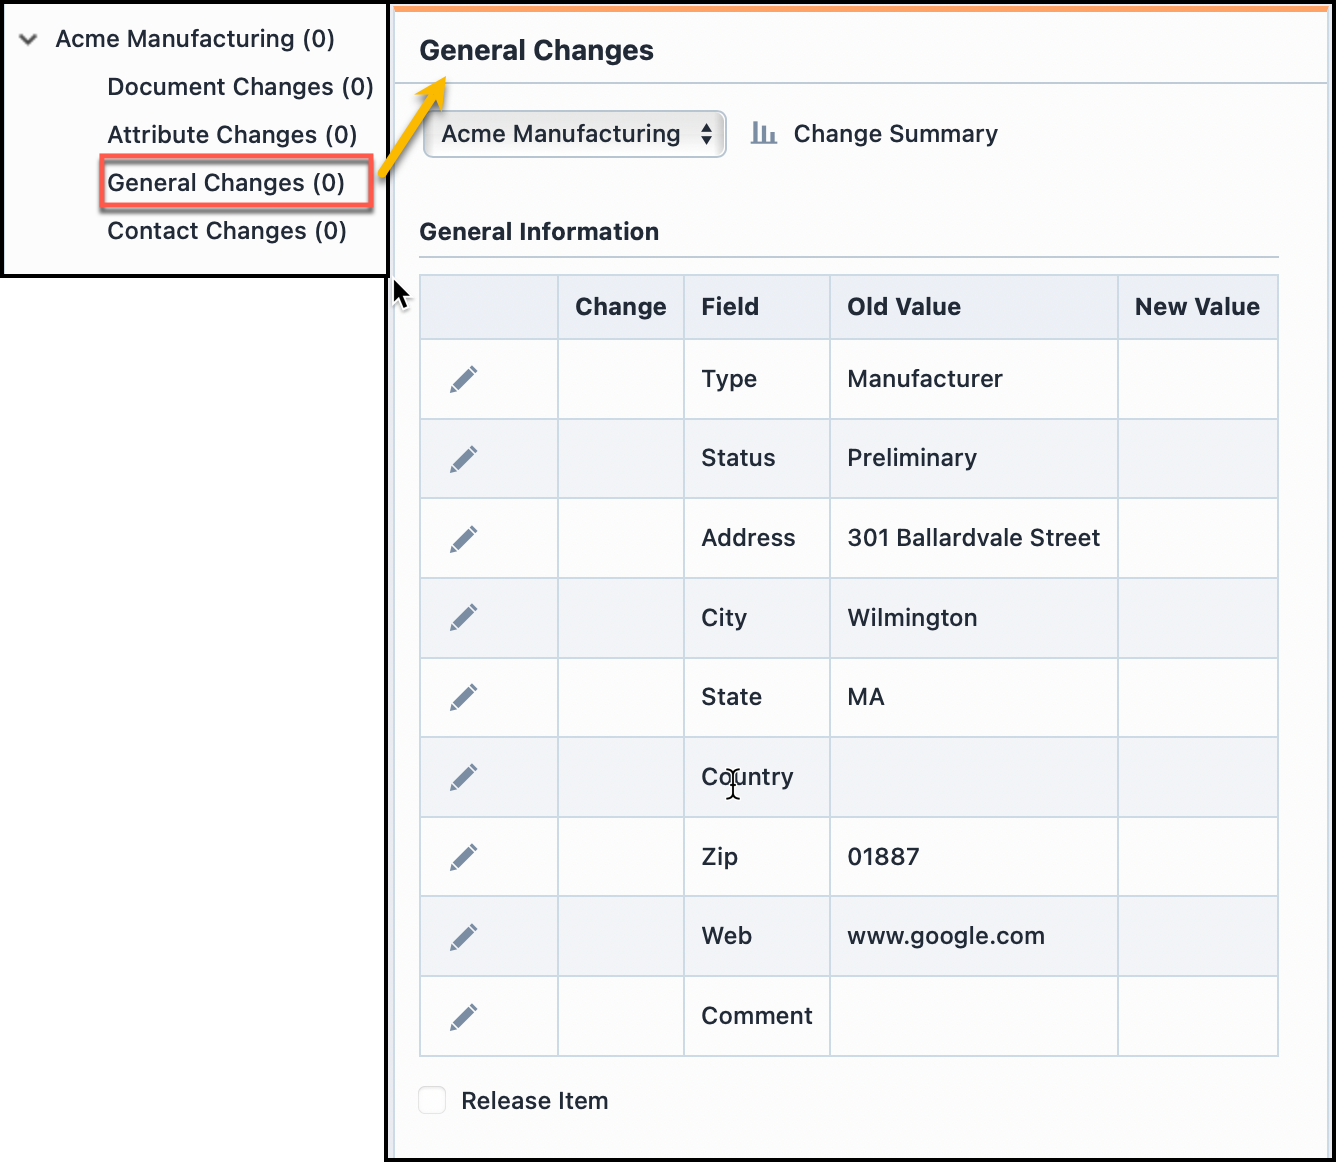 |
| Contact Changes | 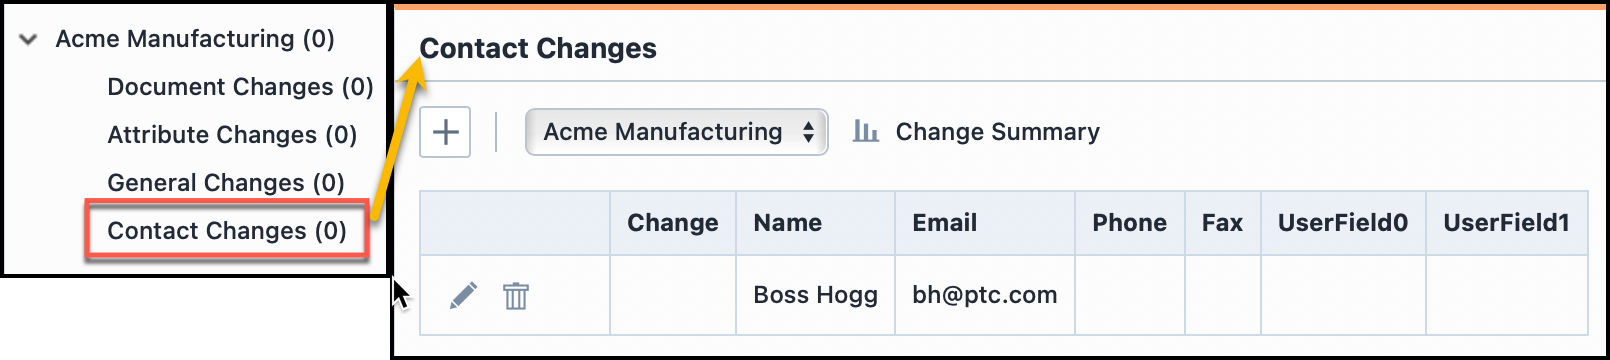 |
Attribute Changes
The Attribute Changes Page allows you to add, modify, and remove attributes on affected items. To invoke the Attribute Redline tool, select the Attribute Changes option from the Summary page or Page Navigator.

Adding Attributes
To add an attribute, click the Add/Update button from the Attribute Redline toolbar: This will display the Add/Edit Attribute panel.
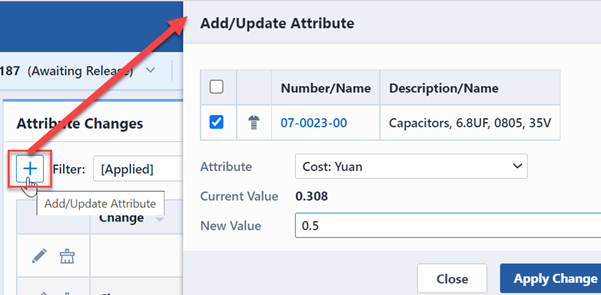
From the Add/Update Attributes dialog box you can select the attribute and specify a value. To add/edit the attribute, click the Apply Change or Apply & Close button.
Editing Attributes
To modify the value of any attribute, click the Edit icon. This will display the Add/Update Attributes dialog box and display the current value.
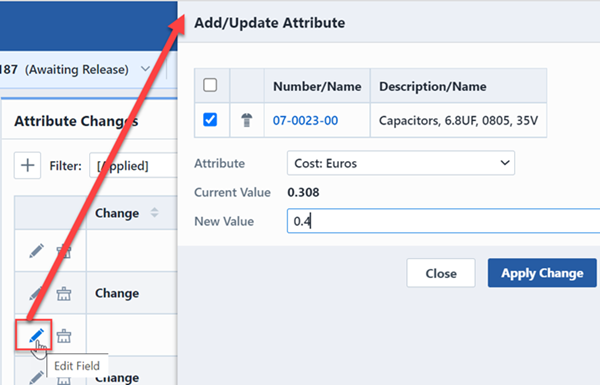
From the Add/Update Attributes dialog box you can select the attribute and specify a value. To update the attribute, click the Apply Change or Apply & Close button.
Removing Attributes
To remove any attribute, click the Clear icon.

To clear redlines or remove any of the fields, click the Clear icon.
General Changes
The General Changes Page allows you to modify general information on affected items. To invoke the General Information Redline tool, select the General Changes option from the Summary page or Page Navigator.

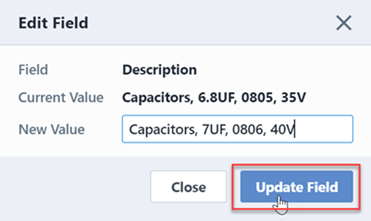
To modify any general field, click the edit icon for the field. This will display the Edit Field panel.
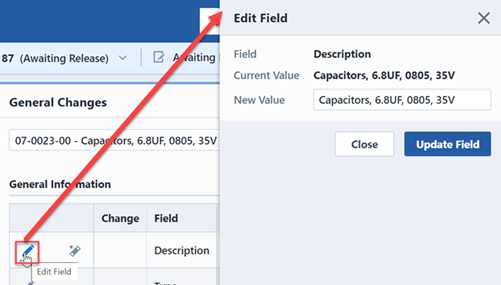
Using the Edit Field dialog box you will be able to specify a new field value.

Note: The relationship between category and type is enforced. The item's category must be a member of its item type. 
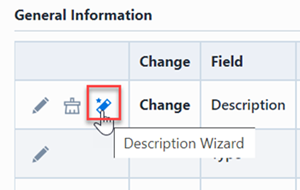
For the Description field, the system will provide a link to assign a Description using the Description Wizard.
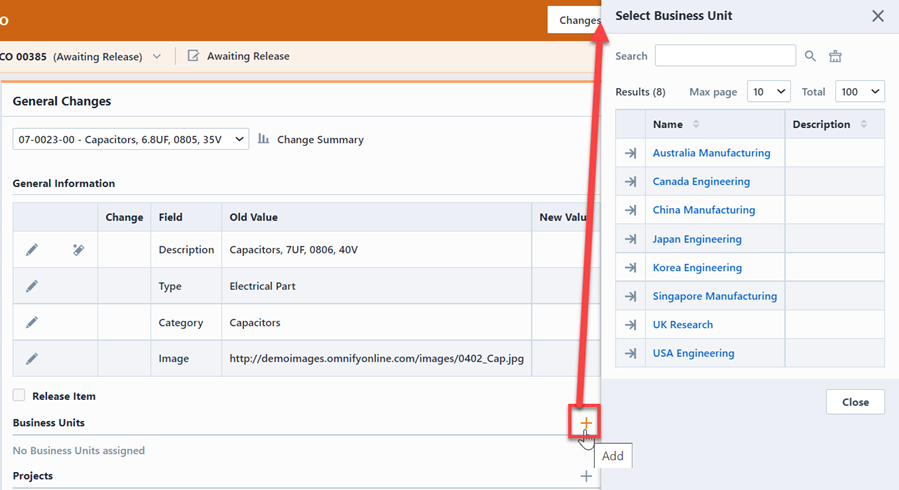
To add Projects or Business Units, click the Add... button. This will display the Add Business Unit dialog box and display a list of options to be added.
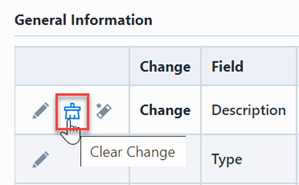
To clear redlines or remove any of the fields, click the Clear icon.
For items in a "Pending" state, the Release Item checkbox will be enabled.
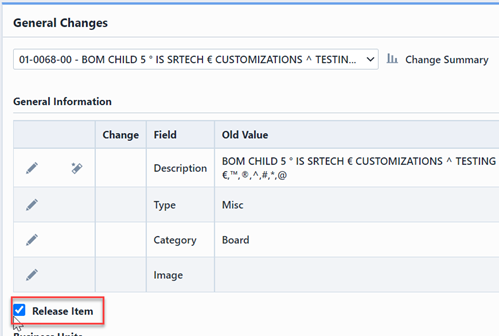
Checking this option will set the item to a "Release" state when the Change/ECO is released.
Service Object Changes
The Service Object Changes Page allows you to add, remove, and modify service object associations for any affected items. To invoke the Service Object Redline tool, select the Service Changes option from the Summary page or Page Navigator.
Adding Service Objects
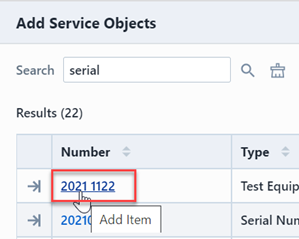
To add a service object, click the Add button from the Service Object Redline toolbar. This will display the Add Service Object panel.

From the Add Service Object dialog box, you can search for the desired item.
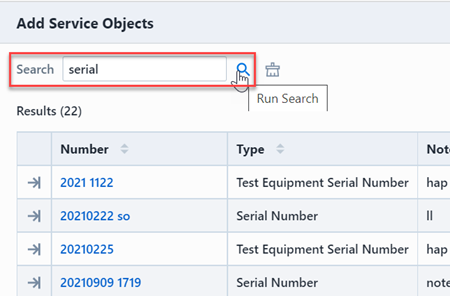
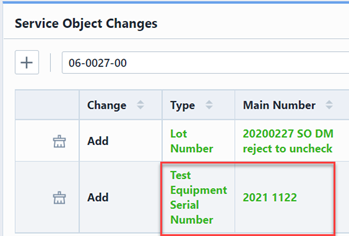
To add the Service Object, click the Number hyperlink.
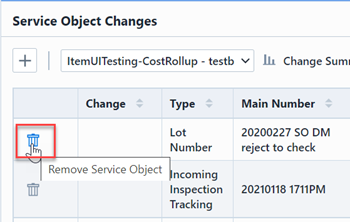
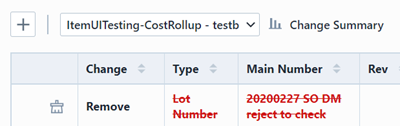
Removing Service Objects
To remove any service object or clear any redlines, click the Remove icon (Actions column).