Document Management
Document Management
Overview
Empower supports unlimited document/attachment assignments for any database object. Documents are specified by their path and file name, and can optionally contain a Title and Type to help describe the document.
Documents associated with any objects in the Empower database, can be either vaulted or non-vaulted documents.
| Types | Description |
|---|---|
| Vaulted Documents | Document information is managed in and by the Empower database. Vaulted documents require "Check-out" and "Check-in" functions to make modifications to the document. |
| Non-vaulted Documents | Document items are links to existing files (typically in a shared file area/directory) |
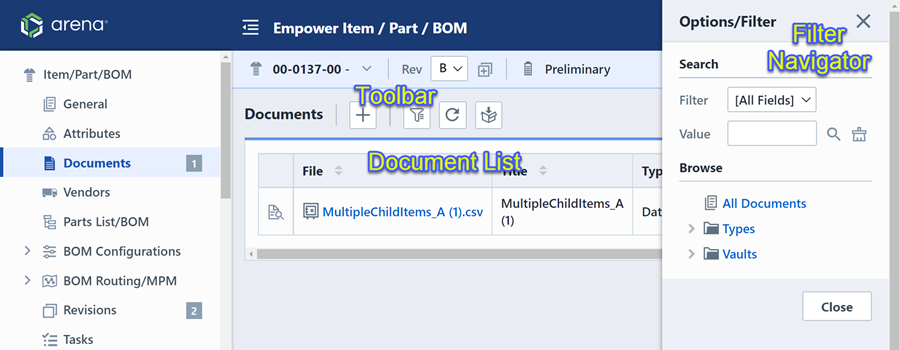
Documents Form
The Documents Form contains the following sections:
| Section | Description |
|---|---|
| Toolbar | Quick access to common Document functions |
| Document List | Current listing of associated documents |
| Filter/Navigator | Quick filter for displaying specific documents in the document list |
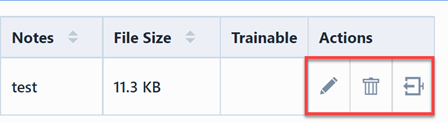
Each document will contain action icons.
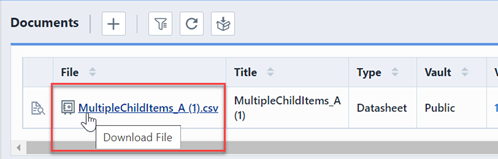
Each document will contain a hyperlink on the file name that will download the file when clicked.
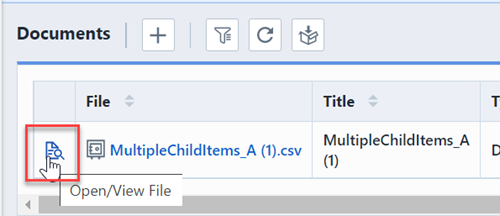
When enabled by the Administrator, you will also see a "view" icon, which will allow you to view the file in the browser without forcing a download. Note: the file type must be able to be viewed directly by the browser or via a browser plug-in.
An icon will appear next to each document to indicate the document type.

| Icon | Type |
|---|---|
 | Document is a linked document |
 | Document is a vaulted document |
 | Vaulted document is checked out |
Navigator/Filter
The Documents page contains both a Document Navigator and Search/Filter features that allow you to search and isolate the documents displayed in the Documents list. To open the navigator, select the Filter/Options toolbar button. This will display the Options/Filter slide-out panel.
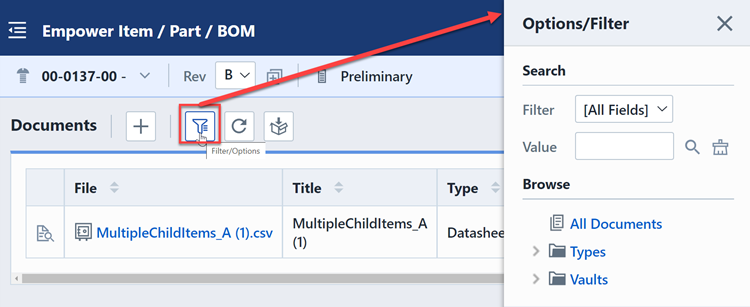
The panel provides Browse and Search options.
Document Browser
The Documents Browser provides a quick method to filter the documents list based on the document type and/or vault.
When the documents list is loaded the system will automatically build the browse tree based on the types and vaults assigned to the documents.

Selecting either a type or vault from the browser tree will automatically set the list filter.
List Search/Filter
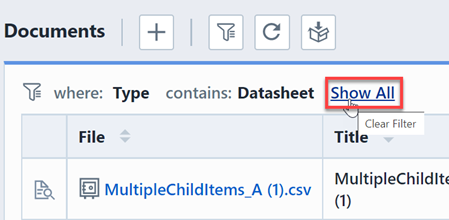
The List Search/Filter area provides you with a way to search and display specific documents on the list.
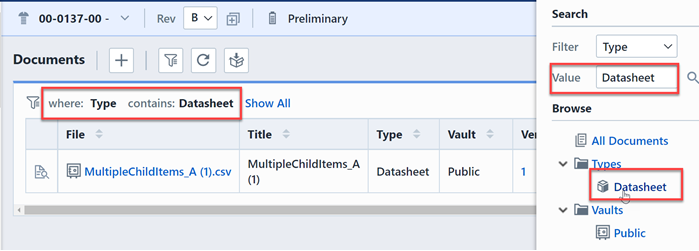
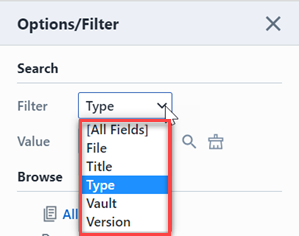
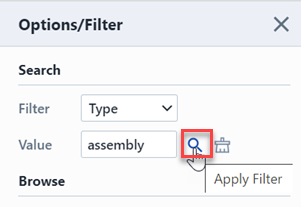
To search for documents, select the field (or all fields) you wish to search for values in.
Then, specify a value to search and click the Apply button.
The list will be filtered to the specific matches and a status indicator will identify the search parameters. To clear the filter and display all documents, click the Show All filter button.
Adding Documents
To add a document to the list, click the Add Document(s) toolbar button.
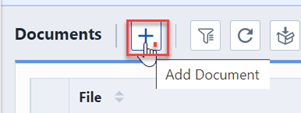
This will launch the Document Assignment Wizard.
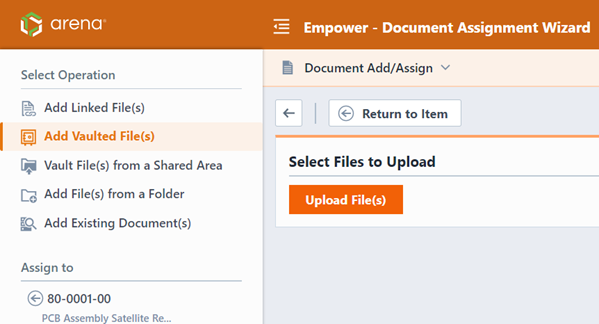
The Document Assignment Wizard contains the following key areas.

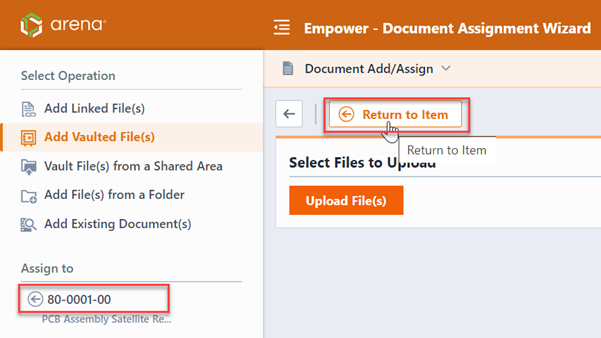
You can return to the assigned object by clicking the Return to [object] toolbar button, or the hyperlink in the object assignment area.
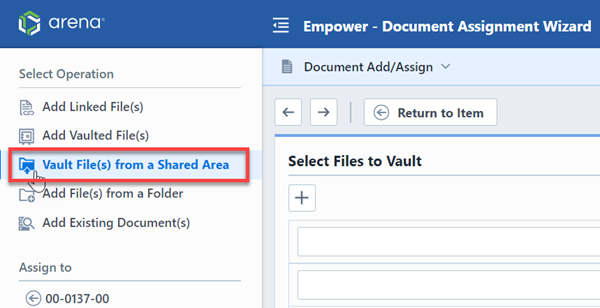
When adding documents, you can select from the following options:
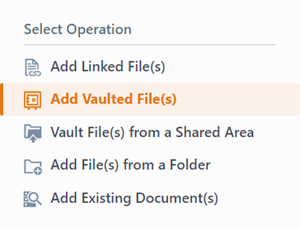
| Operation | Description |
|---|---|
| Add Linked Files | Add a single or multiple file links. These files will remain in their original location (no document management features will be available [check-in, check-out, versioning, etc.]) |
| Add Vaulted Files | Upload and vault a single or multiple files |
| Vault Files from a Shared Area | Vault a single or multiple files without performing an upload through the browser |
| Add Files from a Folder | Read a folder to select files to be added |
| Add Existing Documents | Add documents already assigned to other objects in the system |
"Local" and "Shared File Area" Vaulting
When vaulting documents, you can choose from a "local" file or use a "Shared File Area" file.
When using a "local" file upload the system will transfer the file from the user's location to the server using the web upload process. Once the file has been uploaded to the server, the Empower Web Services will then determine where to place the file for its final destination based on the vaulting settings.
Using this process, the entire contents of the file will be transferred through the browser which could result in a large amount of resource and network bandwidth utilization. Using this process is also subject to size and time delay restrictions that may be placed on the web server for security reasons.
To avoid the network bandwidth utilization and possible size and time restrictions, Empower allows you to define "Shared File Areas". A "Shared File Area" is a directory/folder that is made available to the Web Services to avoid the upload process. Using the "Shared File Area" allows the user to browse for a file in the specified folder (or sub folder), however when the "Add" or "Check-in" process occurs the Web Services read the file directly from the Shared location and then determines where to place the file for its final destination based on the vaulting settings. Using this process, the file is not transferred through the browser, thus providing a quicker "upload" process that avoids potential size and timeout restrictions placed on the web server.
Linked Files
To add linked files to the object, select the Add Linked Files option from the Operations list.
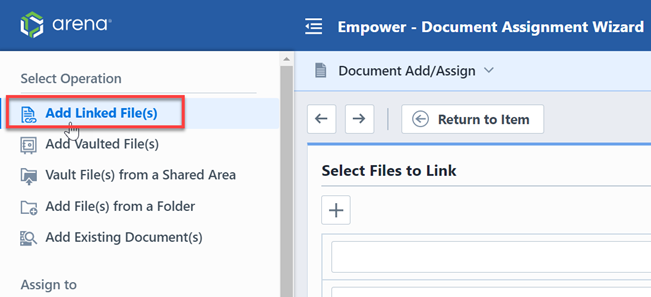
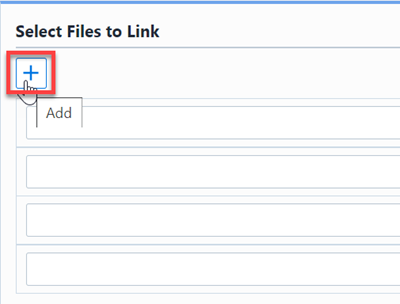
The action area will display a list of empty file entries.
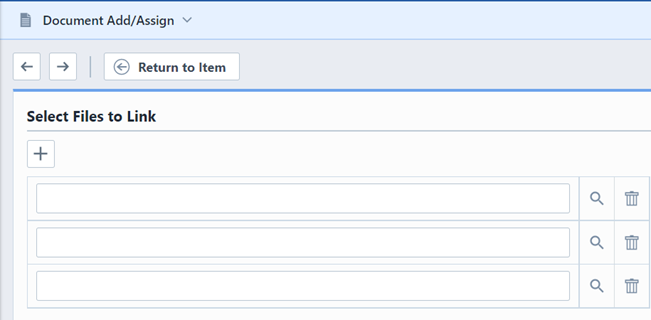
You can increase the number of displayed entries by clicking the Add button.
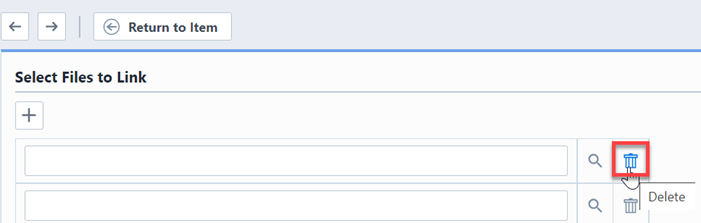
You can remove an entry by clicking the Remove button.
To specify a linked file, type the path and file name into one of the file entries.

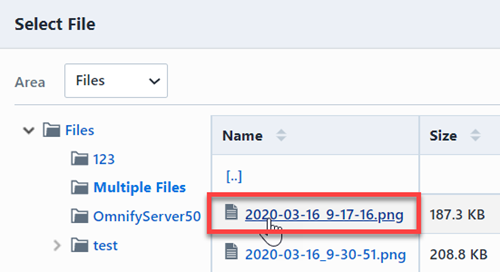
If your administrator has set up "Shared File Areas" to enable file browsing on your network drives, you will be able to click the Browse button to browse for specific files. This will display the Select File panel. Please refer to the Empower Administrator User's Guide for more information on setting up Shared File Areas.

In the Select File panel, you will be able to select an Area defined by the Administrator. "Areas" are mapped to folders on networked drives.
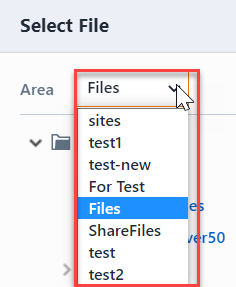
Once an Area is selected, you will be able to browse through folders to select the desired file.
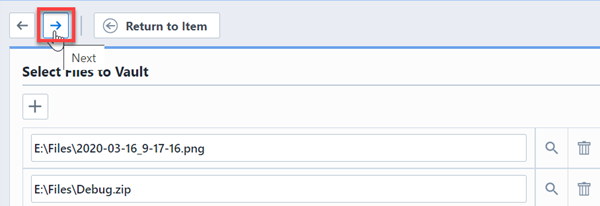
Once all files are specified, click the Next toolbar button to invoke the File Review Page.
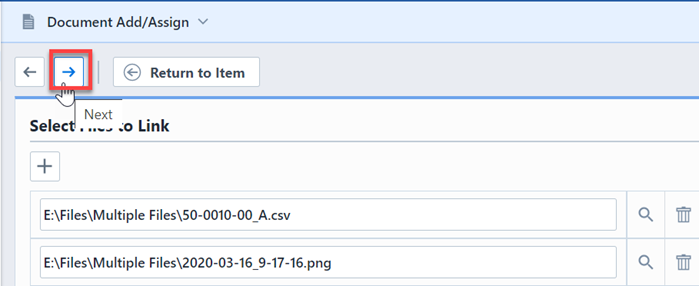
Refer to the File Review Page section for more information on editing files before committing them to the object.
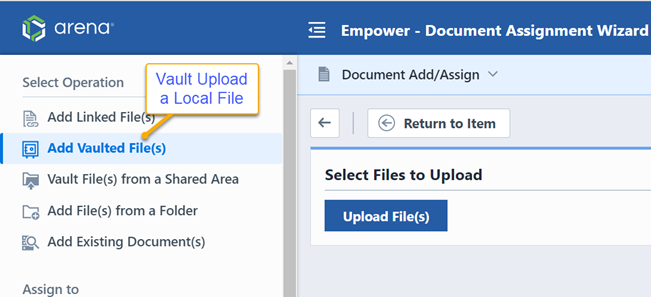
Vaulted Files
To vault files from a "local" file, select the Add Vaulted Files option from the Operations list.

This action allows you to upload files from files available on your local machine to the server to be vaulted in Empower. To upload files, select the Upload Files button.
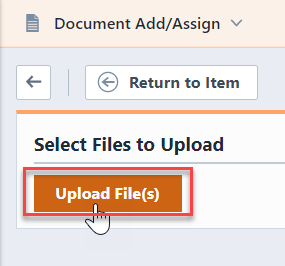
This will display the File Upload dialog box.
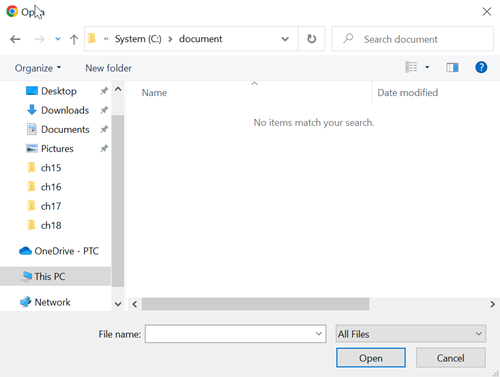
From the File Upload dialog, you will be able to select any files that are accessible to the local machine. You can select a single or multiple files from this dialog. Clicking the Open button will upload the local files to the server.
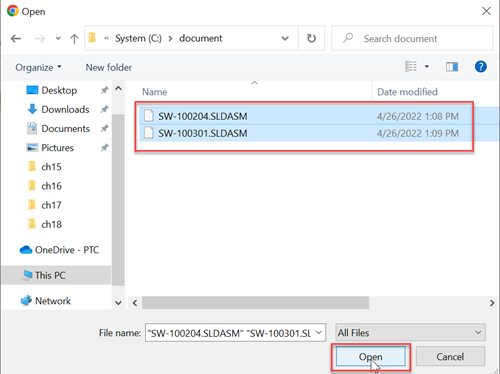
The File Review Page will be displayed automatically after the upload.
Refer to the File Review Page section for more information on editing files before committing them to the object.
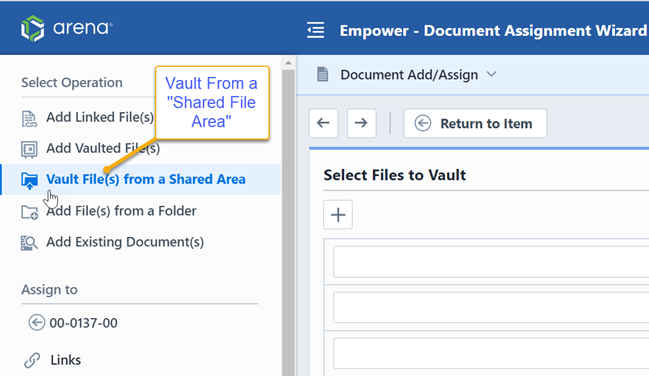
Vault From Shared Area
To add linked files to the object, select the Vault Files from a Shared Area option from the Operations list.
The action area will display a list of empty file entries.
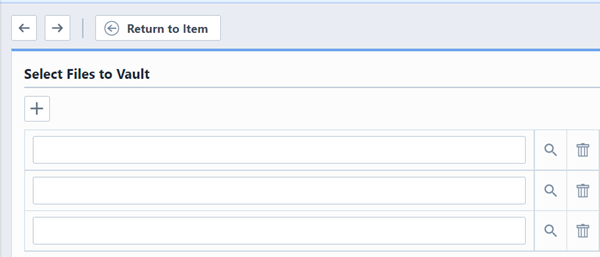
You can increase the number of displayed entries by clicking the Add button.
You can remove an entry by clicking the Remove button.
To specify a linked file, type the path and file name into one of the file entries.
If your administrator has set up "Shared File Areas" to enable file browsing on your network drives, you will be able to click the Browse button to browse for specific files. This will display the Select File panel. Please refer to the Empower Administrator User's Guide for more information on setting up Shared File Areas.
In the Select File panel, you will be able to select an Area defined by the Administrator. "Areas" are mapped to folders on networked drives.
Once an Area is selected, you will be able to browse through folders to select the desired file.
Once all files are specified, click the Next toolbar button to invoke the File Review Page.
Refer to the File Review Page section for more information on editing files before committing them to the object.
Add Files From a Folder
To add linked files to the object, select the Add Files from a Folder option from the Operations list.
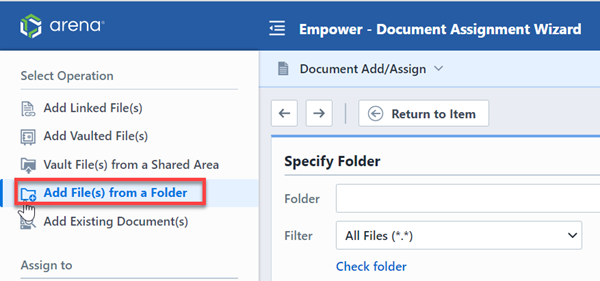
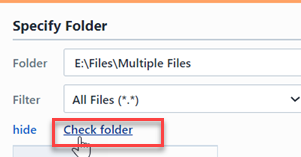
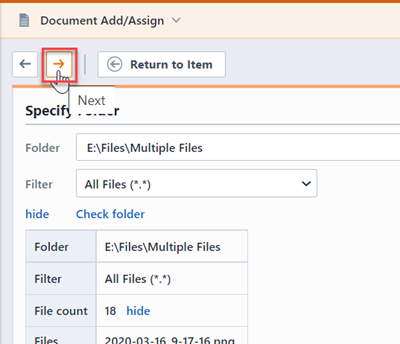
On the Specify Folder form, you can specify a folder and file filter.
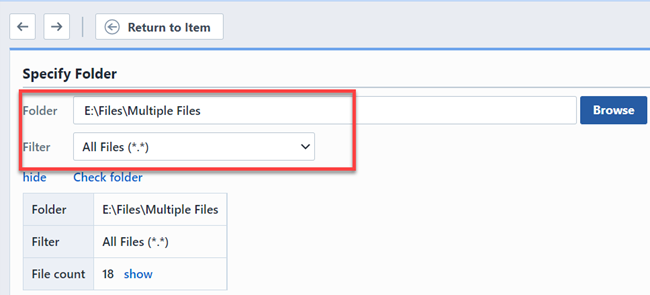
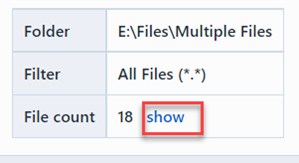
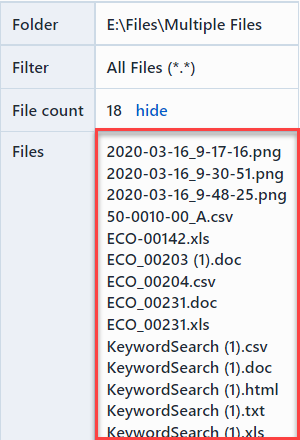
Clicking the Check folder button will list all files in the specified folder.
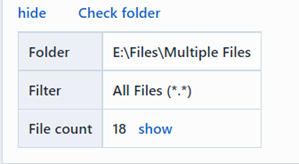
You can view the files by clicking the show button.
Click the Next toolbar button to invoke the File Review Page.
All matching files from that folder will be listed.
Refer to the File Review Page section for more information on editing files before committing them to the object.
Existing Documents
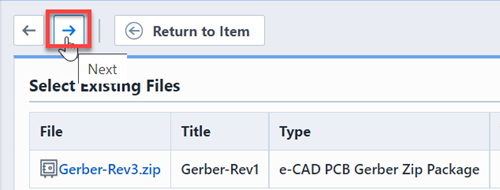
To add documents that are already assigned to other objects in the system, select the Add Existing Documents option from the Operations list.
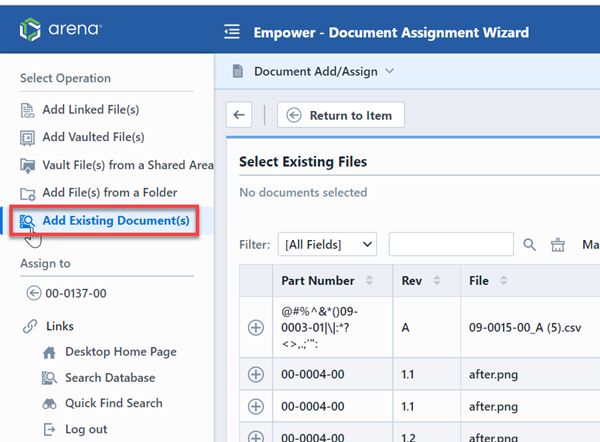
The action area will display a search form that will allow you to search for existing documents in the system.
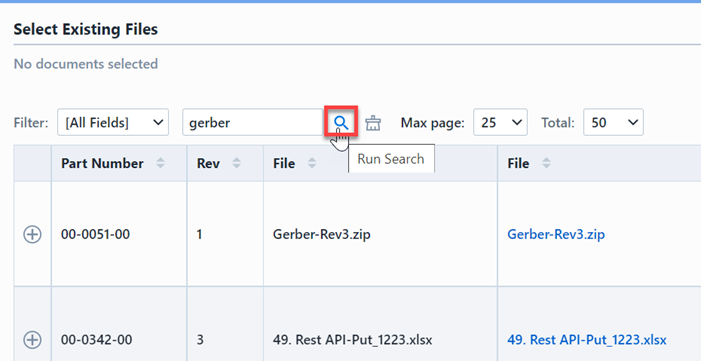
To add a document, click the Add button.
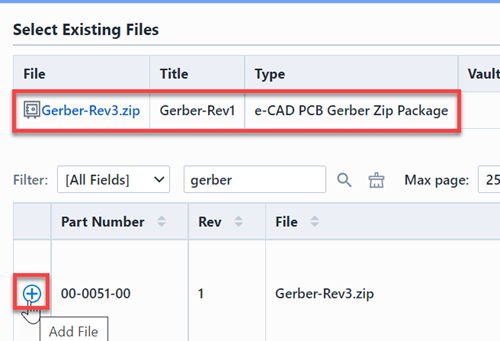
Once all files are specified, click the Next toolbar button to invoke the File Review Page.
Refer to the File Review Page section for more information on editing files before committing them to the object.
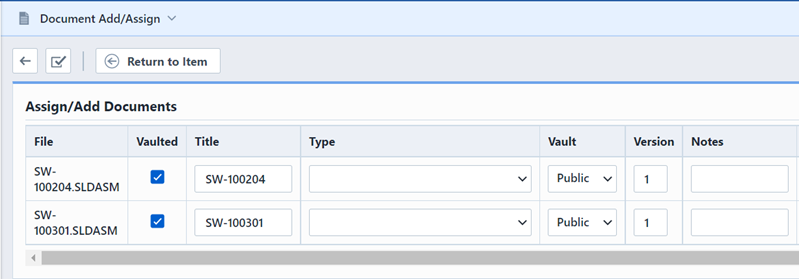
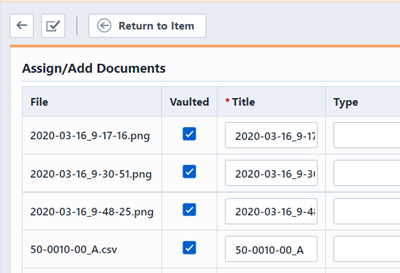
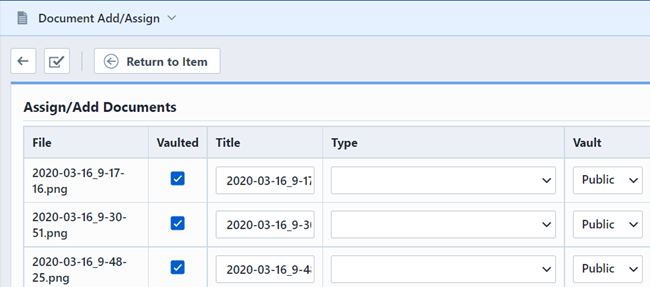
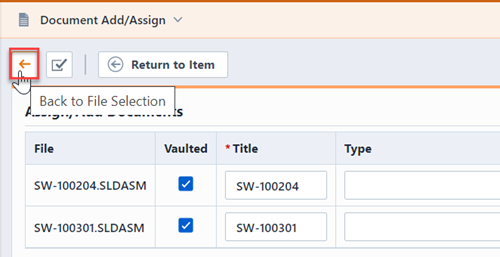
File Review Page
The File Review Page will display all selected files.
To include additional files to the list, click the Back button to return to the file selection page.
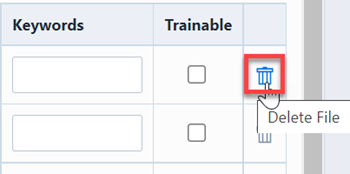
To remove a file from the list, click the Remove button.
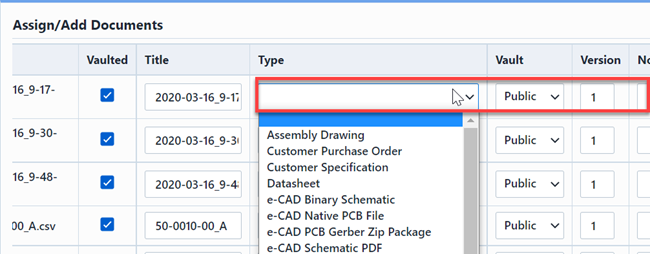
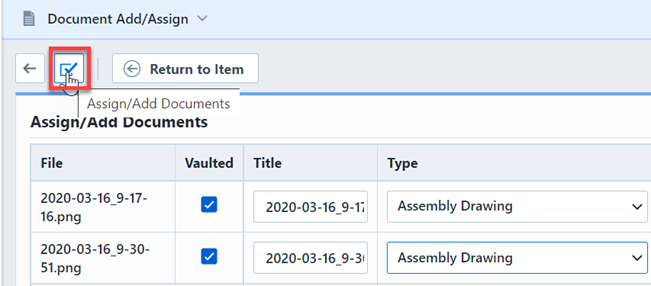
From the Assign/Add Documents list, you can set/modify the Type, Vault, Version, Notes, and Keywords.
Once all files and properties are set, click the Assign/Add Documents toolbar button.
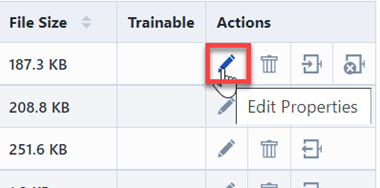
Editing Properties
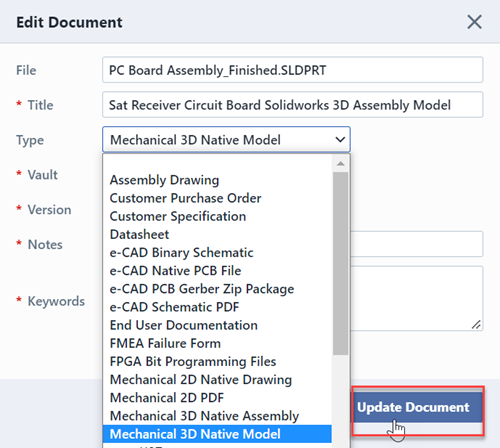
To modify the properties of any document, click the Edit Properties button. This will invoke the Edit Document panel.
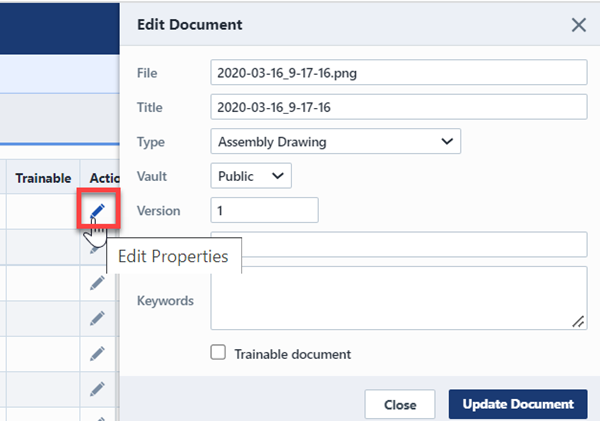
The Edit Document panel allows you to modify the following properties: File (name), Title, Type, Vault, Version, Notes, Keywords. To update the properties, click the Update Document button.
To check-in/vault any linked document, click the Edit Properties button on the linked document.
From the Edit Document panel, check the Vault document checkbox.
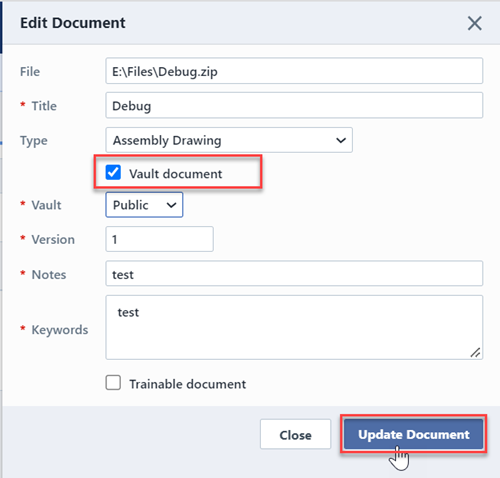
To vault the document, click the Update Document button.
Check-in/Check-out
To check-out a vaulted document, click the Check-out button on the desired document.
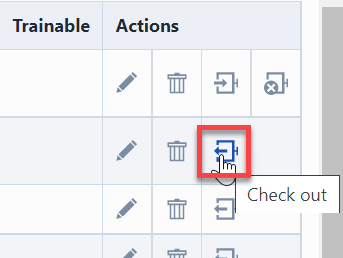
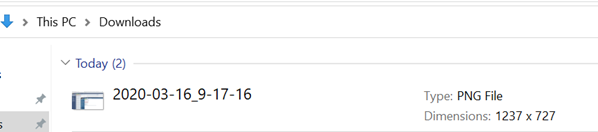
The file will be automatically downloaded to your device.
The status will update to indicate the checked-out status.

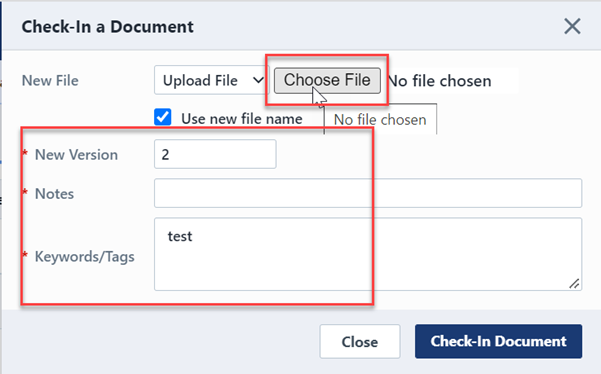
To check-in a new version, click the Check-in button. This will invoke the Check-in panel.
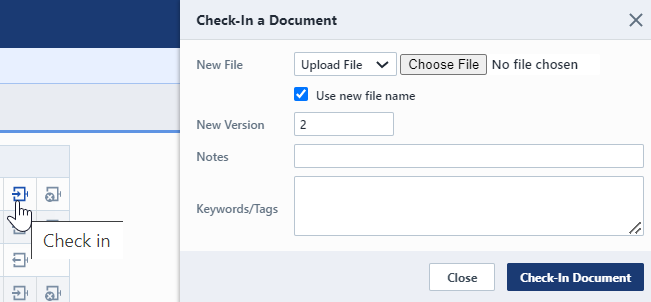
To check in a document, specify the new file and set any desired properties and click the Check-in Document button.
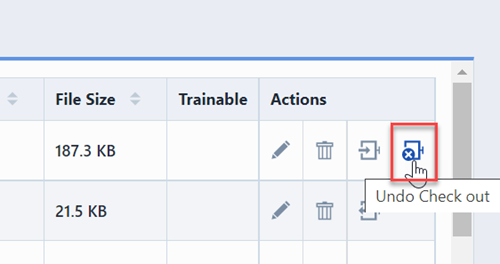
To undo a check-out, click the Undo Check-out button.
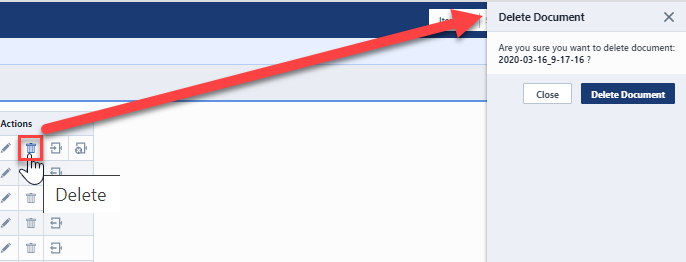
Removing
To remove a document, click the Remove button. This will invoke the Delete Document panel.
Change/ECOs
You can add, remove, modify, and check in new versions of documents using formal Changes/ECO. Refer to the Change/ECO Management section for more information.