BOM Management
BOM Management
Overview
In addition to representing parts, documents, software components, etc. an Item can also represent a Bill of Material (BOM). The Parts List page of the item form will list all "child items" and levels of the BOM.
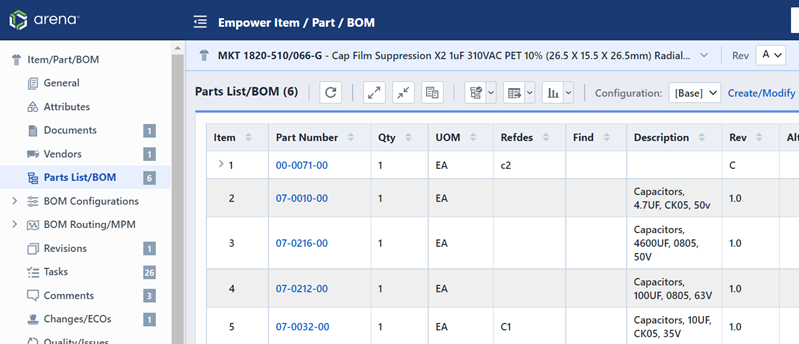
The system will inherently manage/display all "levels" of the BOM.
BOMs can be created:
- Interactively - From any search or open window you can Copy & Paste items into the BOM window.
- Import from a BOM file - Import from any BOM file format (ASCII, Excel, etc.).
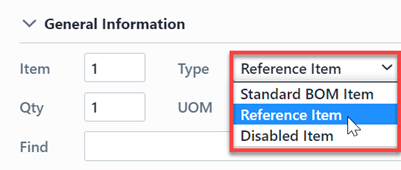
Child items of a BOM can be defined as one of the following types:
| BOM Item Type | Description |
|---|---|
| Standard Item | Item will be represented in all BOMs and can have multiple quantities |
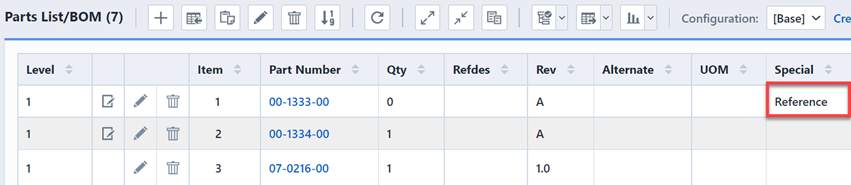
| Reference Item | Item will be represented in all BOMs and always has a Quantity of 0 |
| Disabled Item | Item has not been "hard-deleted" from BOM and can filtered in reports/exporting |
Parts List/BOM Page
The Parts List Page contains the following sections:
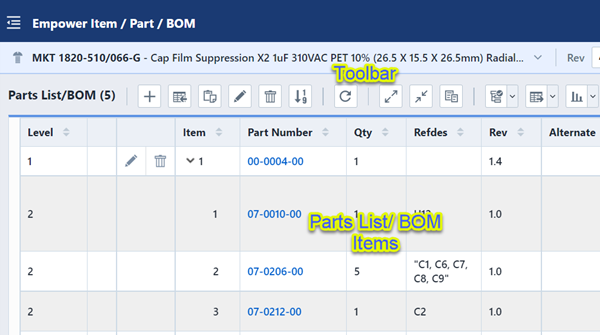
| Section | Description |
|---|---|
| Toolbar | Quick access to common BOM/Parts List functions |
| Parts List/BOM Items | Current listing of child items of the BOM, displays full BOM hierarchy |
The Parts List toolbar contains the following commands:
| Icon | Command |
|---|---|
 | Add Child/BOM items from a database search |
 | Import BOM from file |
 | Paste/Add items from the buffer |
 | Group edit multiple items |
 | Remove multiple items |
 | Renumber/Reset item numbers |
 | Refresh/Reload the list |
 | Expand all items |
 | Compress all items |
 | Copy BOM items to the buffer |
 | Display the Data Check Reports menu |
 | Display the BOM Export menu |
 | Display the Reports menu |
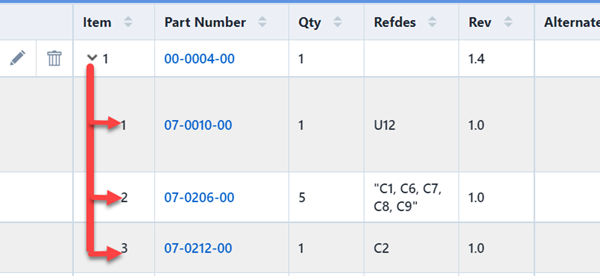
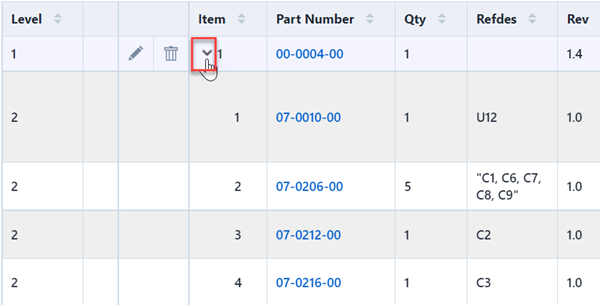
For each child item that contains a BOM/Parts List an expansion button will appear on the left side of the list.
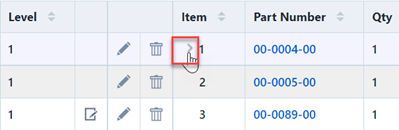
Clicking on the expansion button will display the BOM for that item.
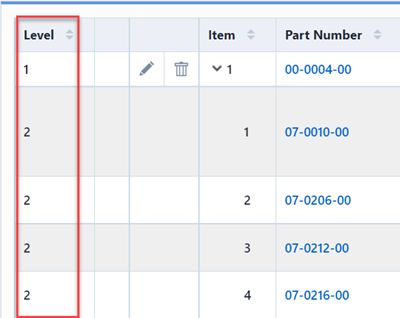
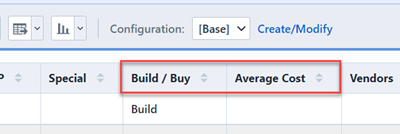
Using the User Preferences you can include a "Level" column on the BOM list to indicate the level of hierarchy for each item.
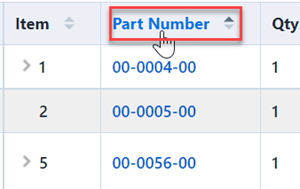
The system will initially display the BOM sorted by the Item/Sequence field.
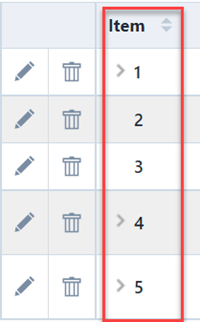
You can sort on any field by clicking the column header.
Column Display
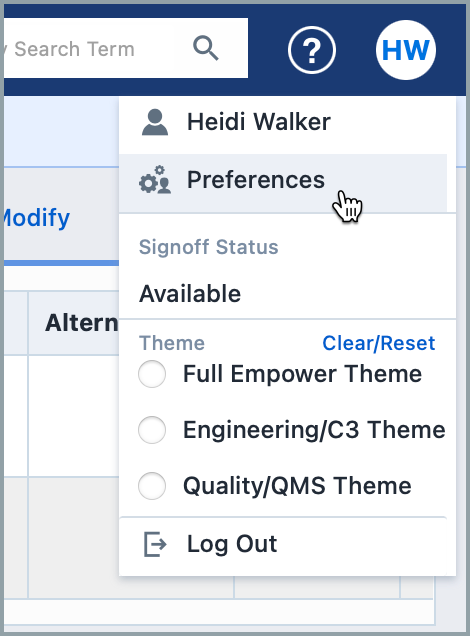
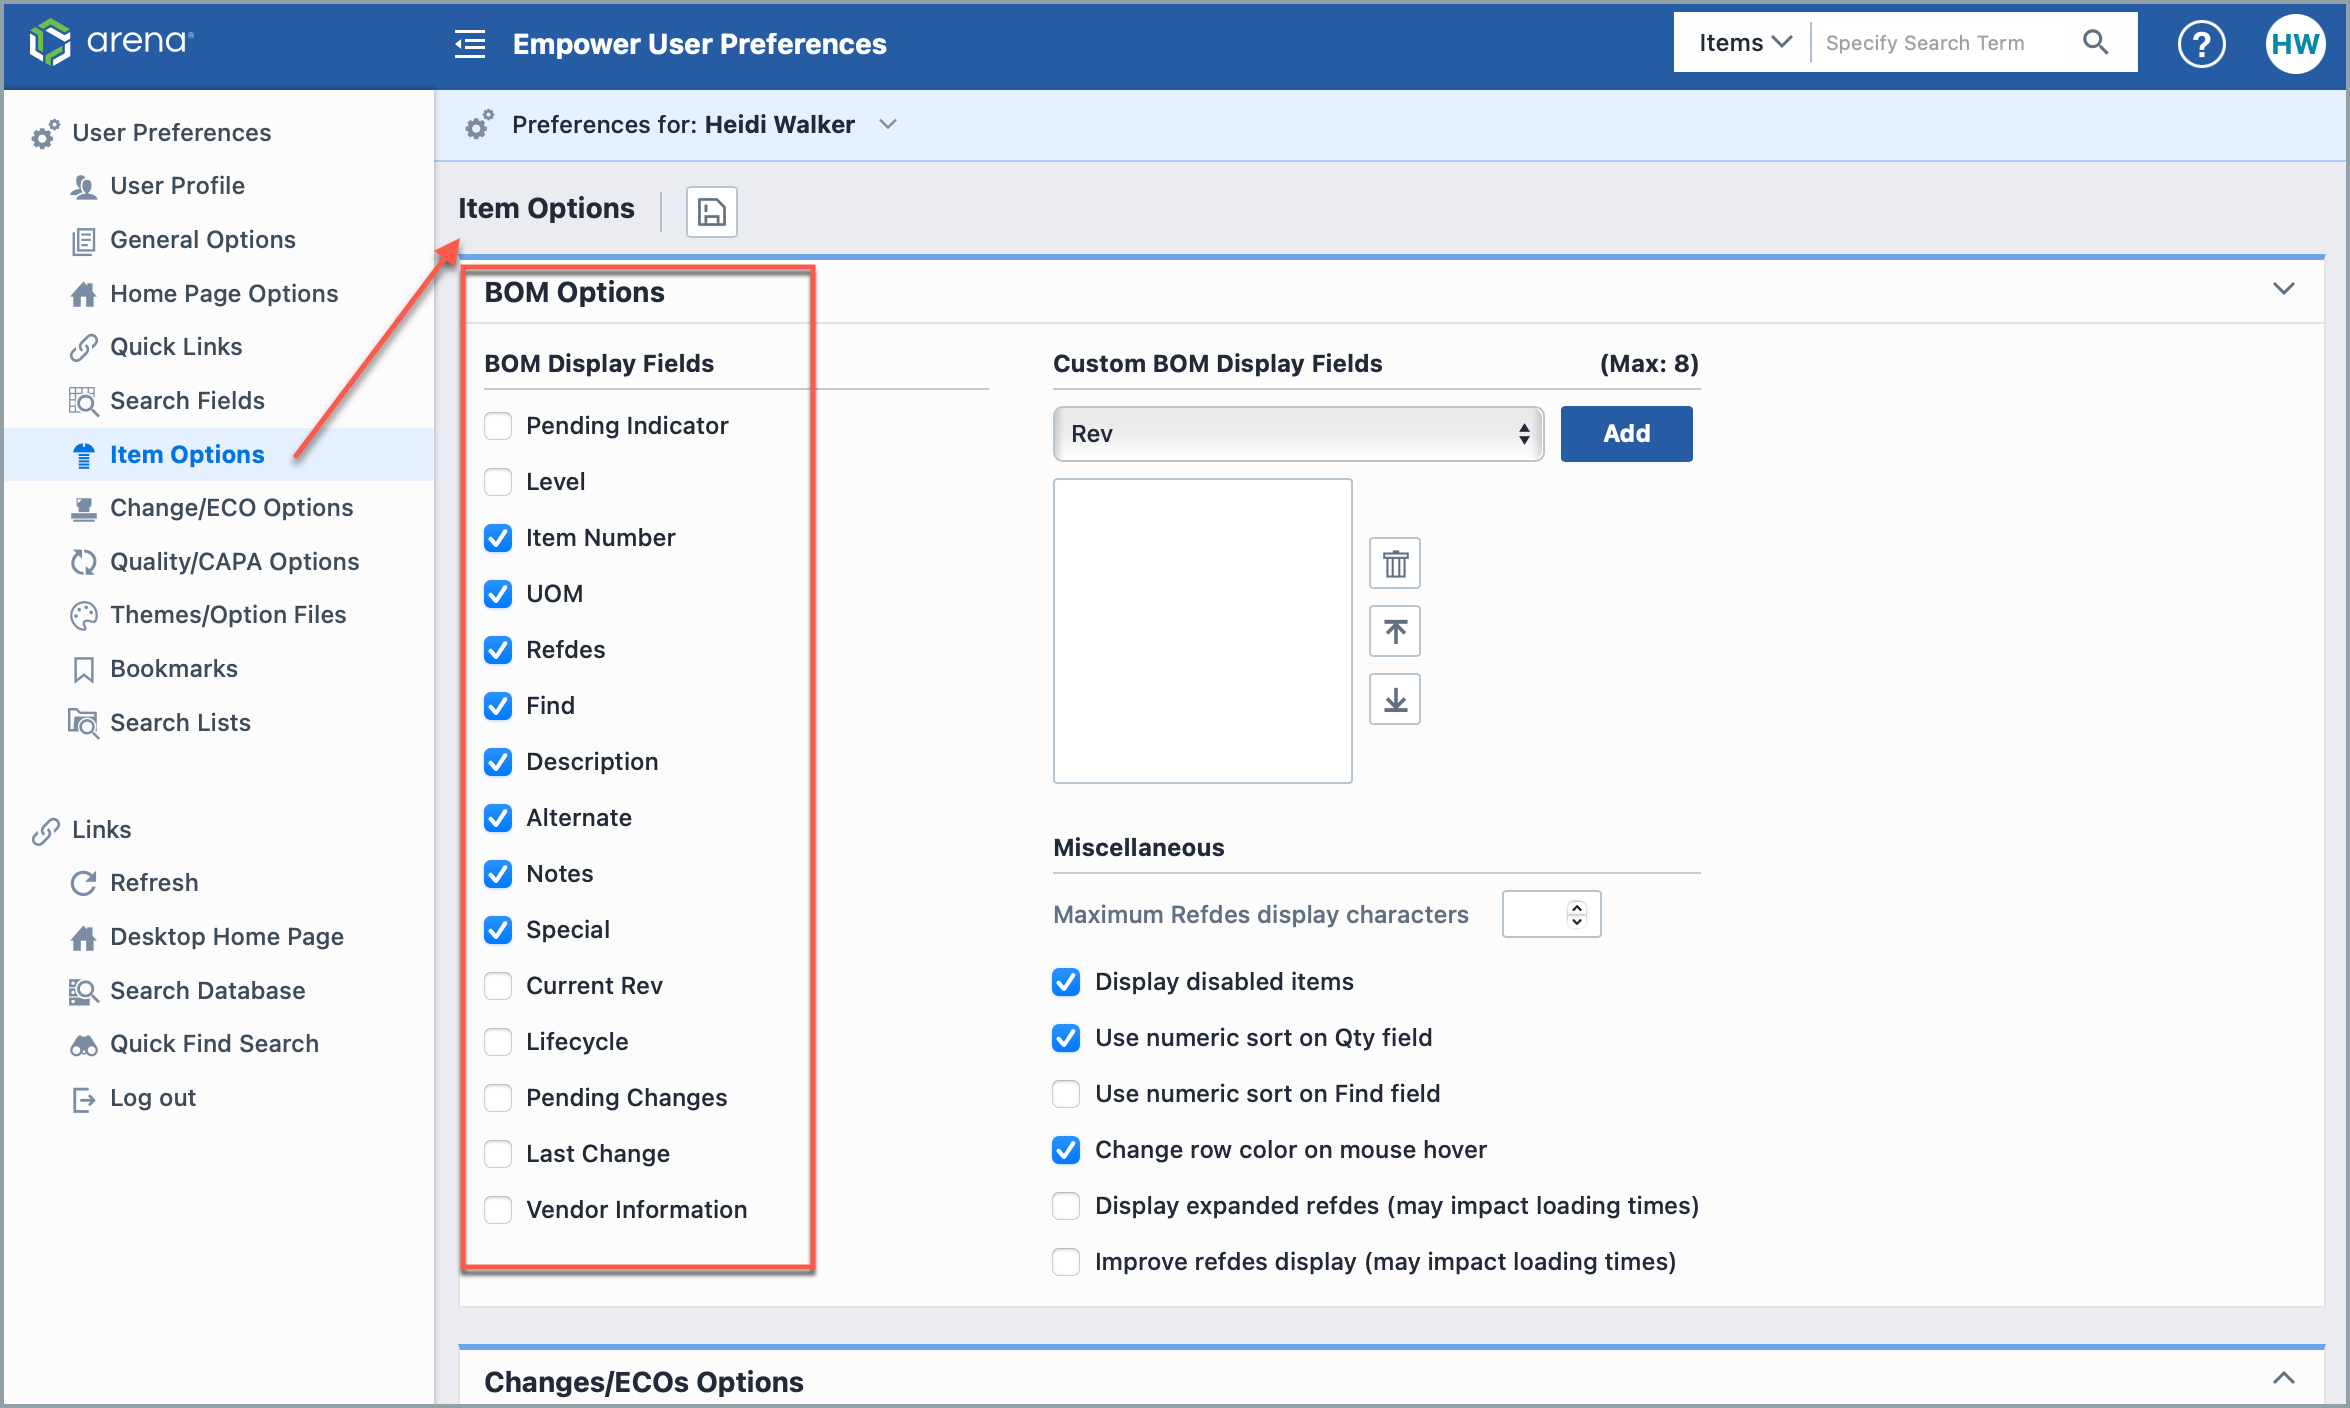
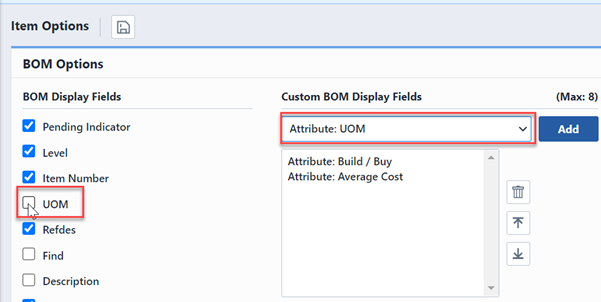
The Parts List Page can be configured to show or hide standard BOM fields as well as item data fields, attributes, and vendor item data. To configure the columns/fields of the BOM list, select the BOM Options section from the User Preferences form.
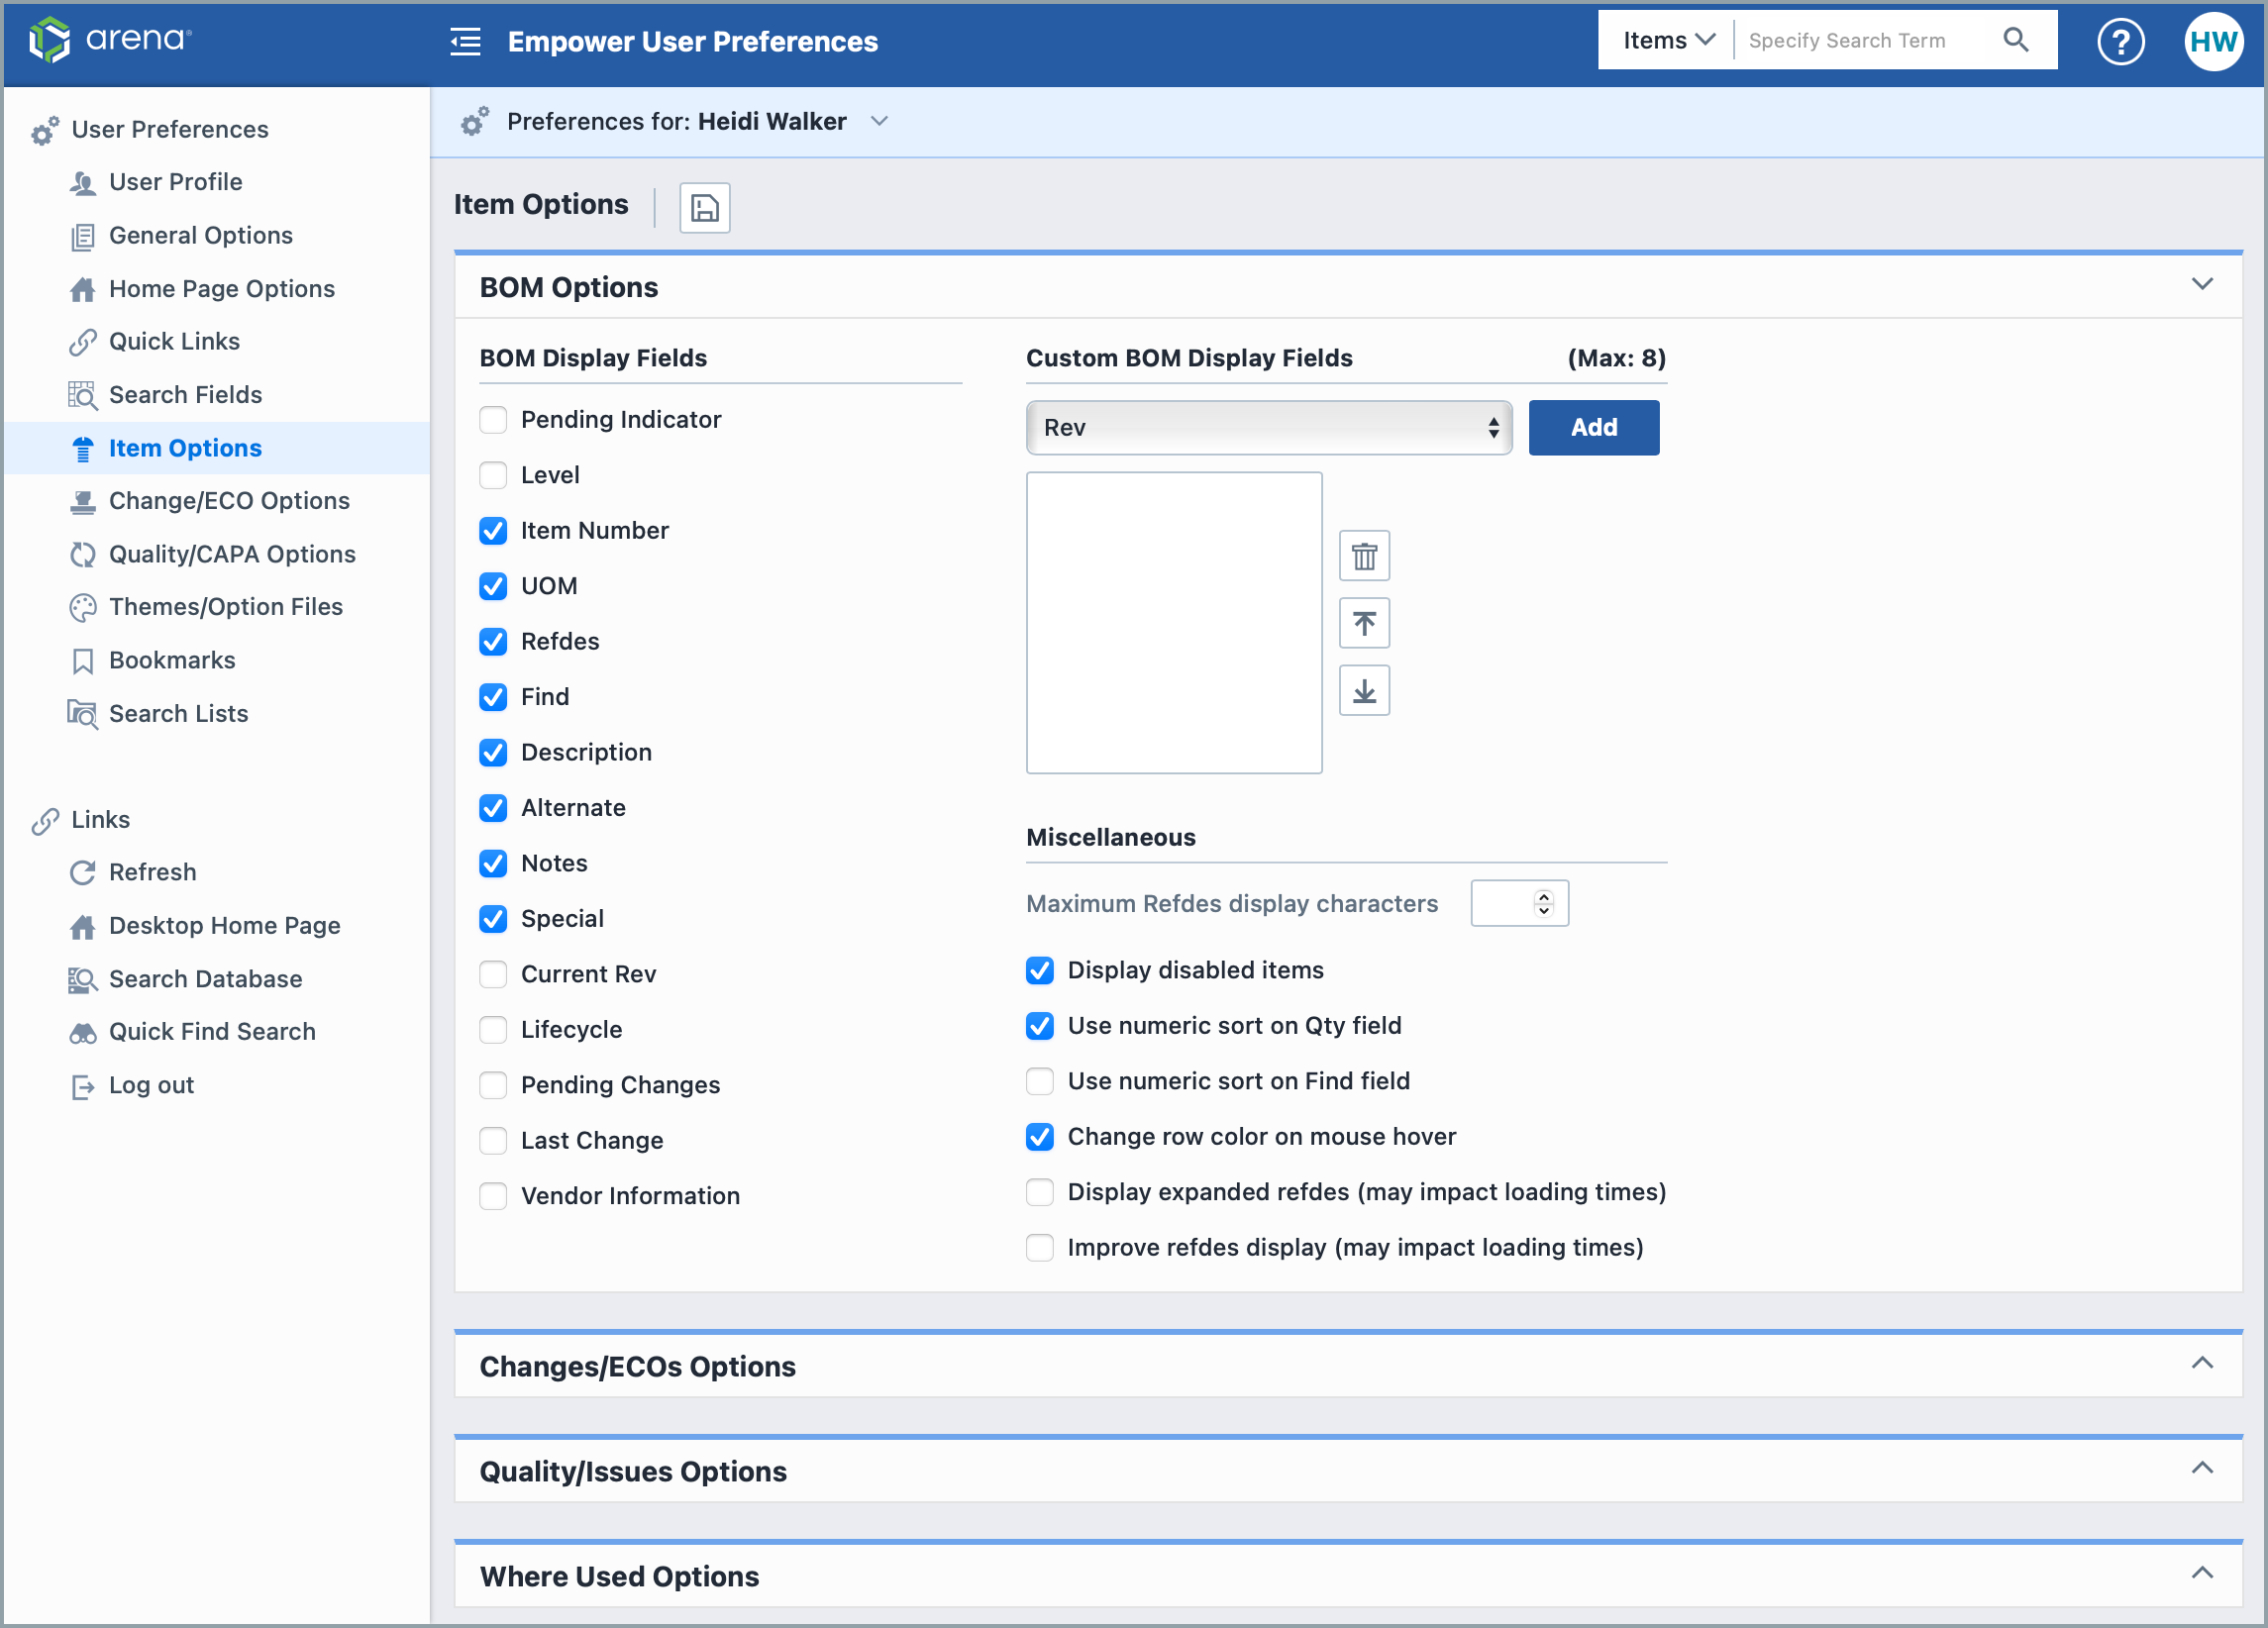
To show/hide standard BOM fields, you can check/uncheck the fields in the BOM Display Fields list.
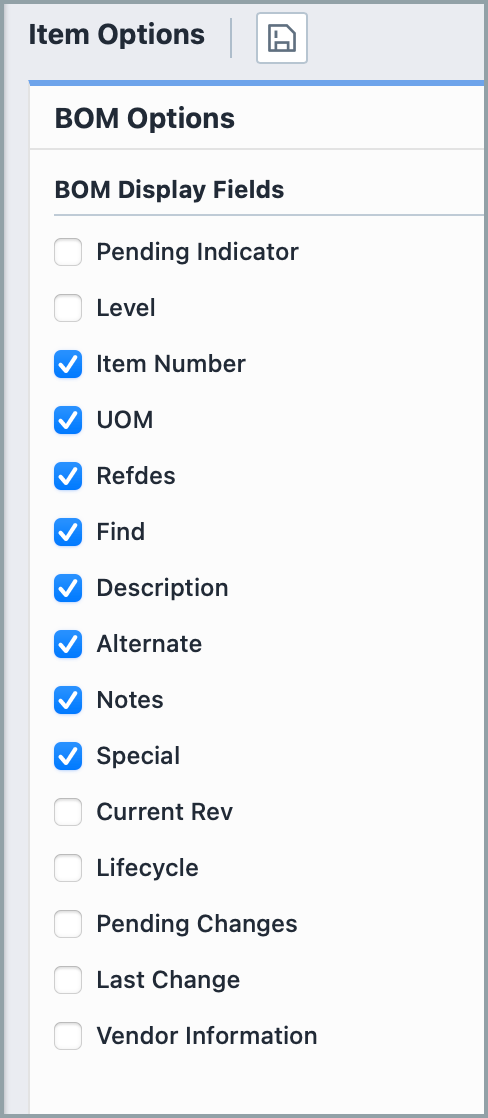
The BOM Display Fields list contains the following fields:
| Field/Option | Description |
|---|---|
| Pending Indicator | Display icon for all pending BOM items |
| Level | Indicates level of hierarchy for each item |
| Item Number | Item/sequence numbers |
| UOM | Unit of Measure field |
| Refdes | Reference designators |
| Find | Find/Balloon number |
| Description | Item description |
| Alternate | Lists BOM Item alternates |
| Notes | Additional text field for BOM items |
| Special | Indicate Standard, Disabled, and Reference Items |
| Current Rev | Lists the item's current revision |
| Lifecycle | Lists the current item lifecycle |
| Pending Changes | Lists Pending Changes to Item |
| Last Change | Includes the last change related to the Item |
| Vendor Information | Includes vendor items list for each BOM item |
Item Data Fields/Attributes
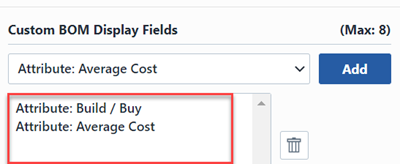
To include item fields (General, Attributes, etc.) in the BOM list, select the desired field from the Custom BOM Display Fields drop list.
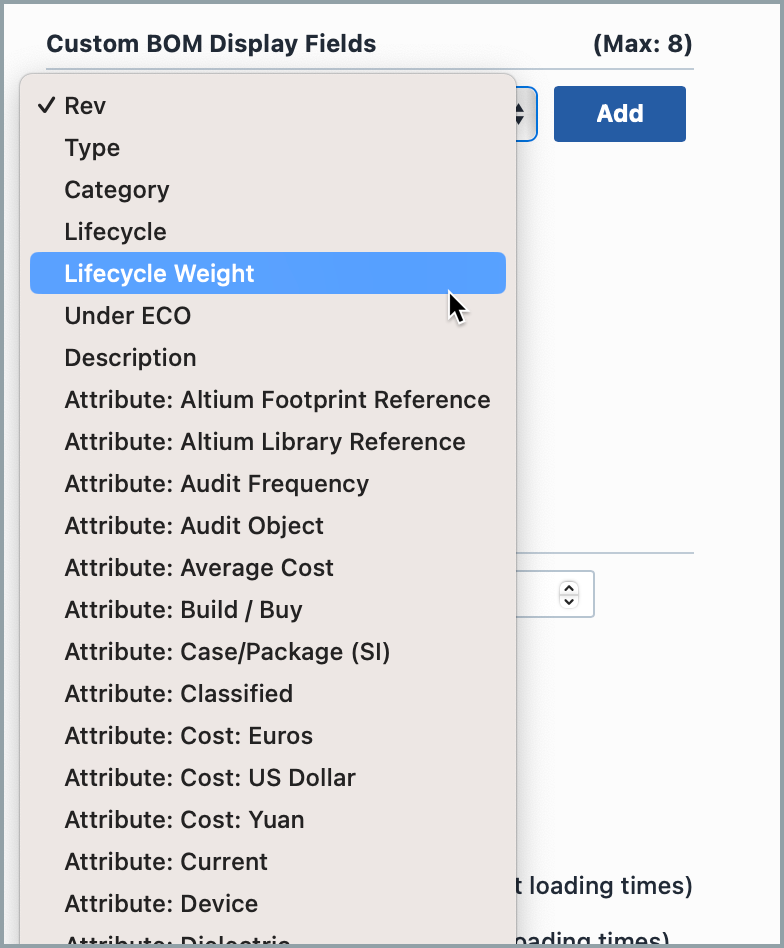
Then click the Add button.
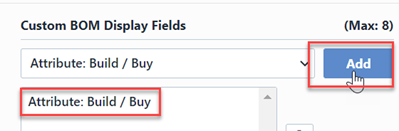
The fields specified in the Custom BOM Display Fields will appear as columns in the BOM list.
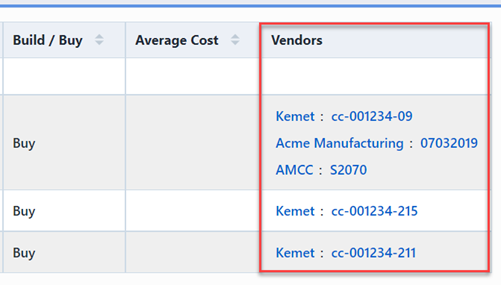
Vendor Items
You can display the associated vendor items in the BOM list by checking the Vendor Information option in the BOM Display Fields list:
Unit of Measure
BOM Items contain a standard property to indicate the Unit of Measure (UOM). The UOM field can be assigned on a per BOM item basis.
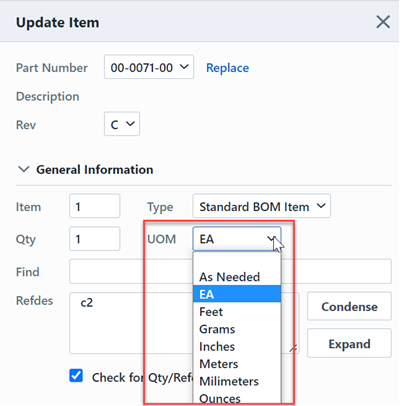
Unit of Measure values are created in the Empower Administrator.
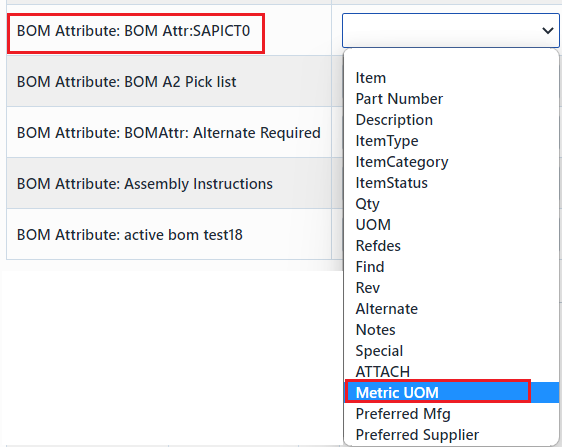
If you would prefer to manage the Unit of Measure as an Item attribute field, you can uncheck the UOM field from the BOM Display Fields and add the attribute to the Custom BOM Display Fields list.
Interactive Creation
You can add items to a BOM interactively using any of the following techniques:
- Click the Add button from the BOM toolbar
- Copy & Paste from any existing BOM window
- Copy & Paste from any item form
- Copy & Paste from the Database Search form
Refer to the Importing section for information on importing BOMs from Text, Excel, OmniBOM, etc. files.
Using the Add BOM Item Wizard
To add an item to a BOM, click the Add button from the BOM toolbar. This will invoke the Add BOM Item Wizard.

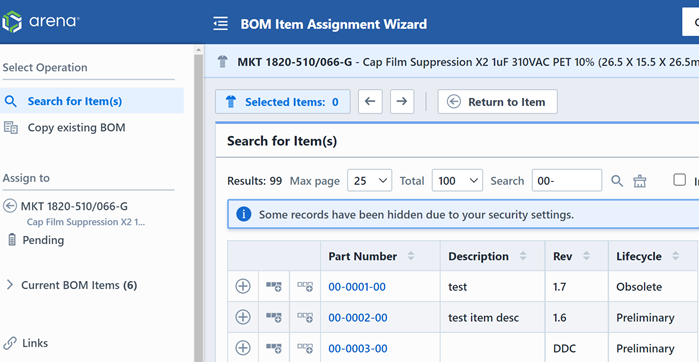
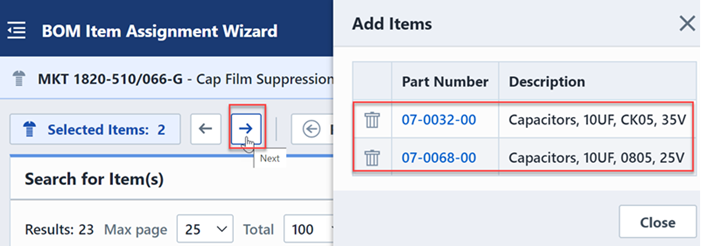
The first page of the wizard allows you to search for the items you wish to add. You can add multiple items at the same time by adding items to the Add buffer. Specify a search term.
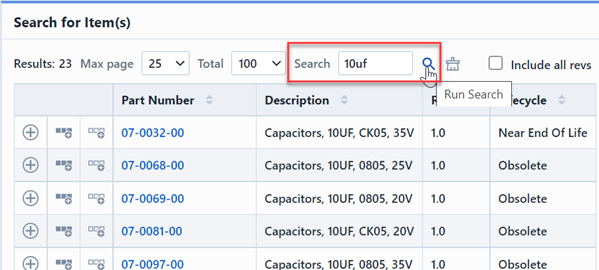
Click on the item hyperlink to add the item to the Add buffer.
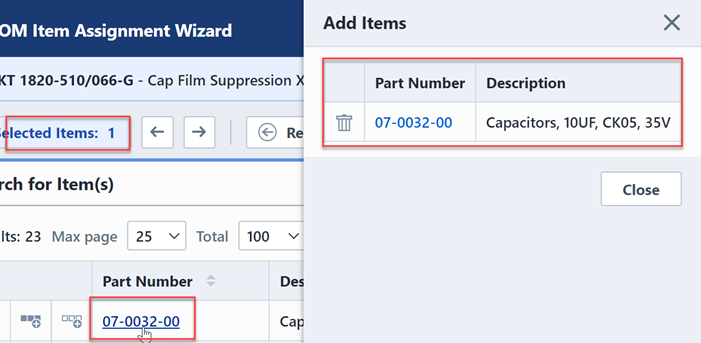
Once all desired items are in the Add buffer, click the Next button.
The next page of the wizard displays all selected items and allows you to set the BOM field properties.
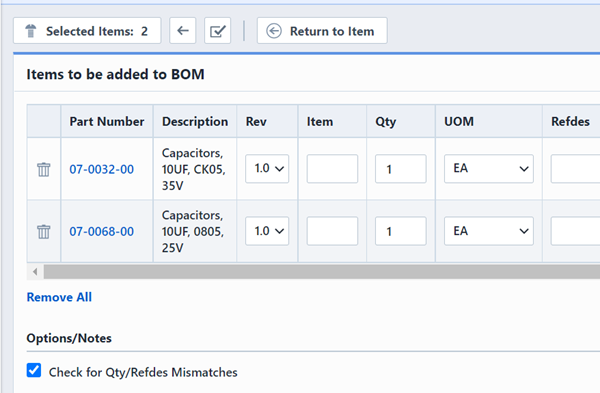
You will be able to modify all BOM item fields before committing the items to the BOM.
| Field | Description |
|---|---|
| Rev | Select the item revision |
| Item | Item/sequence number - the system will automatically assign or you can specify a numeric value |
| Qty | Quantity (numeric or decimal values) |
| UOM | Unit of Measure - values defined in Administrator |
| Refdes | Reference designators |
| Find | Find/Balloon/Drawing Reference number |
| Alternate | Alternate BOM items |
| Notes | Additional text/note field for BOM item |
| Special | Select either Standard BOM Item (blank), Reference Item, or Disabled Item |
| Custom | Custom fields/attributes - defined in Administrator |
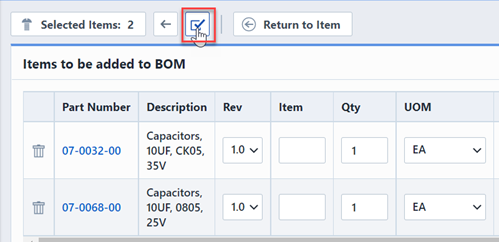
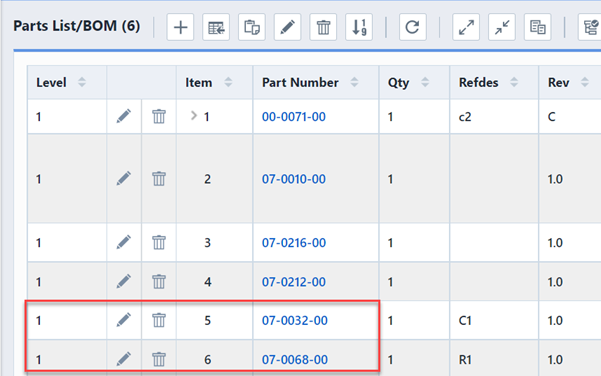
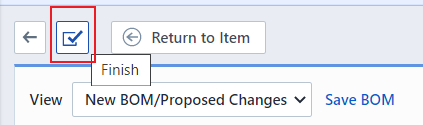
Once all items and fields have been specified, click the Finish toolbar button to add the item(s) to the BOM.
Using Copy and Paste Operations
You can copy and paste BOM items from:
- Existing BOM windows
- Item form
- Database Search form
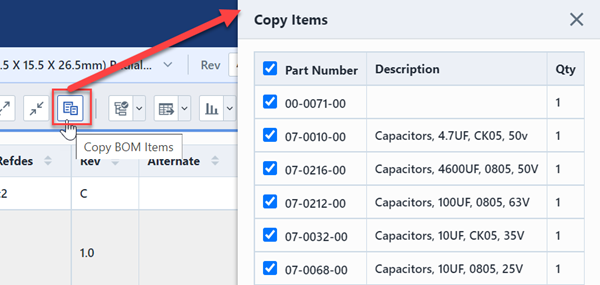
To copy items from an existing BOM, click the Copy toolbar button. This will open the Copy Items panel that will allow you to select the items you wish to copy.
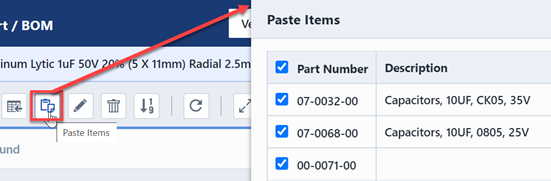
To paste the items to the BOM, return to the target BOM and click the Paste toolbar button. This will open the Paste Items panel that will display the buffer items and allow you to select the items you wish to assign.
Importing BOMs
The Desktop BOM Importer allows you to import files from various file formats:
- OmniBOM
- Text/ASCII
- Excel
- XML
- Etc.
You can import files directly from Engineering (CAD/CAE) tools such as Cadence OrCAD, Mentor ViewDraw, SolidWorks, PTC ProEngineering/ProInterlink, etc.
Importing a BOM File
To import a BOM file, click the Import toolbar button.
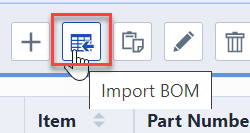
The BOM Import Wizard will appear.
Import Wizard - Source Page
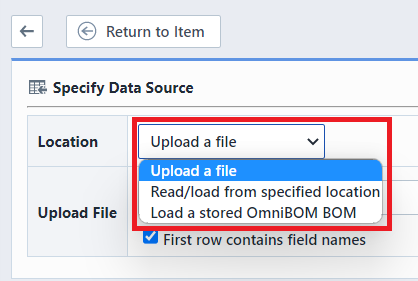
The first page of the BOM Import Wizard allows you to specify the BOM source. You can import from either a file or "Data Set".
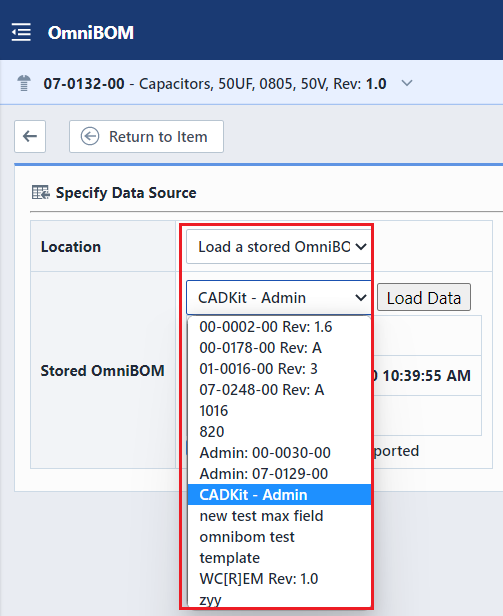
"Data Sets" can be created by OmniBOM, CADKit, and the BOM Import Wizard and eliminate the need to upload files. To import a Data Set, click the Import from a stored data set option.
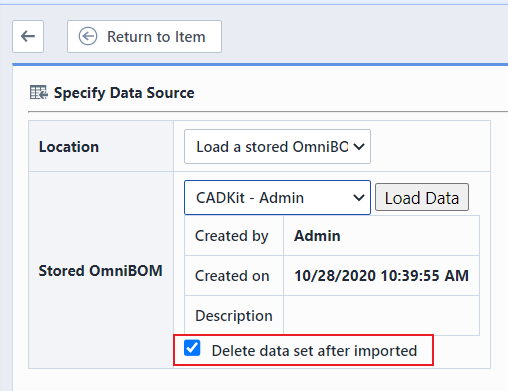
Then select a data set from the drop list.
You can have the system delete the data set automatically once the import is complete by checking the Delete data set after imported.
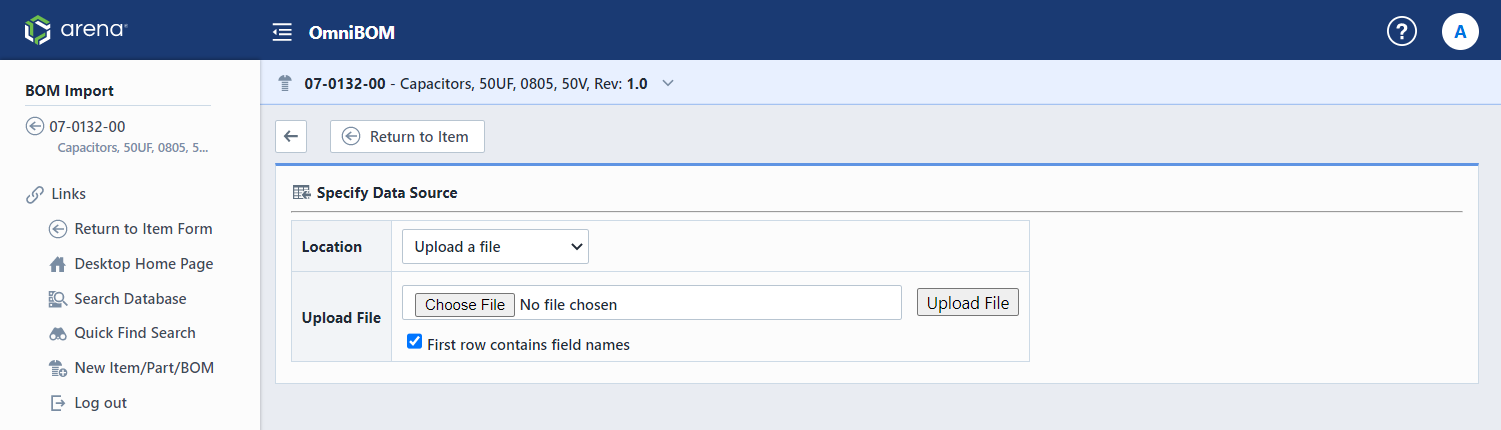
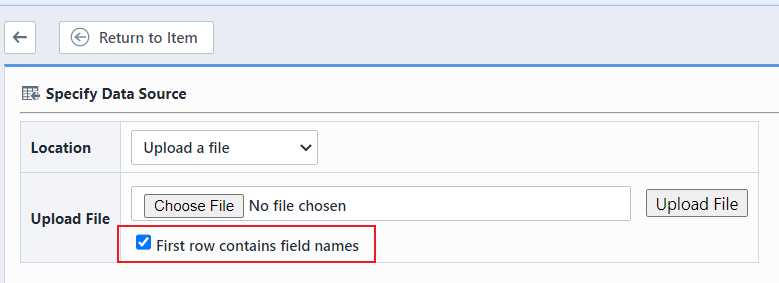
To import from a file, click the Upload a file option.
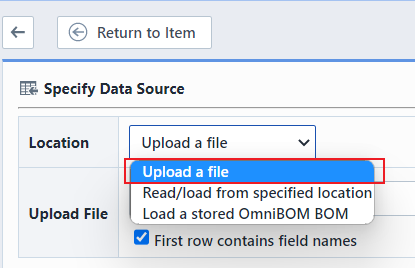
You can then browse for the BOM file to import.

For Excel files, if the BOM contains the field names on the first row check the First row contains field names option.
Once the file has been specified, click the Upload File button to load it to the server.
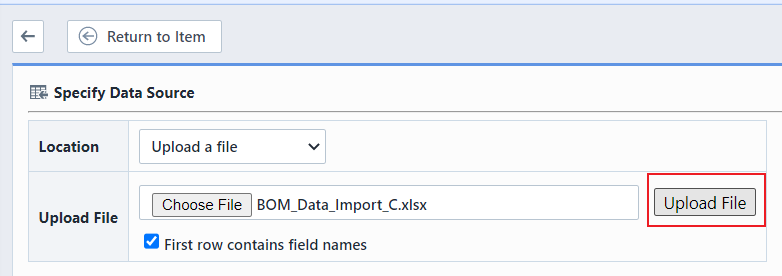
The uploaded file will now be ready to import.
Click the Next button.
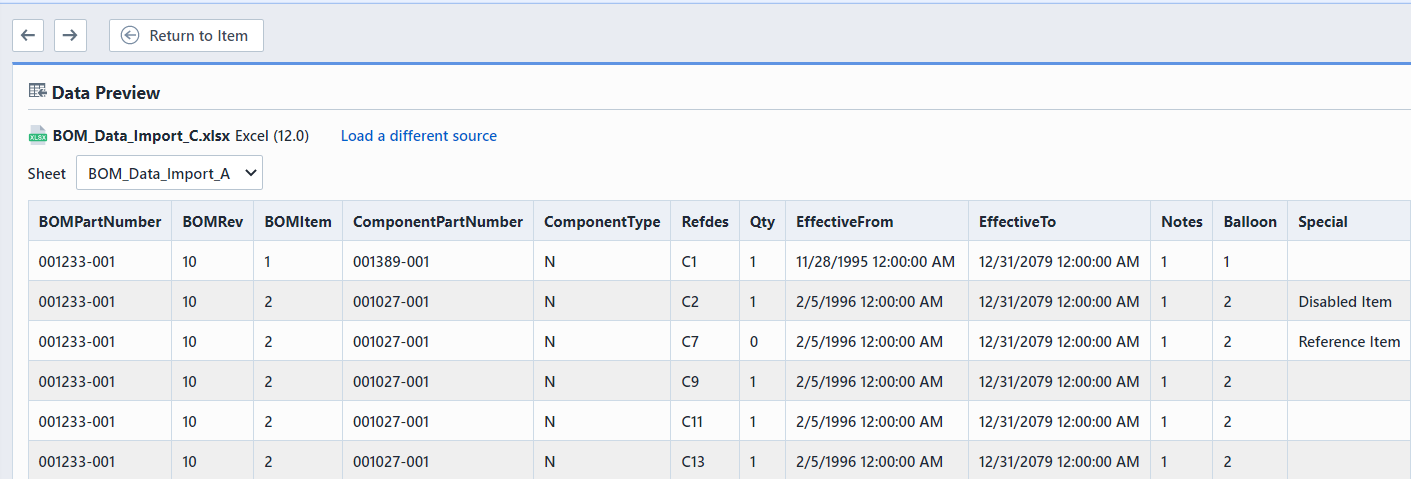
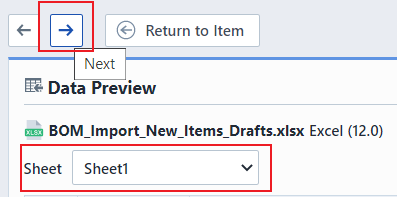
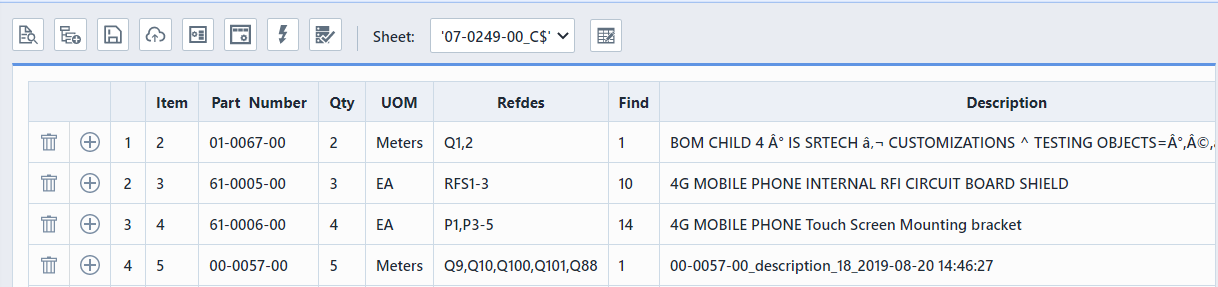
Import Wizard - Source Preview Page
The Source Preview page will display the data to be imported.
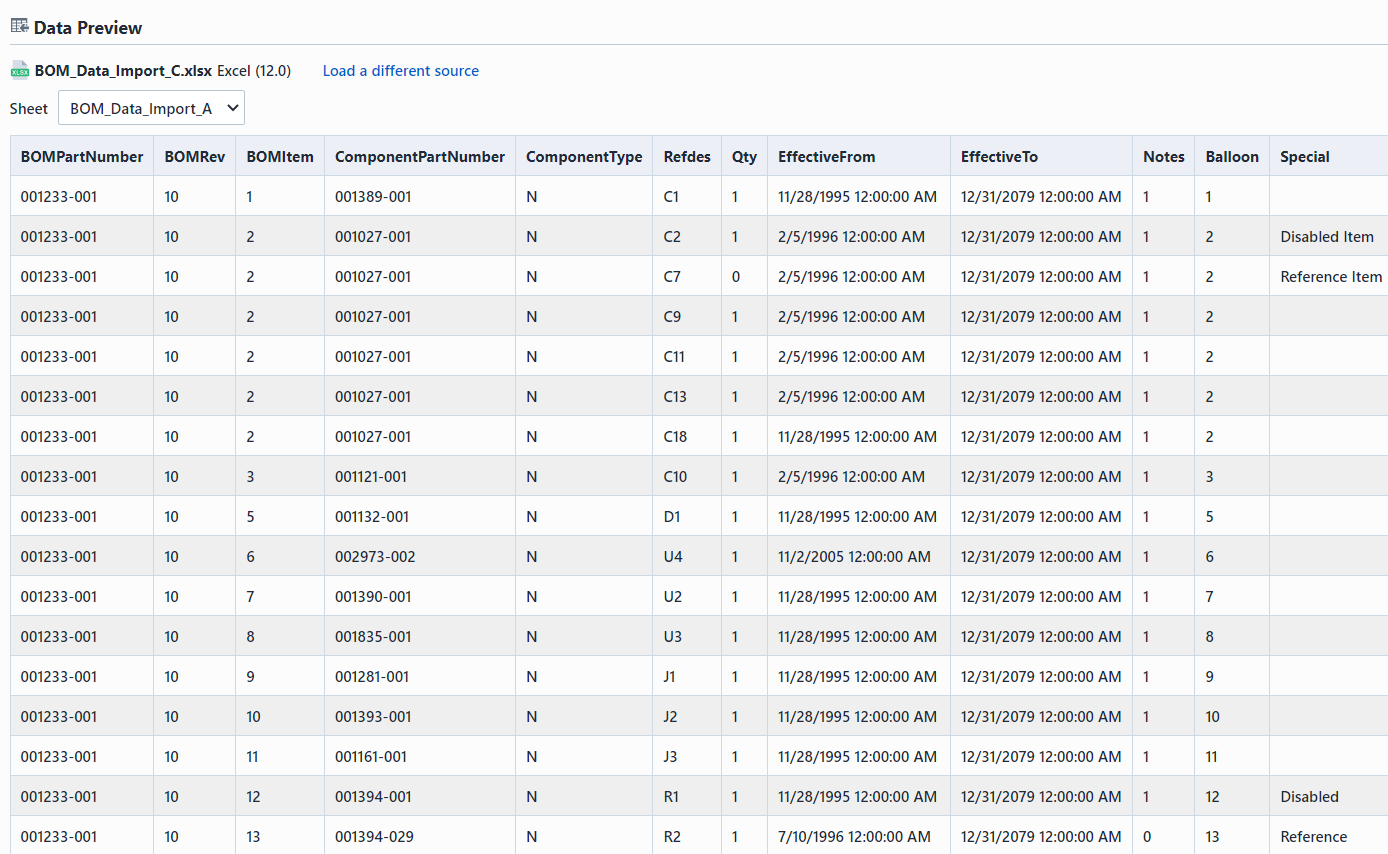
For source files that may contain multiple "sheets" (such as Excel and OmniBOM), the Sheet drop list will list all sheets.
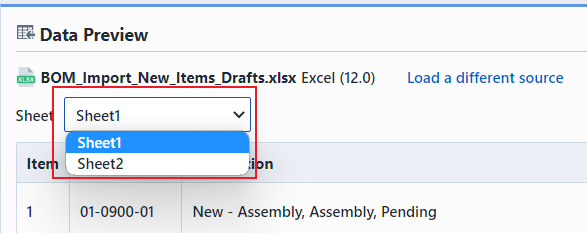
You can select any sheet to import.
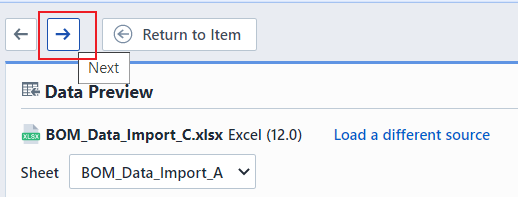
Once the correct sheet is selected, click the Next button.
Import Wizard - Field Mapping and Options Page
The Field Mapping and Options page will display the source fields and import options.
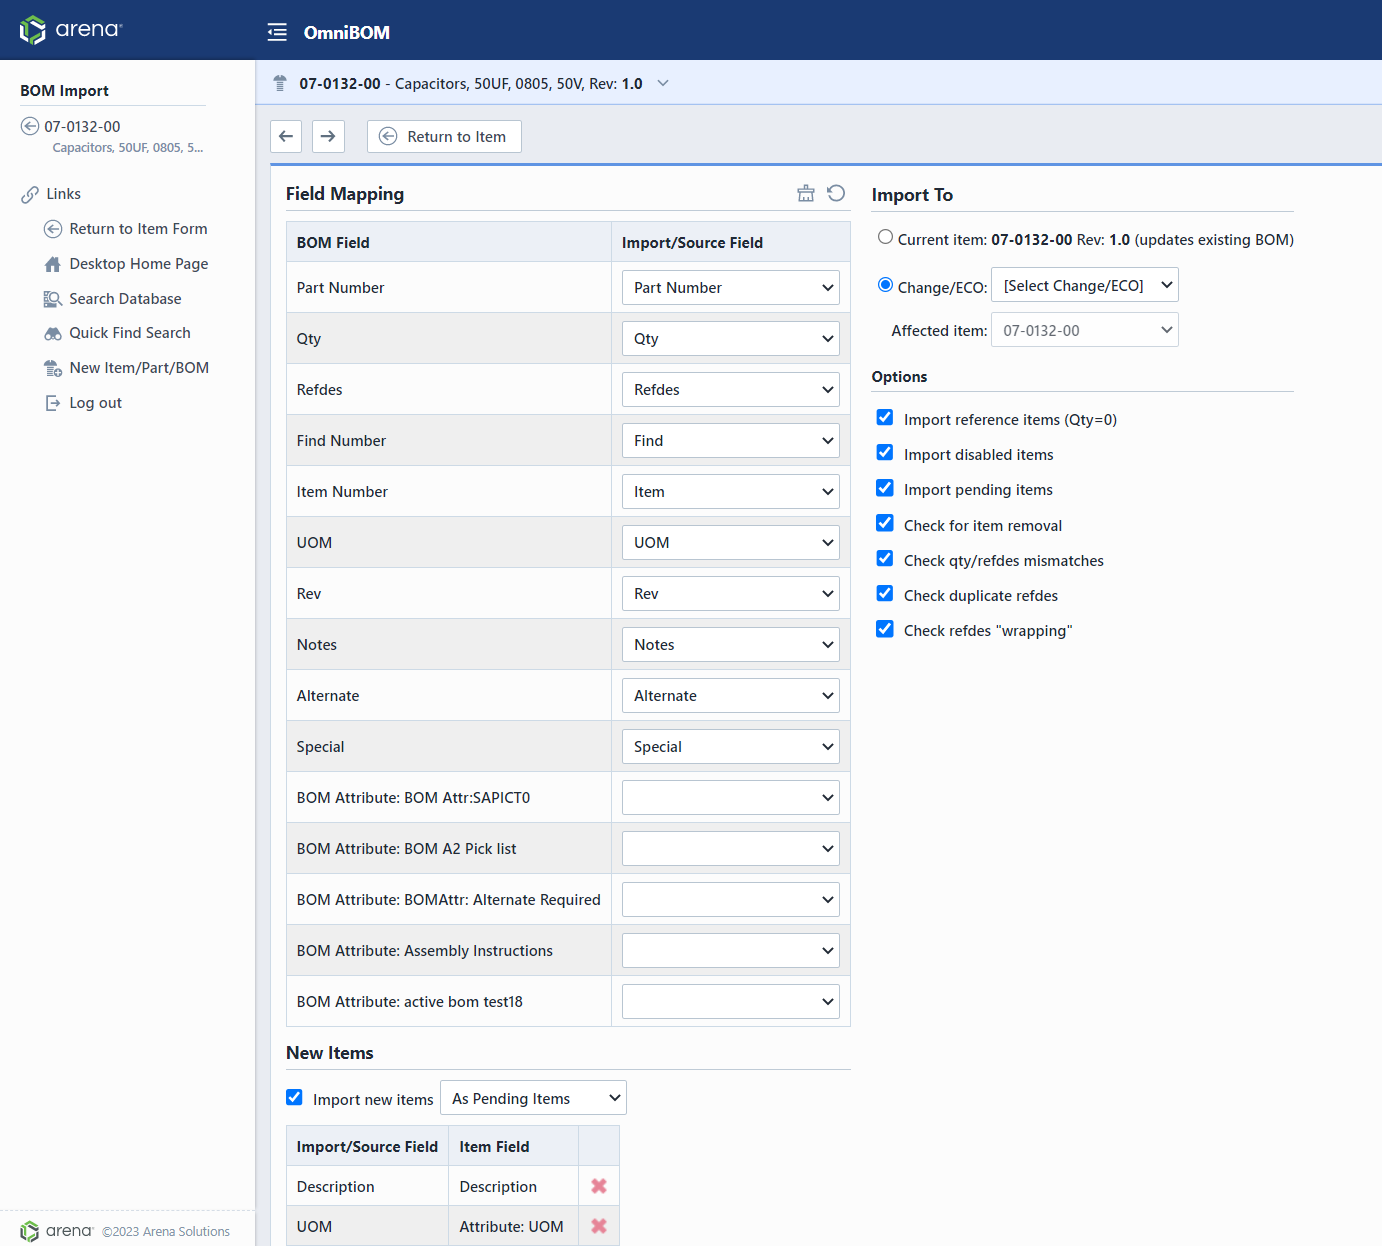
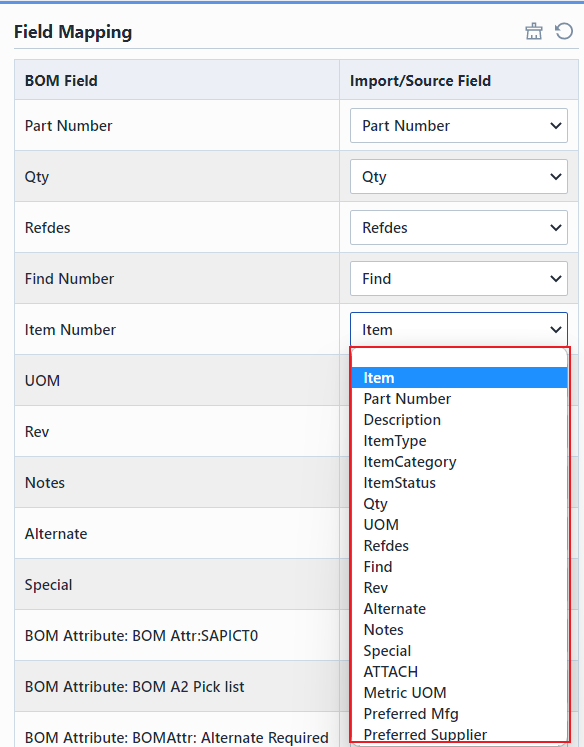
The Field Mapping list will display available BOM fields.
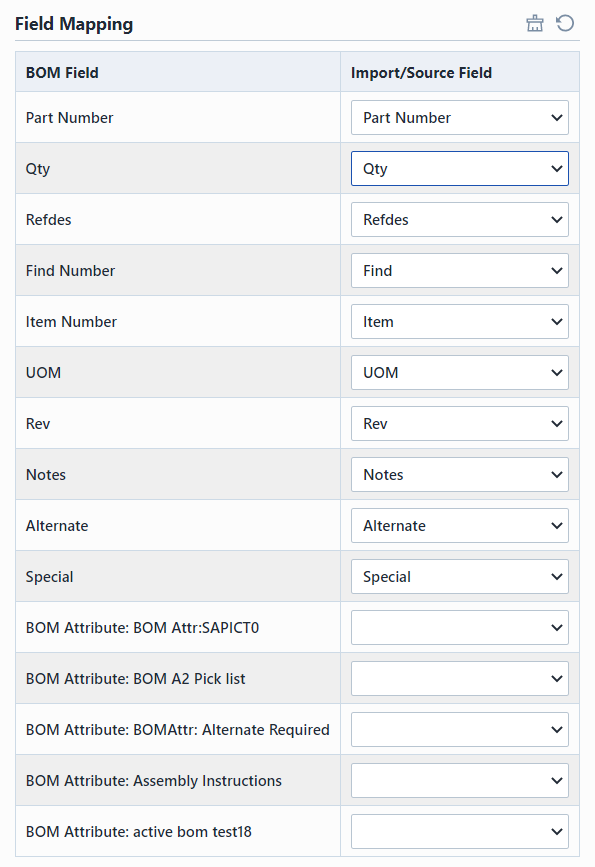
Each field will contain a drop list that will allow you to select from the imported fields.
The BOM Field list will contain the following fields:
| Field | Type | Description |
|---|---|---|
| Part Number | Required | Specifies the child part number column in the BOM file |
| Qty | Optional | Specifies the Quantity column in the BOM file |
| Refdes | Optional | Specifies the Reference Designator column in the BOM file |
| Find Number | Optional | Specifies the Find/Balloon number column in the BOM file |
| Item Number | Optional | Specifies the Item/Sequence Number column in the BOM file |
| UOM | Optional | Specifies the unit of measure column in the BOM file |
| Rev | Optional | Specifies the child revision column in the BOM file |
| Notes | Optional | Specifies the BOM item notes column in the BOM file |
| Alternate | Optional | Specifies the alternate parts column in the BOM file |
| Special | Optional | Indicates Standard, Disabled, or Reference item.(Note: All items will default to Standard items, to indicate a disabled or reference item, use keywords: Disabled or Reference for this field. Any item with a Quantity of 0 will automatically be set to a Reference item.) |
| BOM Attribute | Optional | Specifies a column in the BOM file that maps to one of the enabled user-defined BOM attribute fields |
| Parent Part Number | Optional | Specifies the Parent Part Number column when importing Hierarchical BOMs.(Note: if this field is mapped, the system will use the Hierarchical BOMs import process.) |
| New Item: Description | Optional | For new items (part numbers not specified or found in the database) this field will map to the new item's Description field. |
| New Item: Type | Optional | For new items (part numbers not specified or found in the database) this field will map to the new item's Type field. |
| New Item: Category | Optional | For new items (part numbers not specified or found in the database) this field will map to the new item's Category field. |
| New Item: Attribute | Optional | For new items (part numbers not specified or found in the database) this field will map to the new item's Attribute (specified) field. |
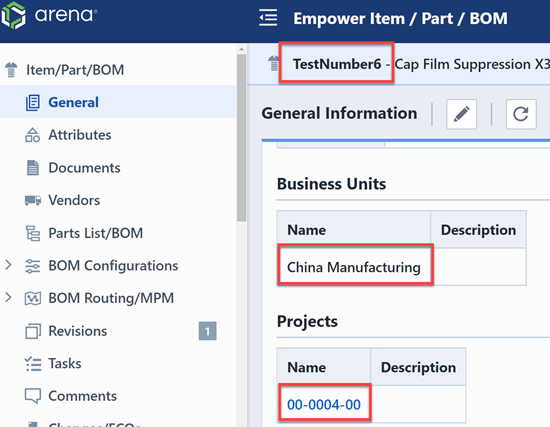
Projects and Business Units are now available as Item fields when importing new Items through the BOM Import Wizard.
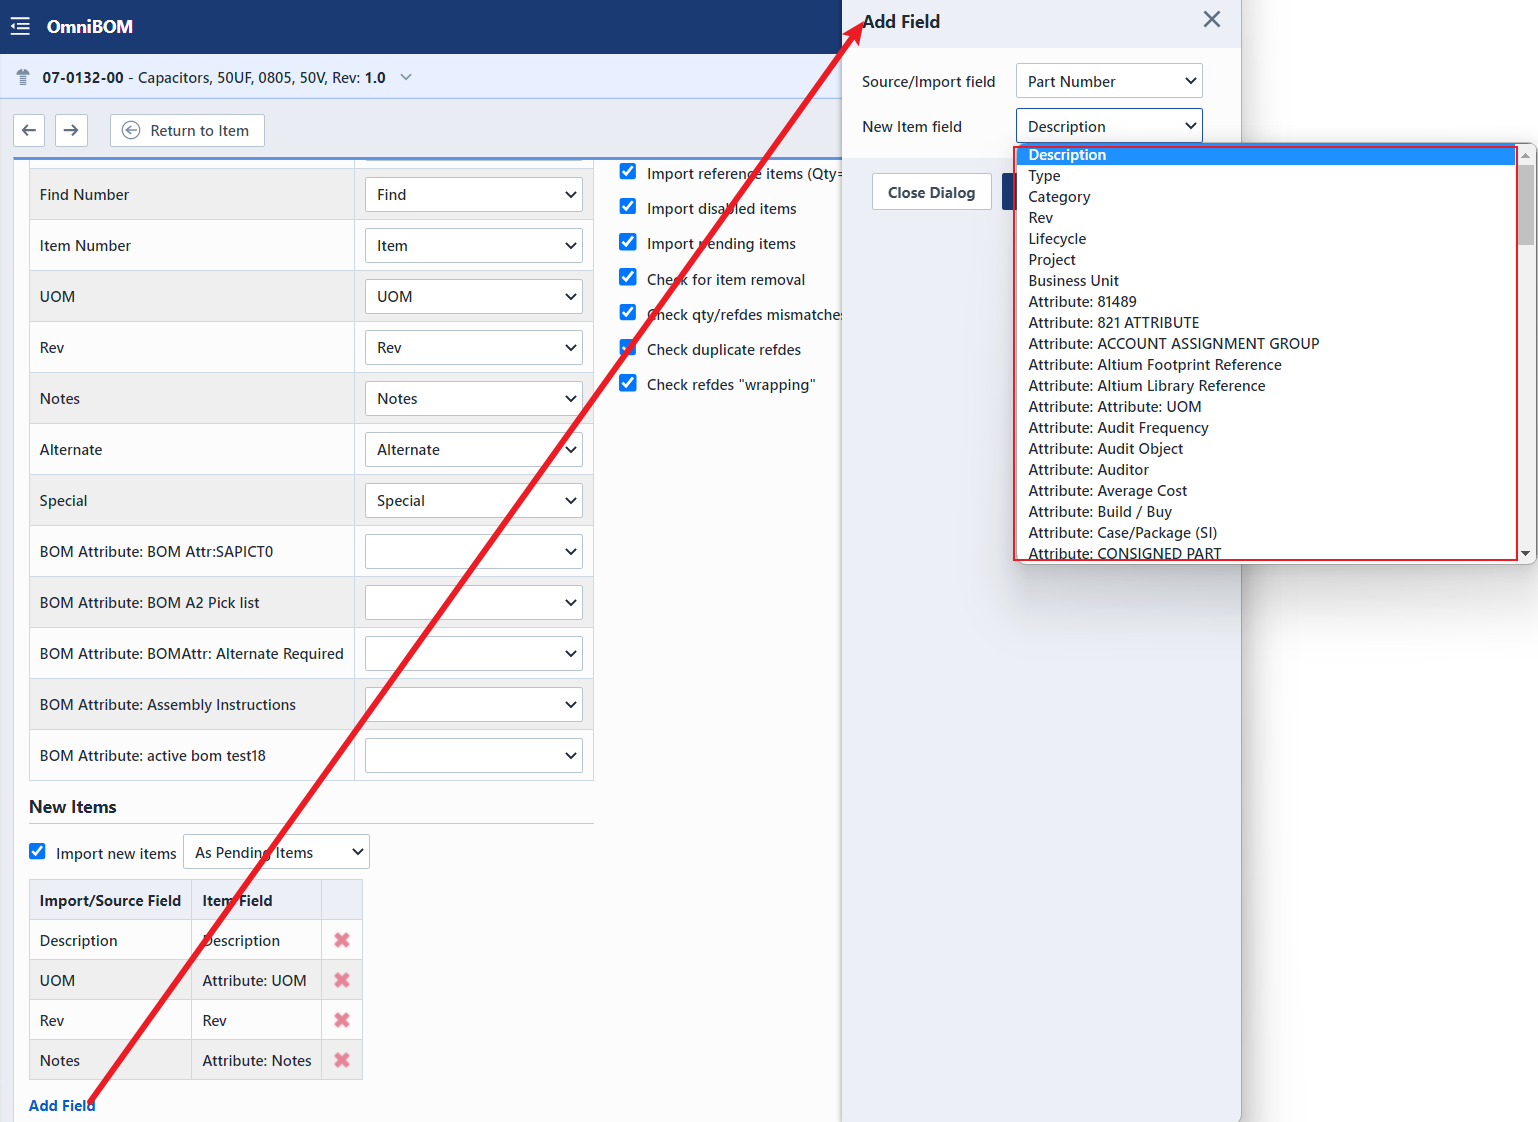
If Projects and Business Units are added as fields from the New Item field drop down list, BOM Import will include Project and Business Units as attributes from Items within an import file if the new incoming Item contains values for Project and Business Units.
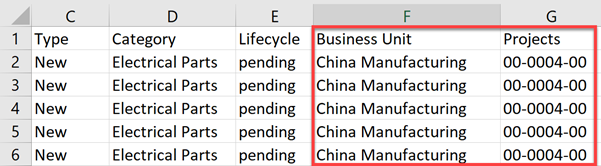
When the import is complete, the new Item created through the import will have the values for Projects and Business Units specified in the import file.
Users can import more than one Business Unit or Project for a line in an import file by including multiple values and separating them with a semi-colon.
Additionally, please note that invalid Business Units and Projects cannot be imported.
Import Wizard - Import Options
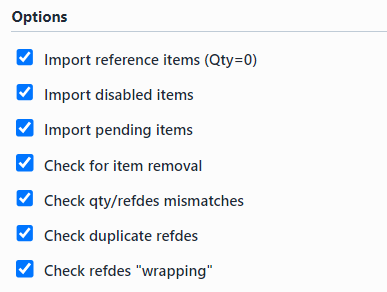
When importing a BOM, you will have the following options:
| Option | Description |
|---|---|
| Import reference items (Qty=0) | Import or ignore (uncheck) Reference (Qty = 0) items |
| Import disabled items | Import or ignore (uncheck) disabled items |
| Import pending items | Import or ignore (uncheck) items that are not released |
| Check for item removal | If this option is checked, the system will remove items from the existing BOM structure that are not found in the import source |
| Check qty/refdes mismatches | Checks for quantity and reference designator count mismatches |
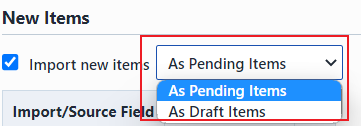
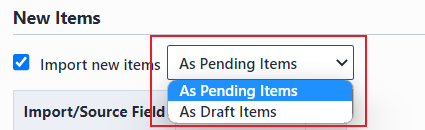
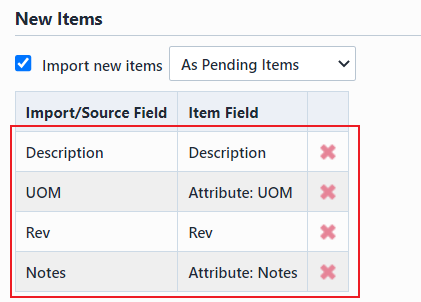
| Import new items | Import or ignore (uncheck) BOM import items that do not exist in the database |
| Import new items as draft | When importing new items check this option for the items to be assigned a "Draft" status |
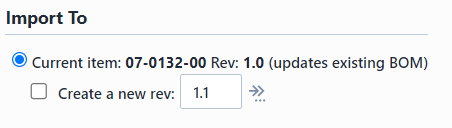
When importing from the Item form (as opposed to the Change/ECO form), you will be able to define where the changes are to be applied.
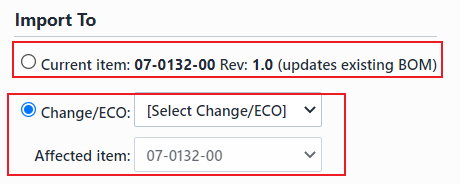
To import to the current item, select the Current item (updates existing BOM) option. You will be able to select whether to import to the current rev or create a new rev.
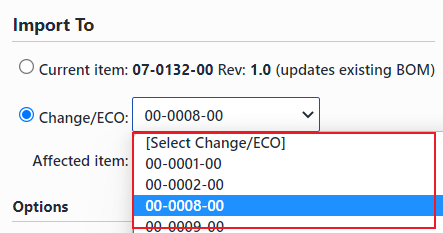
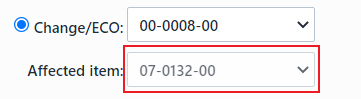
To import the BOM (and changes) to a Change/ECO form, select the Change/ECO: option and then select the target Change/ECO number and affected item.
Importing New Items
When importing a BOM file, you will have the option to import items that do not already exist in the Empower database.
If this option is enabled, the BOM import will create parts for part numbers specified in the import file that do not already exist in the system. The BOM import will also create items and assign part numbers for items that are left blank in the import file.
You can identify import columns that can be mapped to item data fields to be applied to new items that are created by the import process.
Once all fields and options have been assigned, click the Next button.
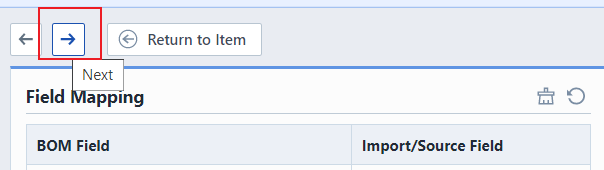
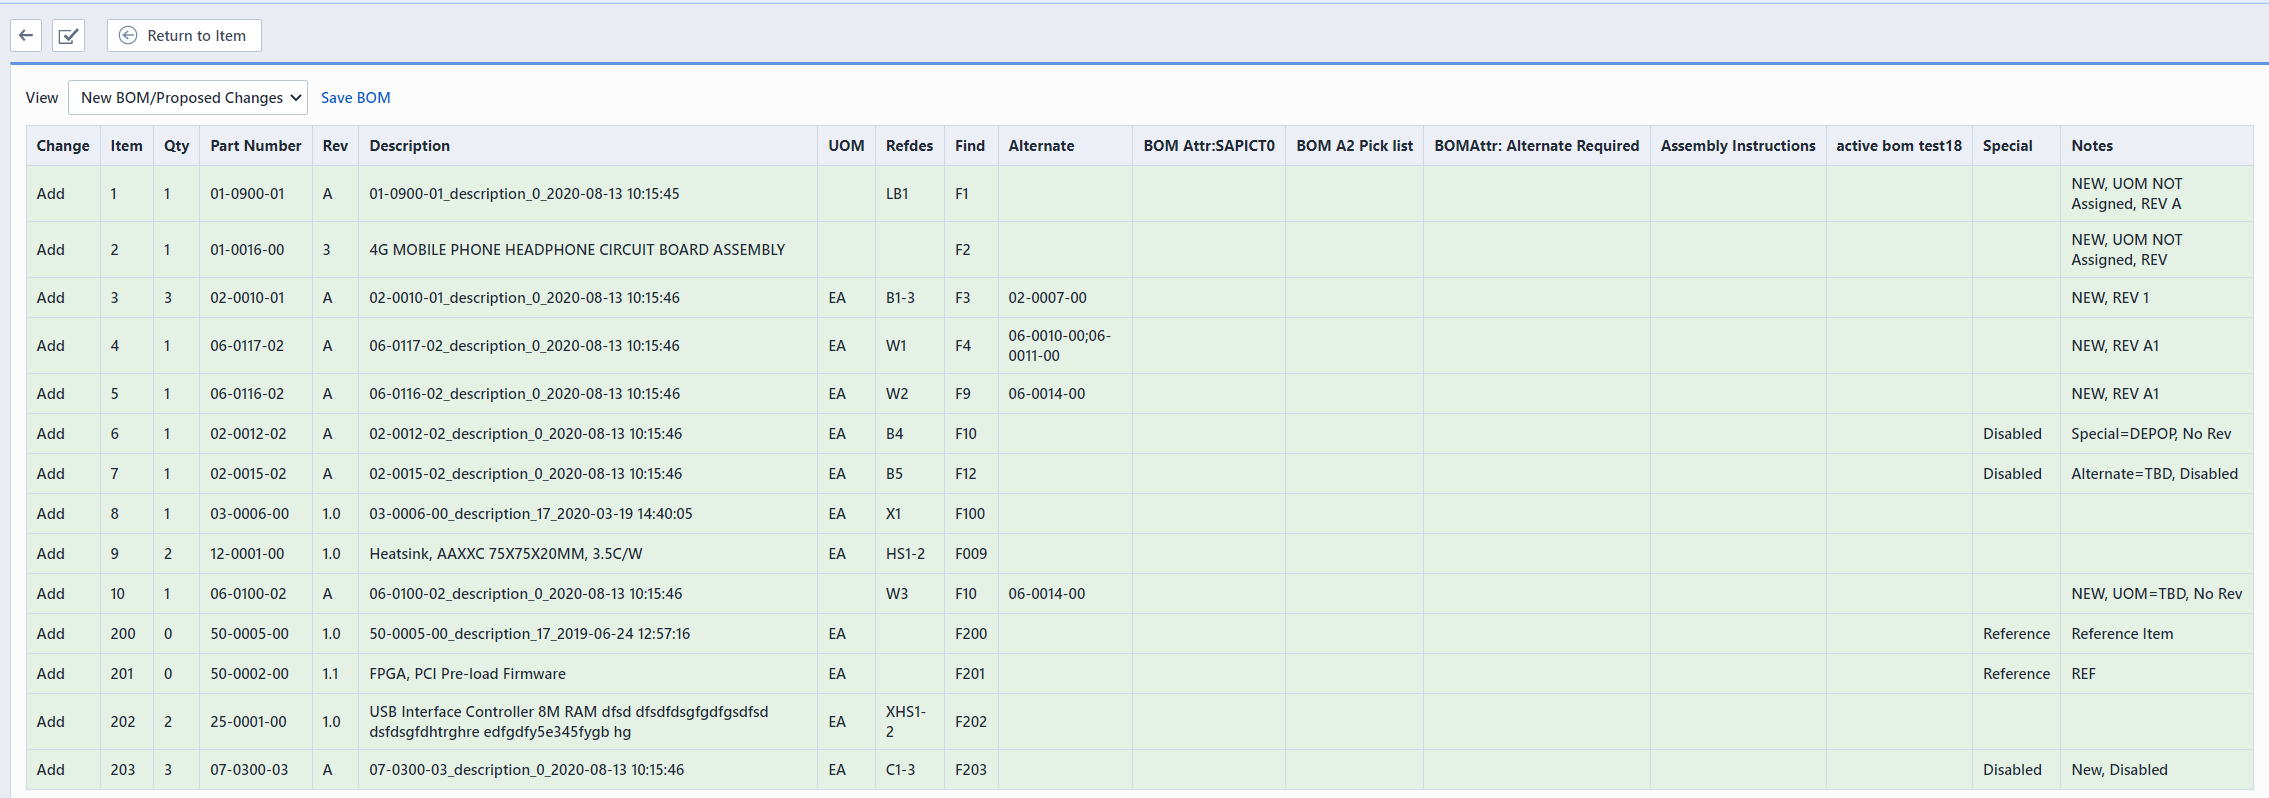
Import Wizard - BOM Changes Page
The last page of the BOM Import Wizard will display all of the changes found between the import BOM source and the current BOM structure.
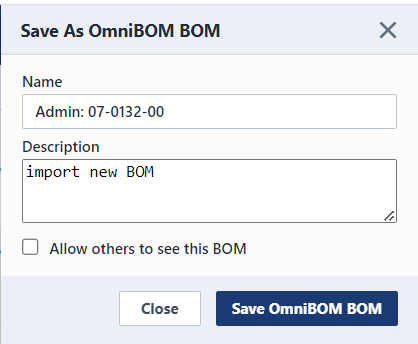
The final page will allow you to save the imported BOM data to a data set. To save the data to a data set, click the Save button.
This will present the Save As OmniBOM BOM dialog box where you can specify a data set name. Click the Save button to save the BOM.
To import the BOM and/or Changes to the item or selected Change/ECO, click the Finish button.
If the Import to Change/ECO option is specified, the parent items will be added as affected items and the BOM changes will automatically appear in the Redlines view for the BOM.
Editing Items
Note: Please note that adding, removing and importing is only for unreleased BOMs. All changes aside from a gold user must be performed for released items on a change order.
You can interactively modify BOM items by clicking the Edit icon on the toolbar. This will display the Edit BOM Items panel.
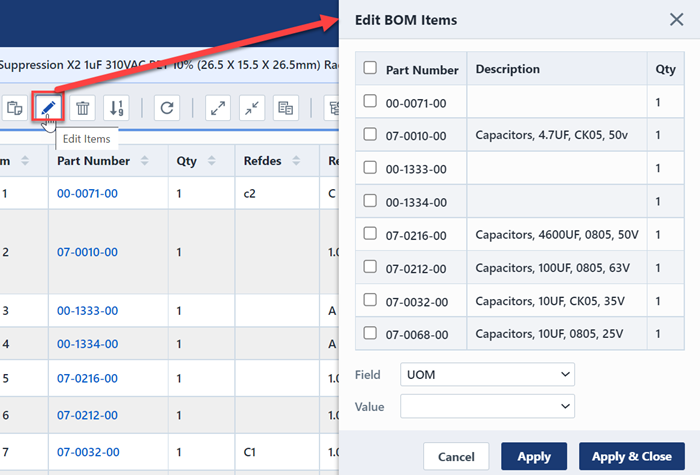
The Edit BOM Items dialog box allows you to assign properties to items that you selected.
After selecting desired Field and Value from the drop lists, click the Apply button.
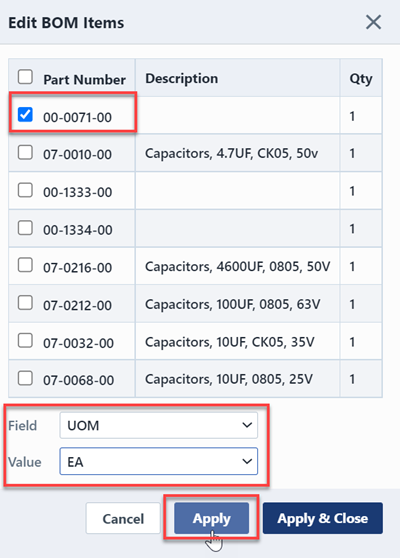
Feild changes will appear in the BOM form.

Replacing Items
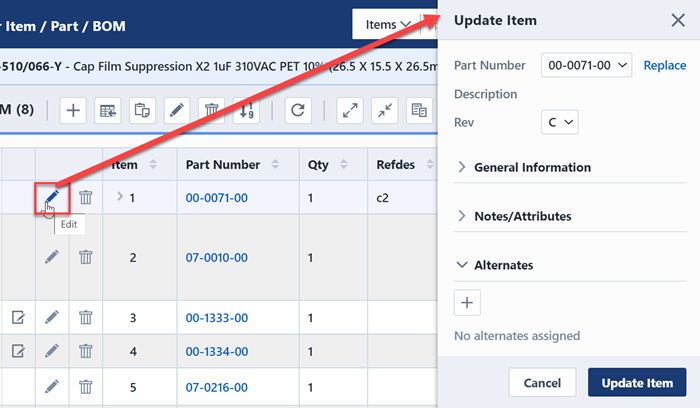
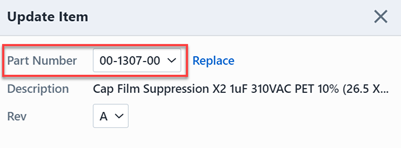
To replace a BOM item, click the Edit icon in the Actions column. This will display the Update Item panel.
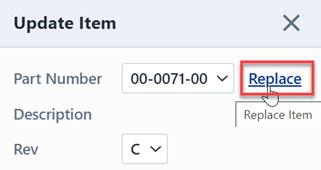
To replace the item, click the Replace button.
This will invoke the Select Replacement Item panel. You can search to find the replacement part.
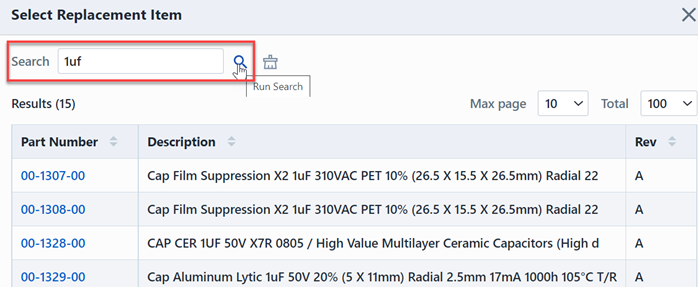
Select the hyperlink of the desired replacement item to replace it.

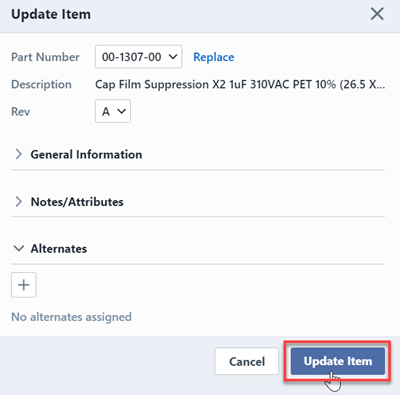
You will then be returned to the Update Item panel, and the replacement part will be selected.
To replace the item on the BOM click the Update Item button.
The replaced item will appear in the BOM form.

Item Numbers
You can reset the item numbers for all BOM items, by clicking the Renumber Items toolbar button. This will present the Renumber Items panel.
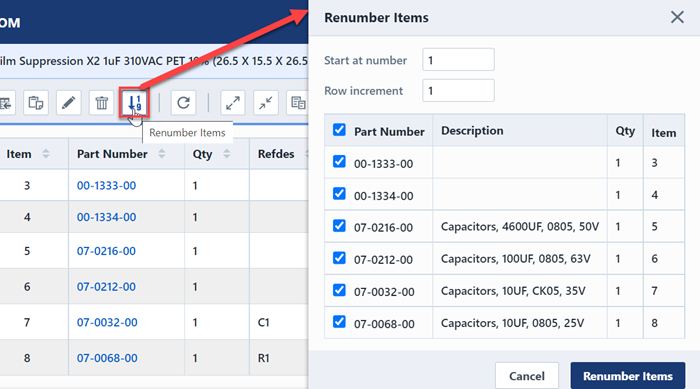
From the Renumber Items dialog box, you can specify a starting number and then click the Renumber Items button.
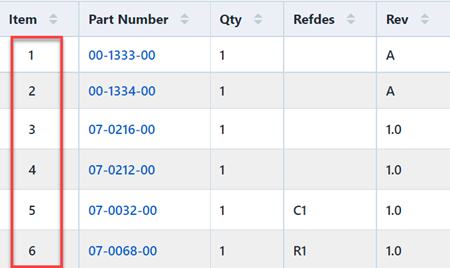
The reordered BOM items will appear in the form.
Removing Items
To remove a BOM item, click the Remove Item toolbar button. This will display the Delete BOM Item panel.
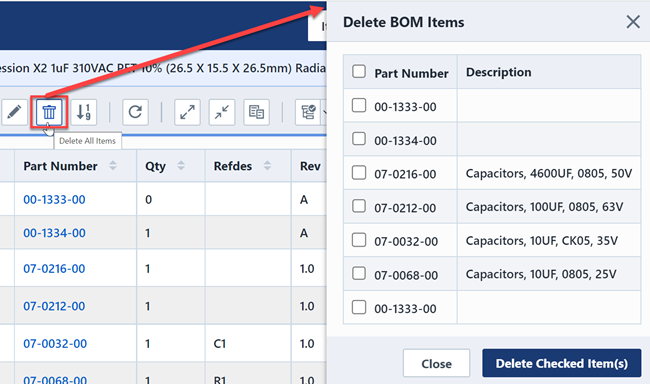
From the Delete BOM Item panel, you will be able to select the BOMs you wish to remove.
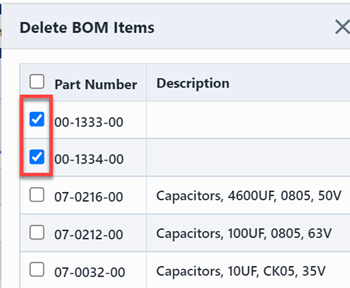
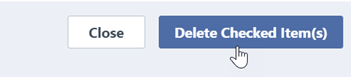
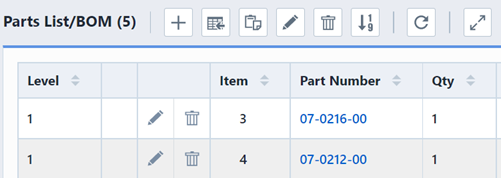
Click the Delete Checked Items button and those selected items will disappear.
Disabled Items
For BOM items that you wish to list in the BOM but may not get assembled in the production build, such as test connectors, etc. we can use the Disabled Items BOM feature of Empower.
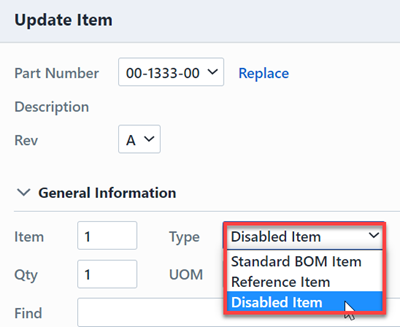
To create a disabled item, click the Edit button, this will display the Update Item panel.
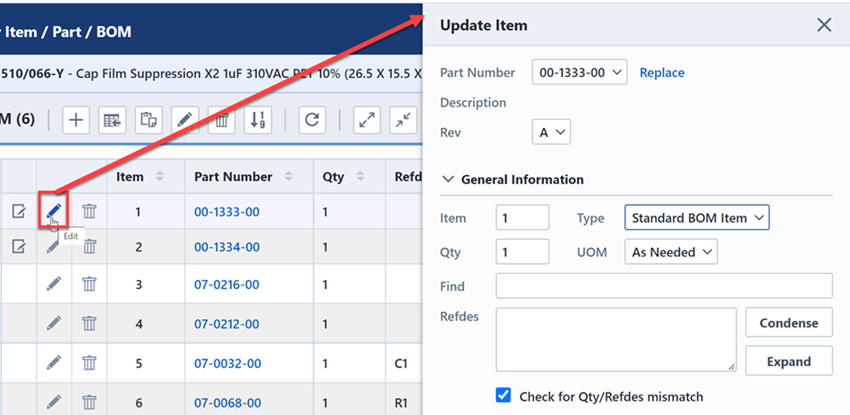
Select Disabled Item from the Type drop list.
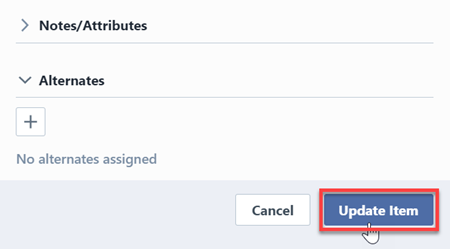
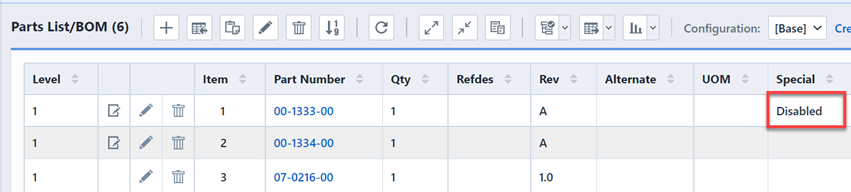
Then click the Update Item in the bottom of panel, the item will change to disabled item.
Reference Items
Reference items refer to those items that will work with ECO affected item roll-up on where-used but are not part of a production build (Reference documents/Programmed firmware, etc.) , and users can set these to Reference items.
To create a reference item, click the Edit button, this will display the Update Item panel.
Select Reference Item from the Type drop list.
Then click the Update Item in the bottom of panel, the item will change to reference item.
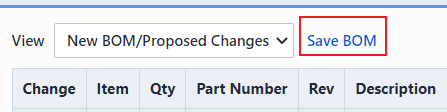
Exporting BOMs
You can export BOMs by clicking the Export toolbar button, this will display a drop list allows you to select.
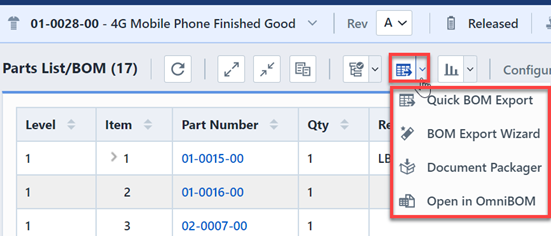
Quick BOM Export
Quick BOM Export is only used for exporting the standard BOM information displayed on the BOM List. To export BOM with extended fields, you may use the BOM export wizard.
To export current BOM, you can select Quick BOM Export option to save data, this will display a Quick Export panel.
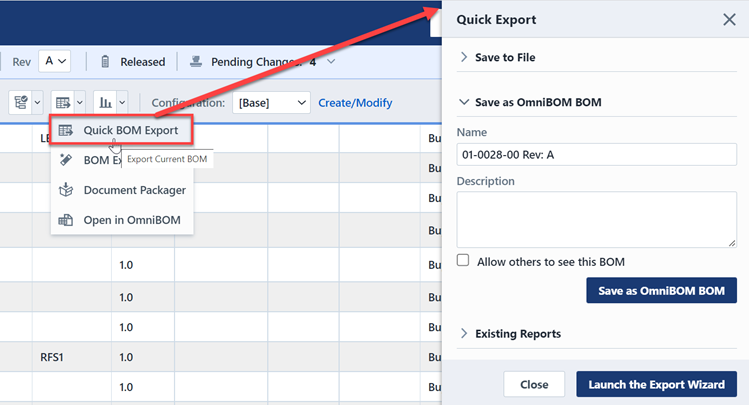
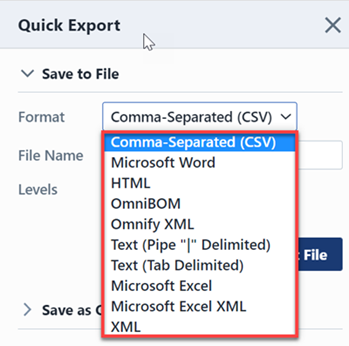
In the Save to File section you can select the file format from the available Formats list.
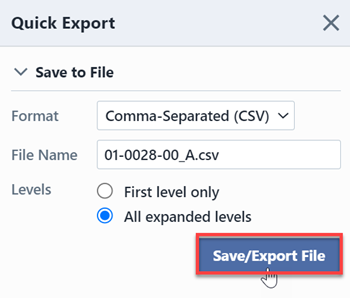
After filling in the File Name and selecting desired level, click the Save/Export File button.
A download tooltip will appear, you can click the hyperlink to save the file.
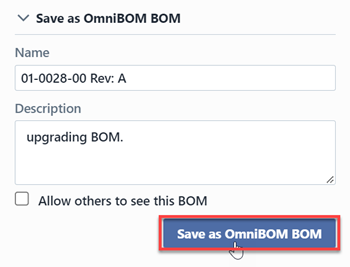
To select save as a OmniBOM, input File Name and Description, then click the Save as OmniBOM BOM button.
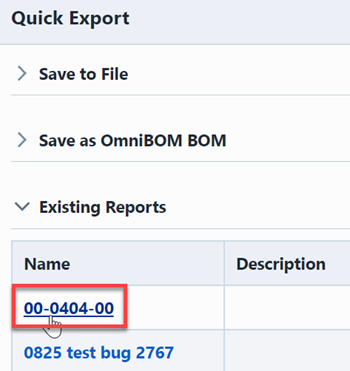
In Existing Reports section, click the desired report hyperlink, then a download tooltip will appear.
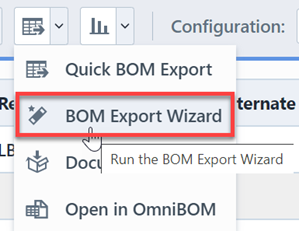
BOM Export Wizard
In BOM Export Wizard, you can export BOMs with any fields you wish to display in the list.
To run the Export BOM Wizard, select the Export BOM Wizard option, this will display the corresponding page.
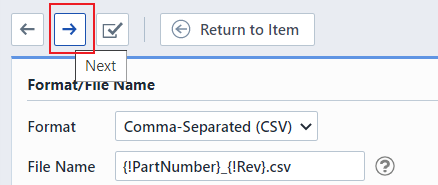
After selecting the Formats and filling the File Name, click the Next toolbar button.
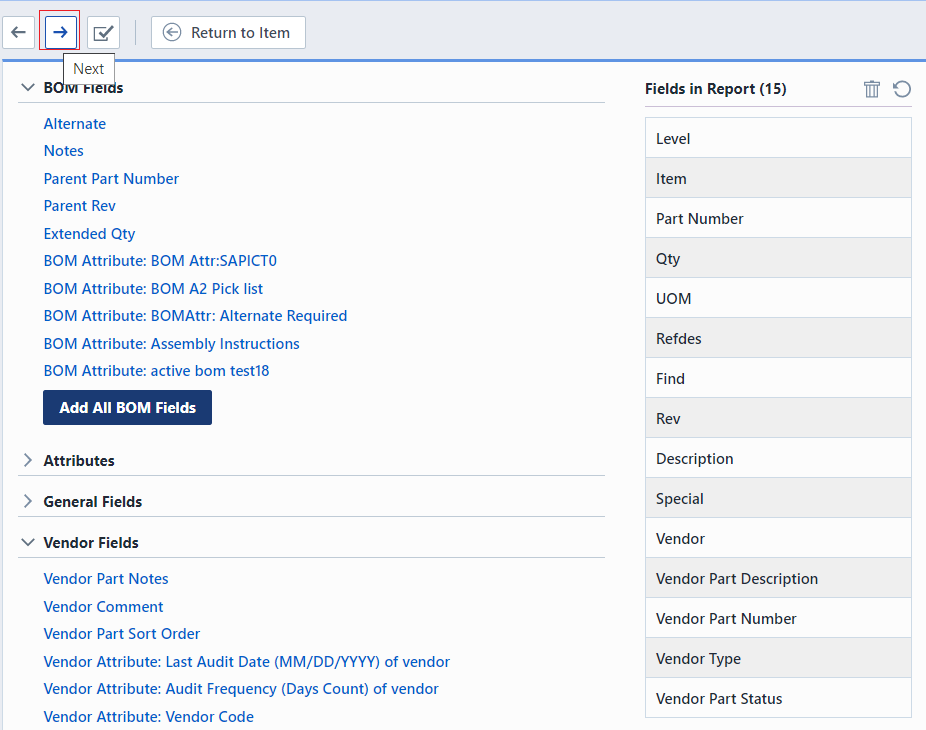
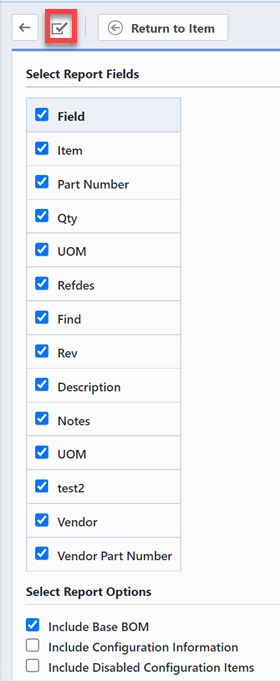
This will display the current Fields in report, you can add desired fields, attributes, general fields and vendor fields.
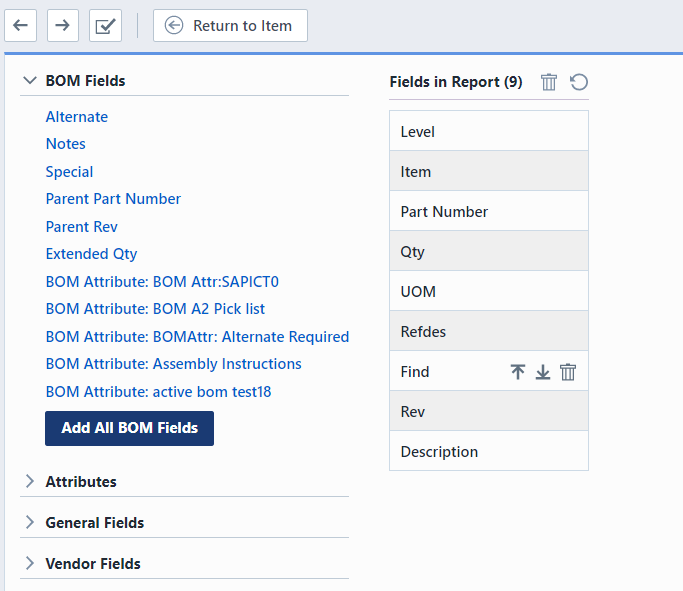
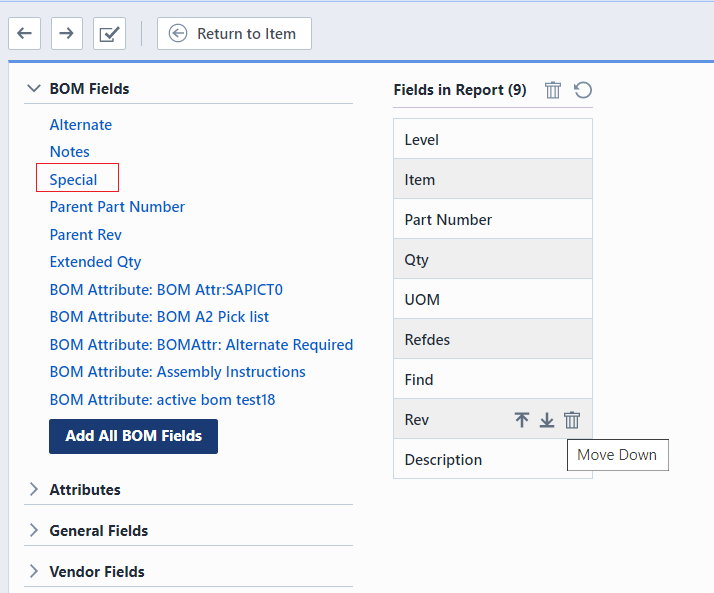
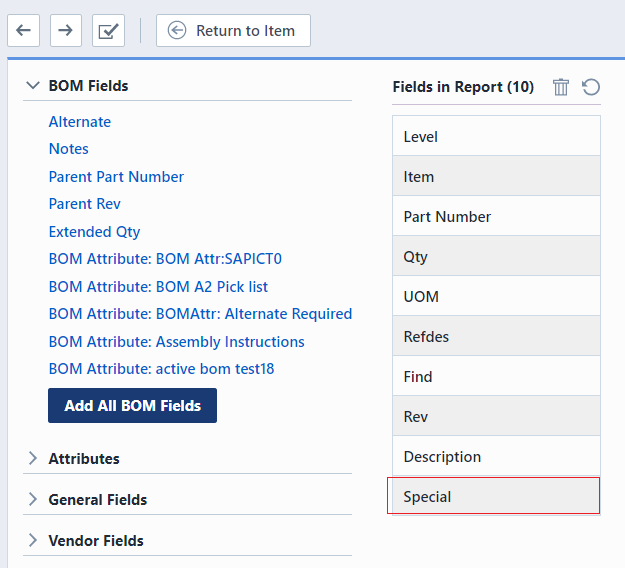
For selected fields, you can adjust their sequence by clicking the Move UP/Move Down button.
Also, you can delete the fields by clicking the Remove button.
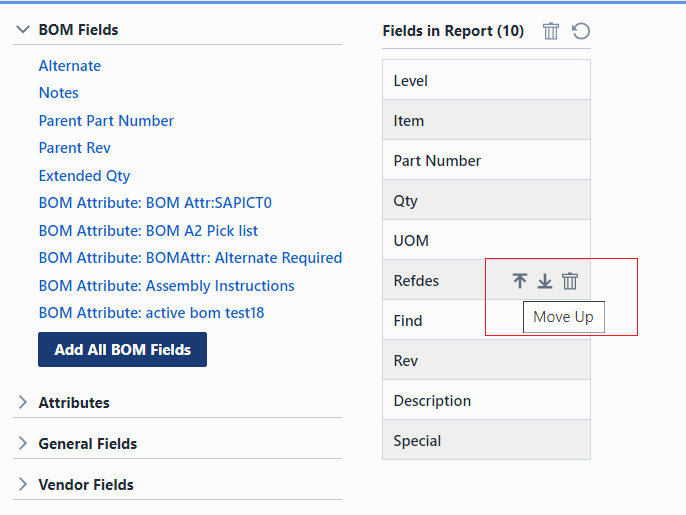
Sepcify the BOM fields you need, click the Next toolbar button.
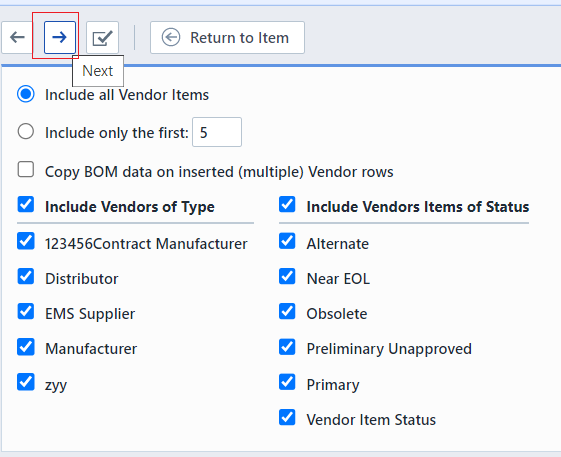
Select desired Vendor/Vendor Items setting, then click the Next toolbar button.
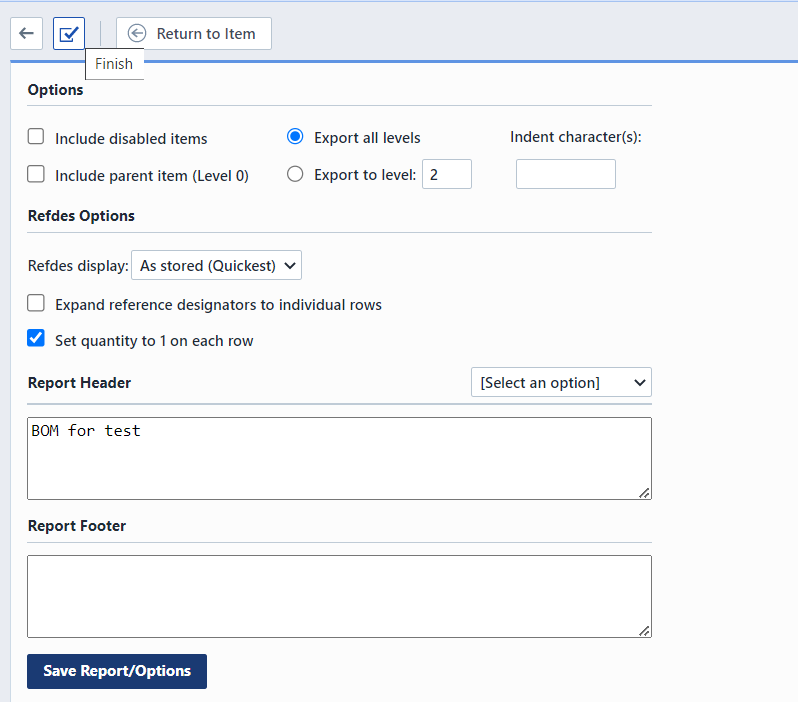
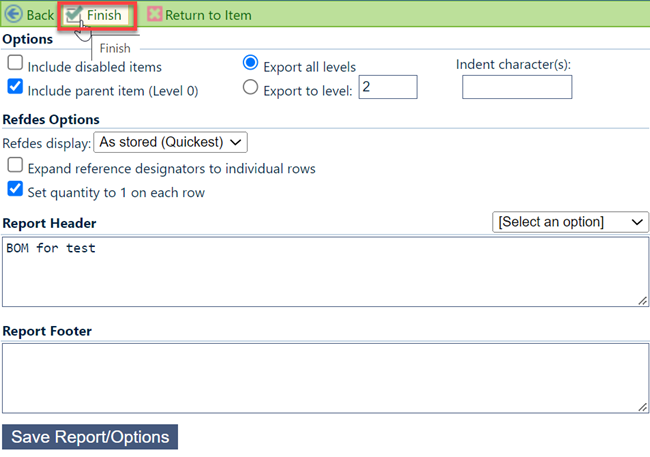
Set options as you need, and input a report header/footer, then click the Finish toolbar button.
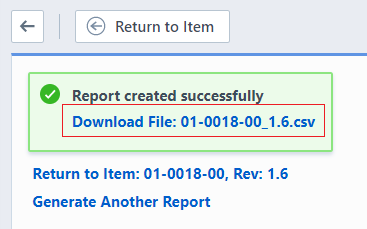
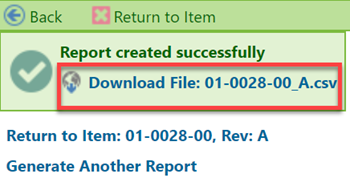
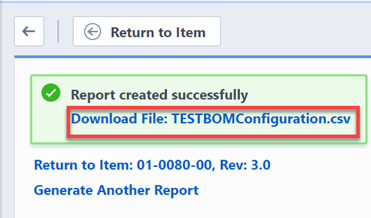
Then a dialog box will indicate that Report created successfully, click the hyperlink and download the file.
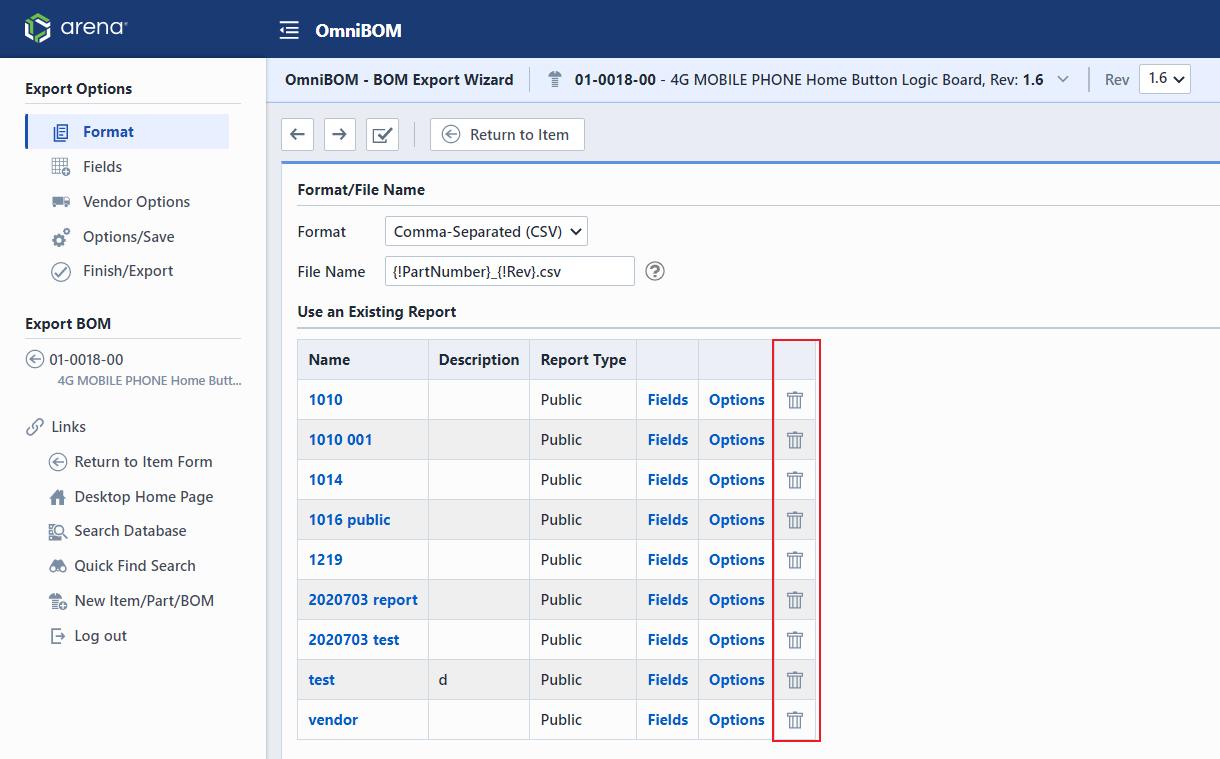
Only an Administrator or the original report creator can delete a custom public report or a public report in the BOM Export Wizard. A user who is neither the original report creator or an Administrator can not see the delete icon symbolized by a red X. Administrators and the original report creator can see the delete icon which allows them to delete that specific report.
Document Packager
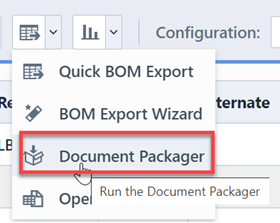
To package the documents, select the Document Packager option.

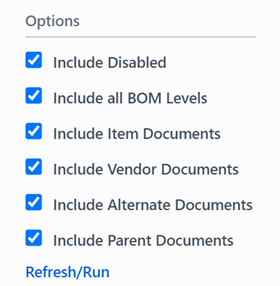
The Options panel allows you to choose different documents as you need.
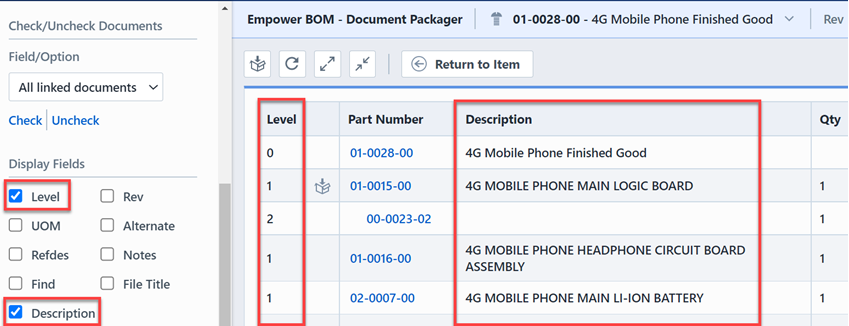
The Display Fields panel allows you to select fields you desired.
To export the document packager, click the Export toolbar button, this will display a Create/Export Package panel.
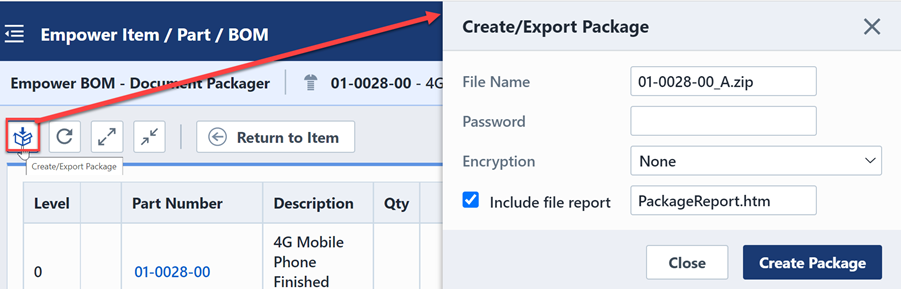
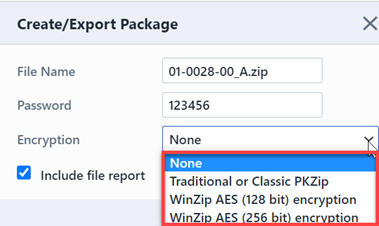
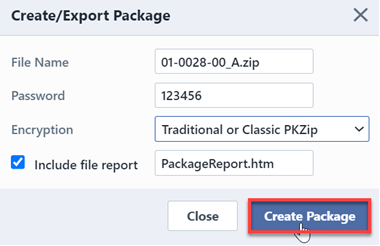
You can set a password and encryption for the package from the drop list.
Then click the Create Package button in the bottom of the panel.
Open in OmniBOM
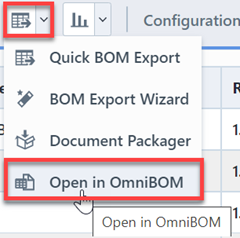
To review the BOM in OmniBOM, select the Open in OmniBOM option.
This will display a OmniBOM form page.
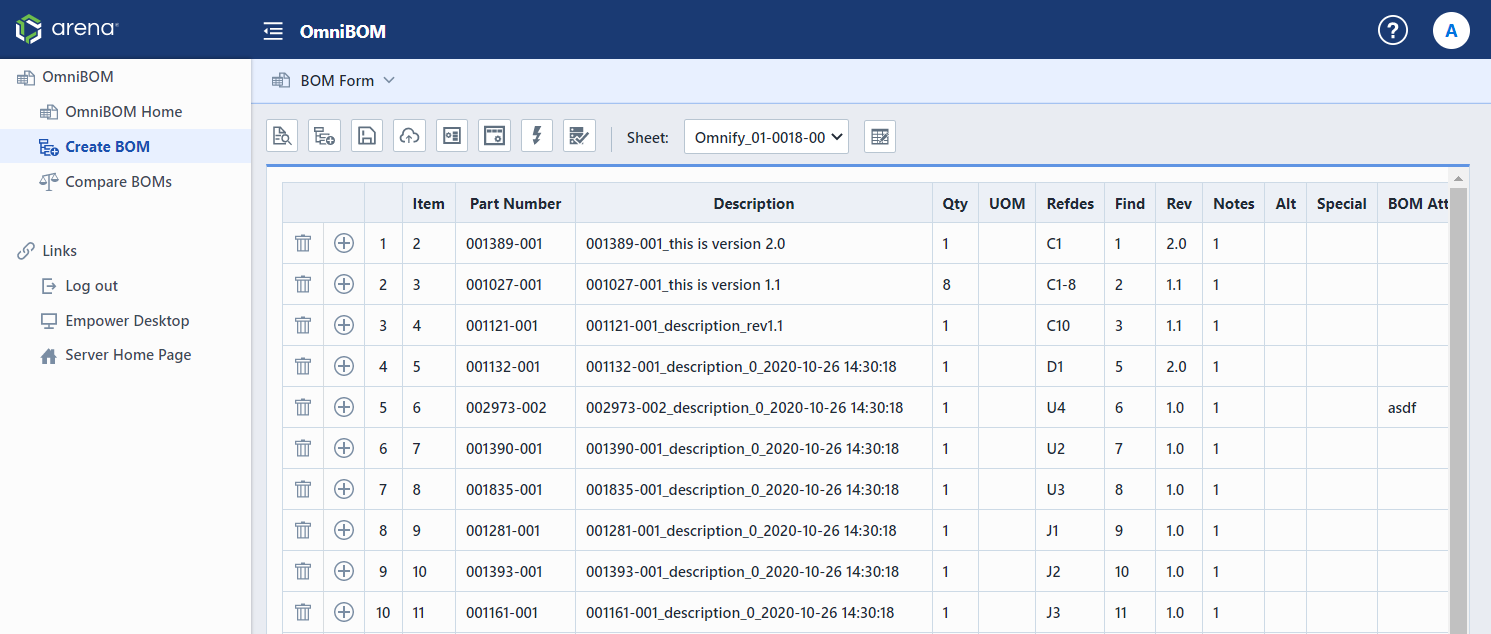
You can add or delete rows by clicking the Insert/Remove button.
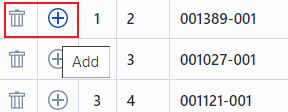
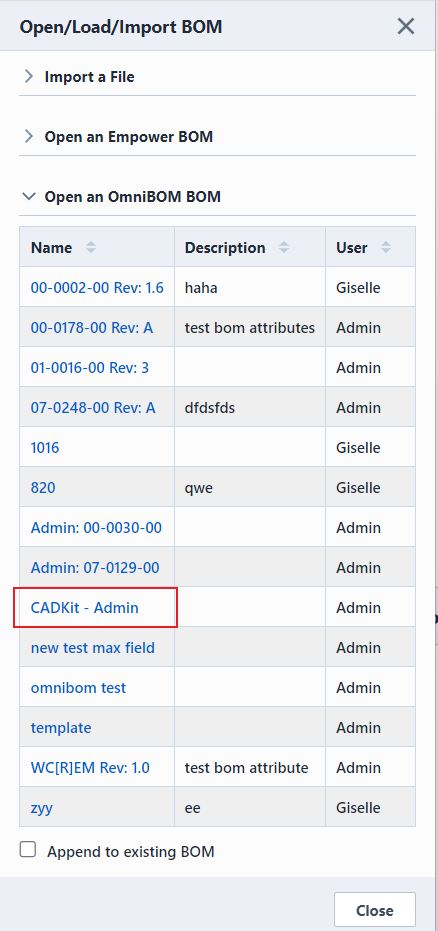
You can open or import BOMs by clicking the Open toobar button, this will display a Open/Load/Import BOM dialog box.
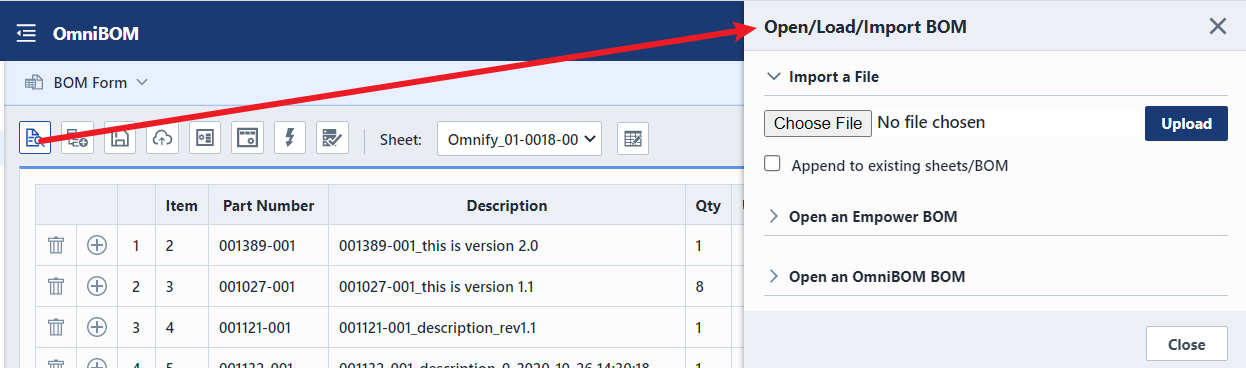
For Importing a File, click the Choose File button, and select a local file, then click the Upload button.
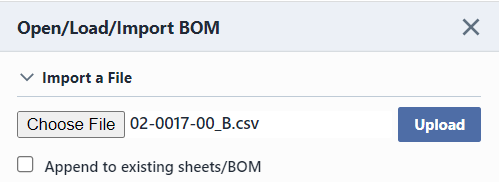
This will display the uploading BOM form.
For Opening an Empower BOM, select the part number, and click the hyperlink, an Empower BOM form will appear.
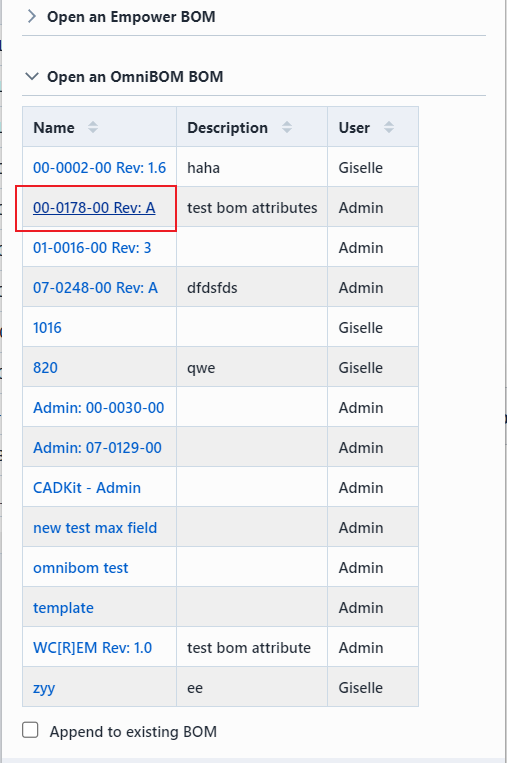

For opening an OmniBOM BOM, select the form you need, and click the hyperlink, an OmniBOM BOM form will appear.
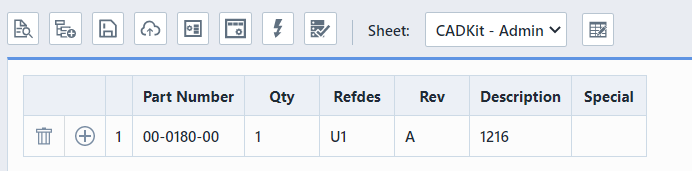
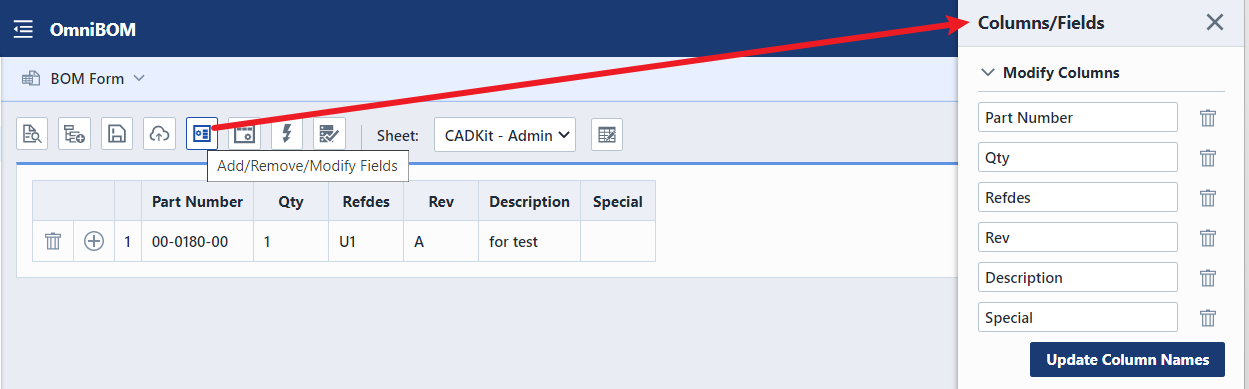
The OmniBOM BOM form allows you to edit the field.

You can edit the fields in the BOM by clicking the Fields toolbar button, this will display the Columns/Fields panel.
Data Checks
BOM Checks helps you to review the BOMs,for instance, review its Qty, Refdes and Lifecycle etc.
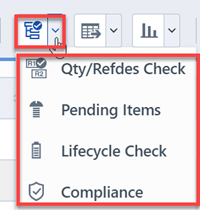
Qty/Refdes Check
To check BOM Items Qty and Refdes, select the Qty/Refdes Check option, and this will launch the Checking page.
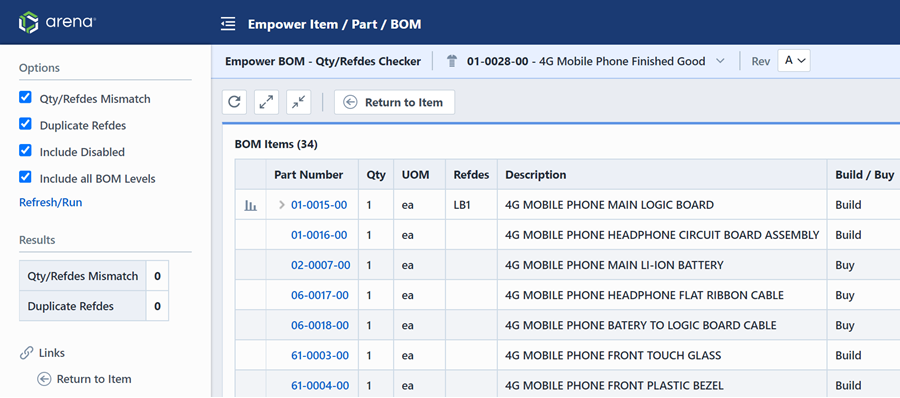
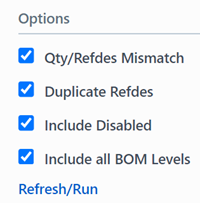
The Options section allows you to display different BOMs under these settings.
The Results section will display the checking mismatch.
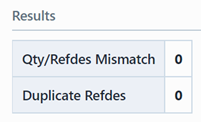
Pending Items
To check those BOM items in pending, select Pending Items option, this will launch the Reports page.
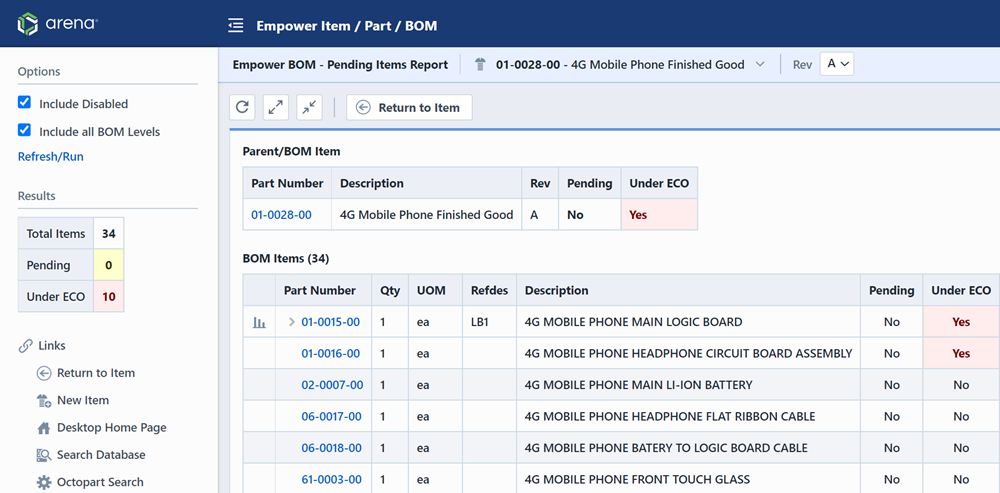
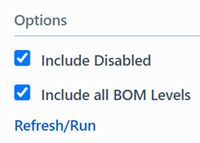
The Options section allows you to display different BOM items.
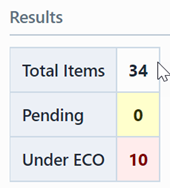
The Results section will display the amount of BOM items under ECO and in pending.
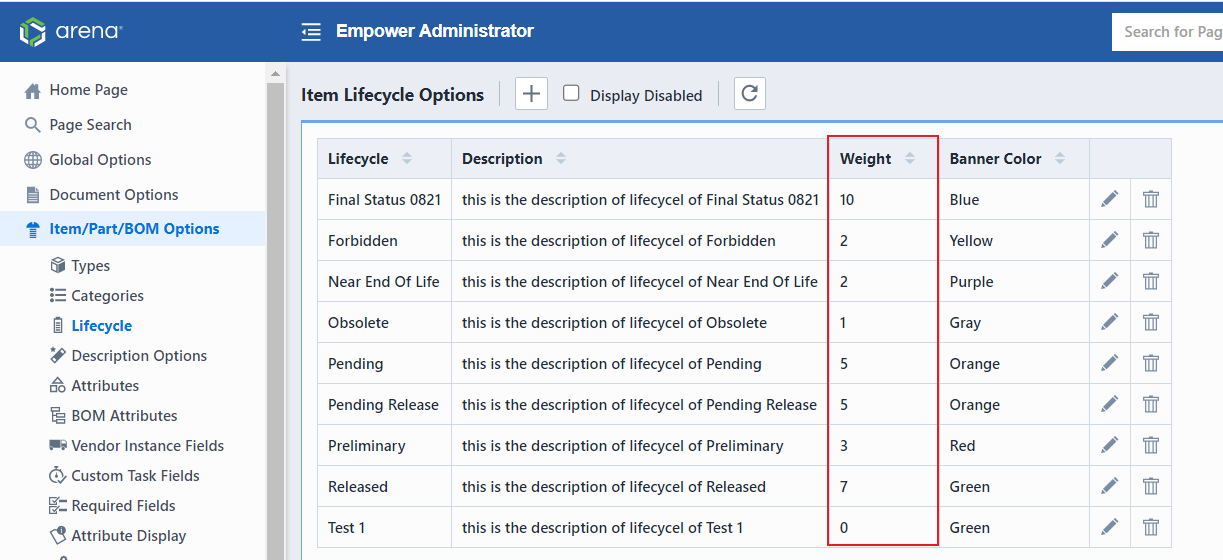
Lifecycle Check
To check BOM Items lifecycle, select the Lifecycle Check option, and this will launch the lifecycle checker page.
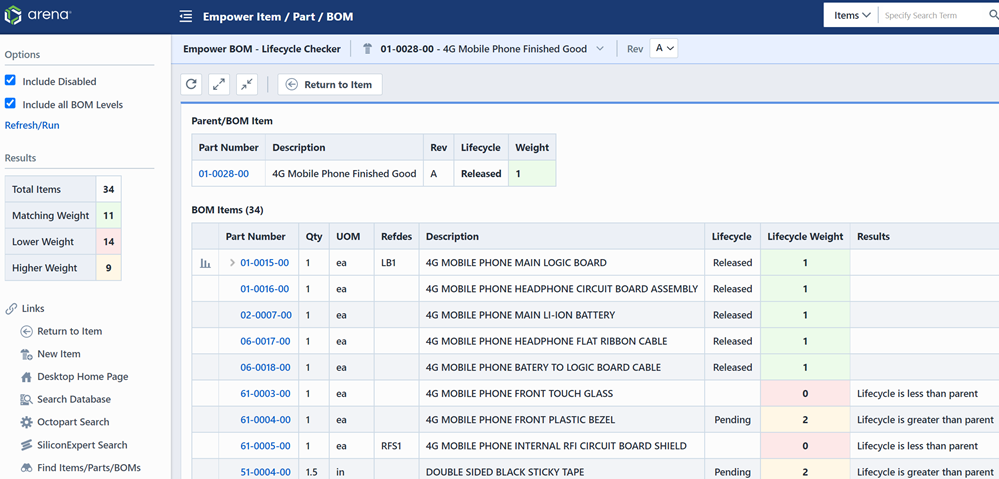
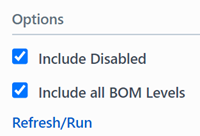
The Options section allows you to display different BOM items.
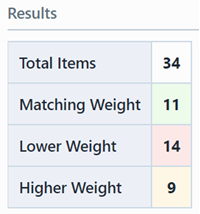
The Results section will display the checking results of lifecycle weight.
As for the lifycycle weight, the Administrator can configure in the Empower Administrator-Item Lifecycle Options section.
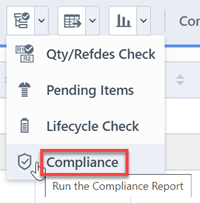
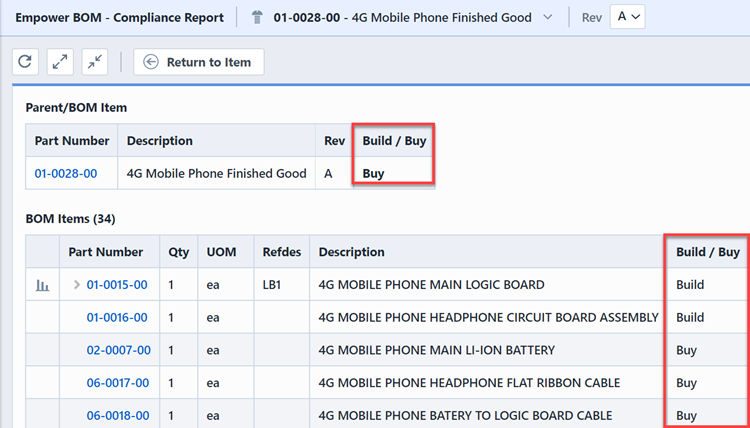
Compliance
To run the Compliance Report, select the Compliance option, this will go to the Reports page.
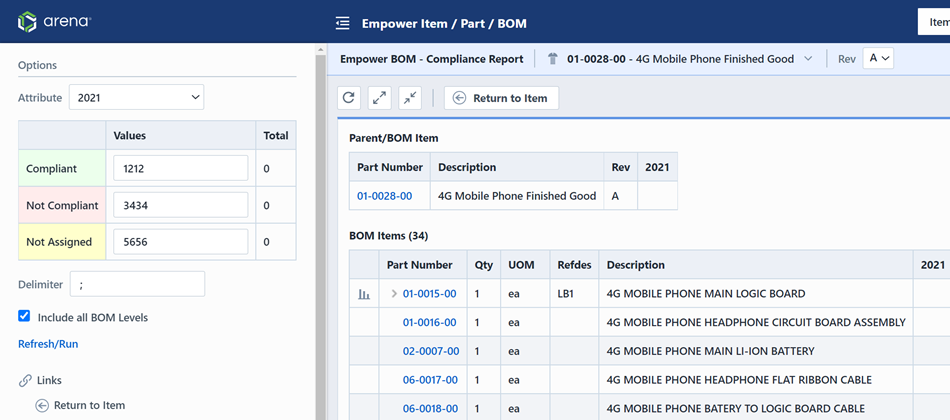
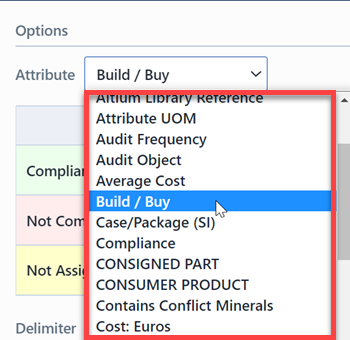
The Options section allows you to display different fields in report, you can select desired attribute from the drop list.
Reports
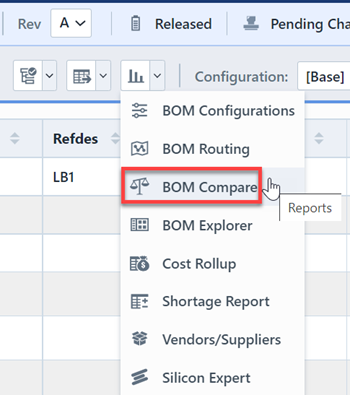
BOM Compare
To compare two or more BOMs, you can select the BOM Compare option from the Reports drop list.
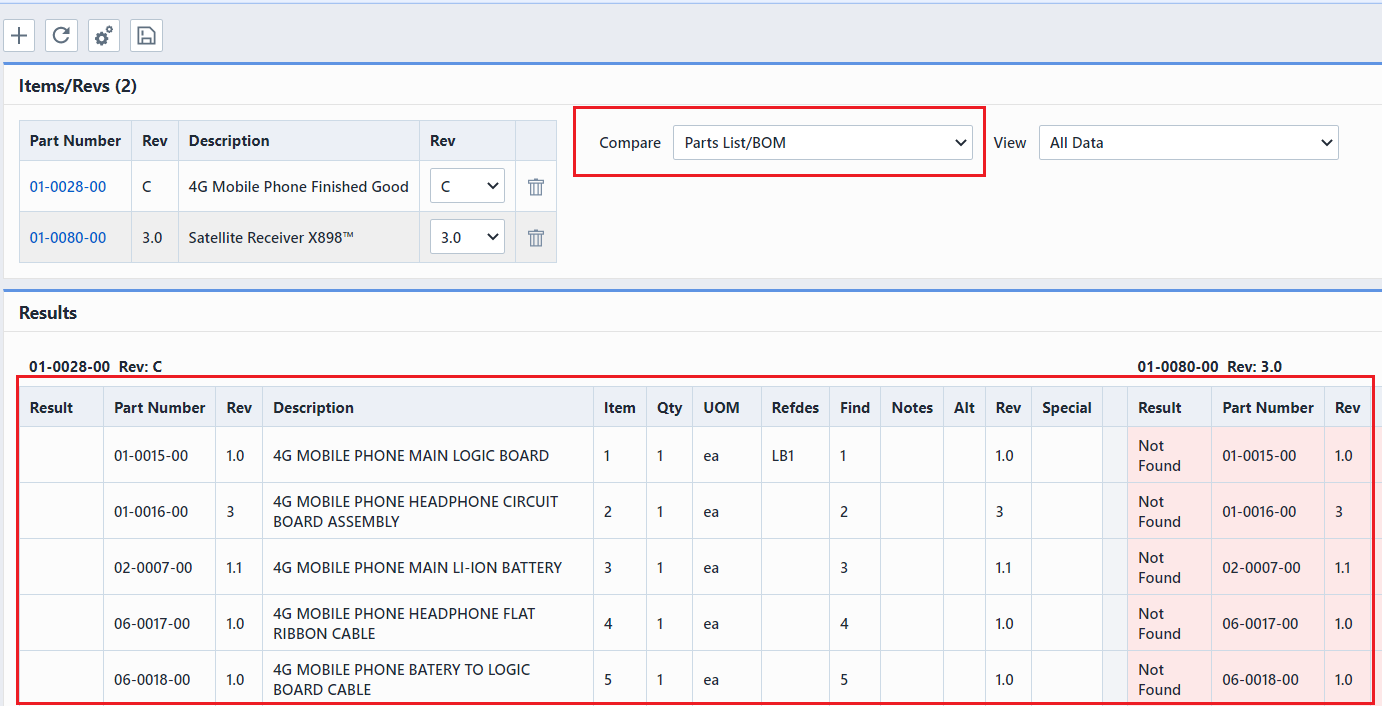
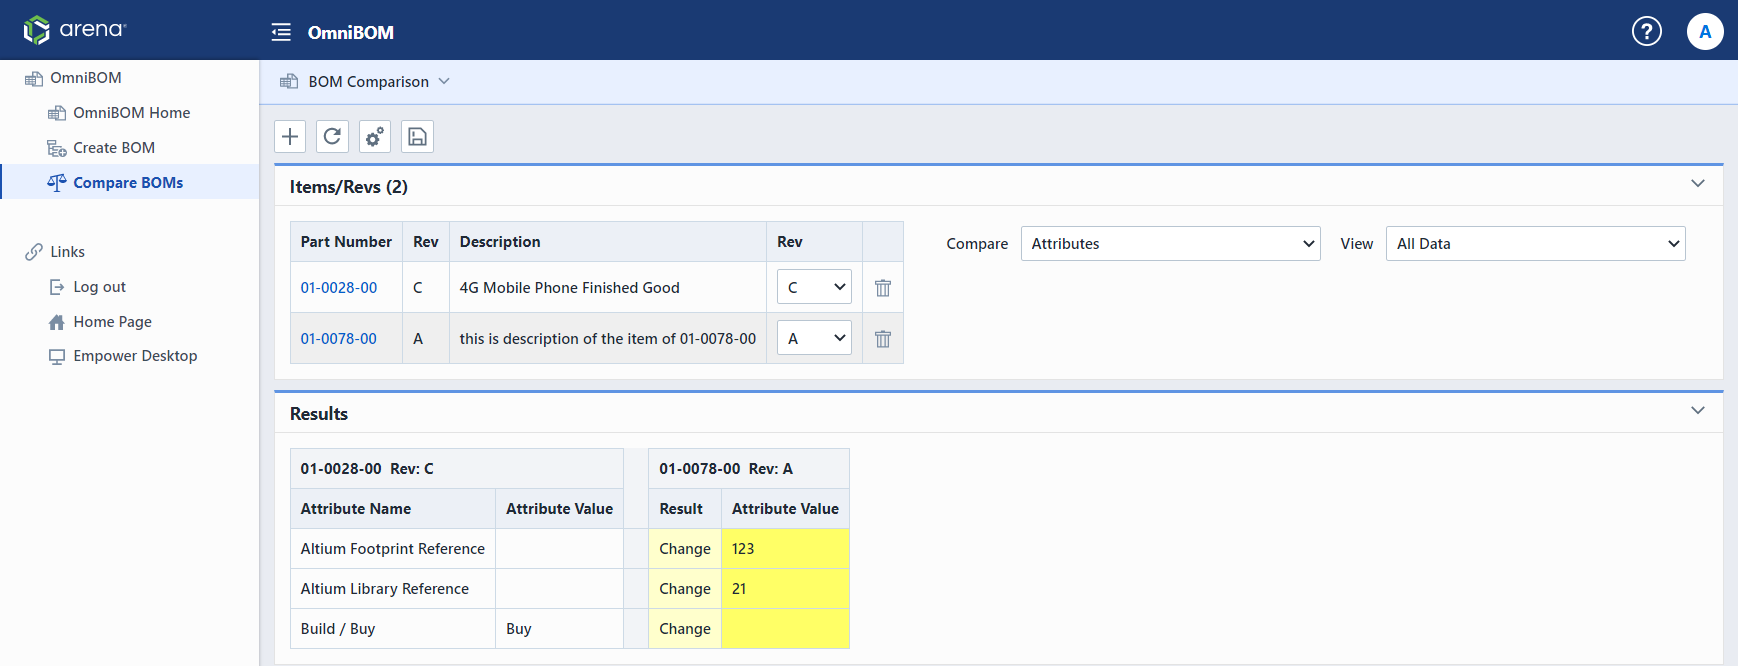
This will invoke the OmniBOM-BOM Comparison page.
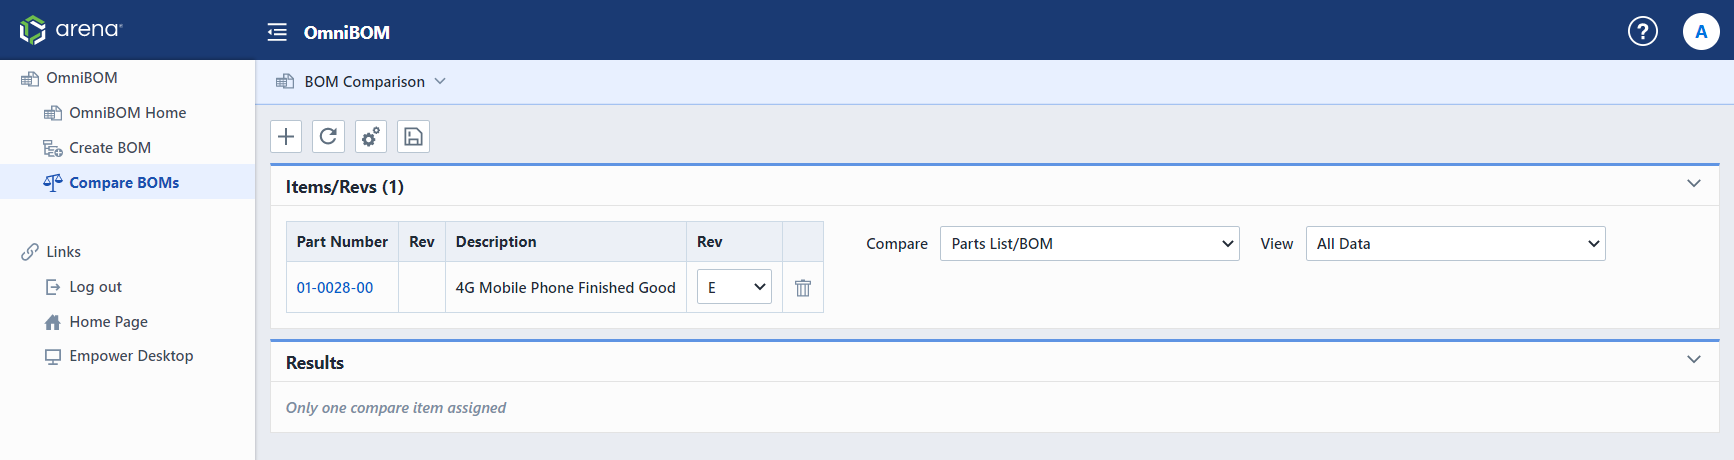
Then you can click the Add Items/Revs toolbar button to add different BOMS, this will display a Add Compare Items panel.

Select from the item list or search a desired item, click the number hyperlink, then the selected item will appear in the compare form.
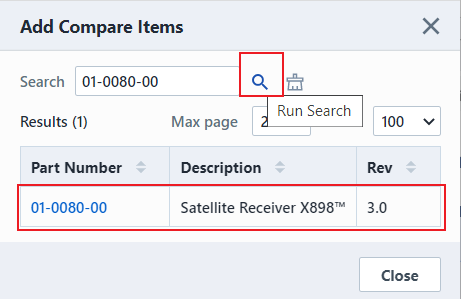

Note: If you search for an item, the search results list will display the item under latest revision.
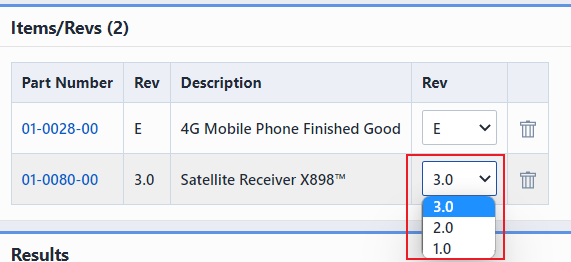
You can change the item revision from the Rev drop list in Items/Revs form.
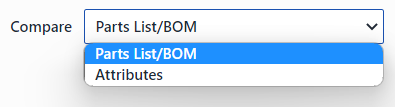
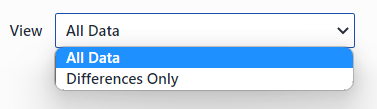
You can view different display list by selecting from the Compare and View drop lists.
After selecting desired filter list, you can click the Run/Refresh toolbar button to run the comparison.
Options
To view desired fields in comparison results form, you can click the Options toolbar button, this will invoke the Options dialog box.
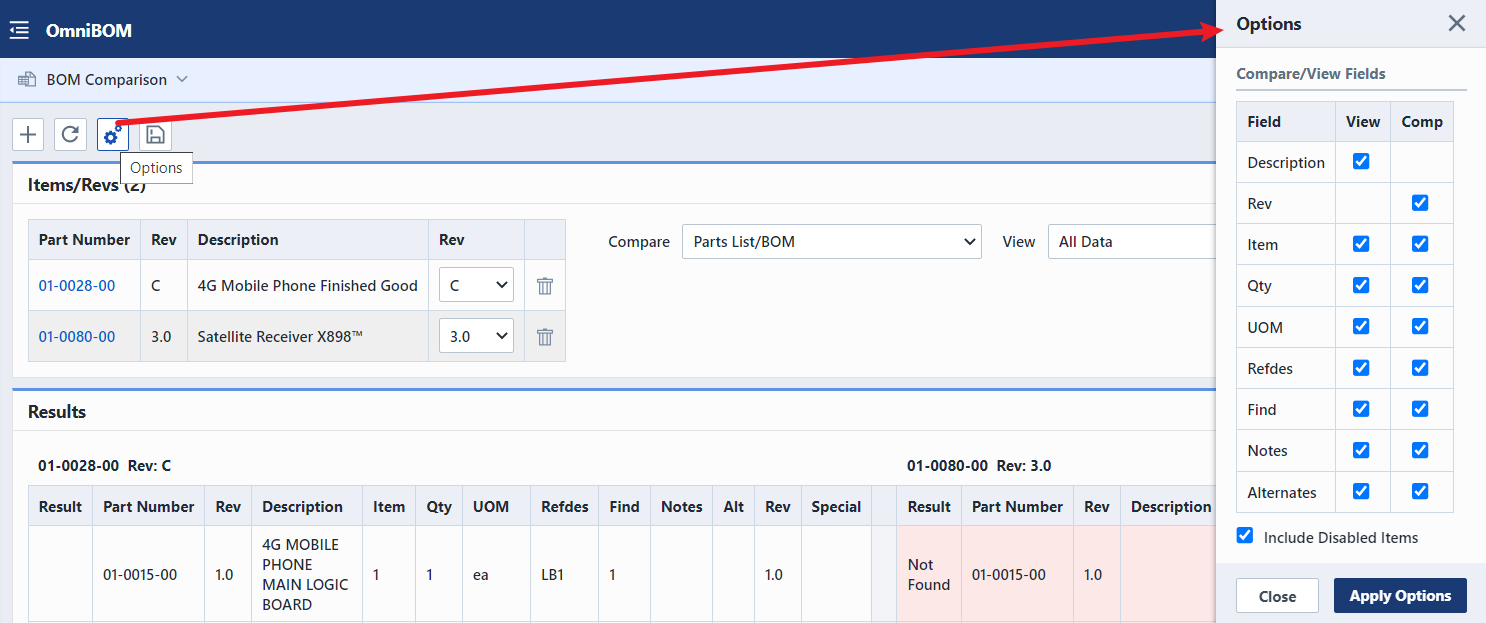
Select fields you need, then click the Apply Options button in the bottom of the panel.
Save/Export
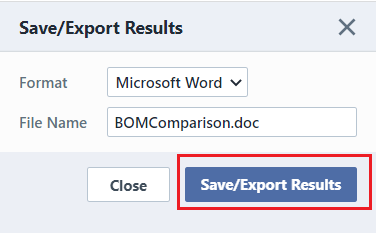
To save and export the BOM comparison as a file, you can click the Save/Export toolbar button, this will invoke a Save/Export Results panel.

You can select the file format from the Format drop list.
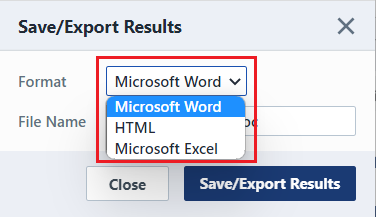
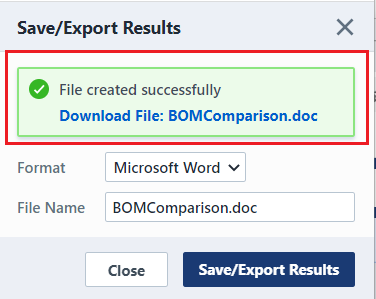
Click the Save/Export Results button in the bottom of panel, this will invoke the tooltip--File Created Successfully, and you may click the hyperlink to download the file.
Below is an example of a BOM Compare Parts list/BOM export in Excel.

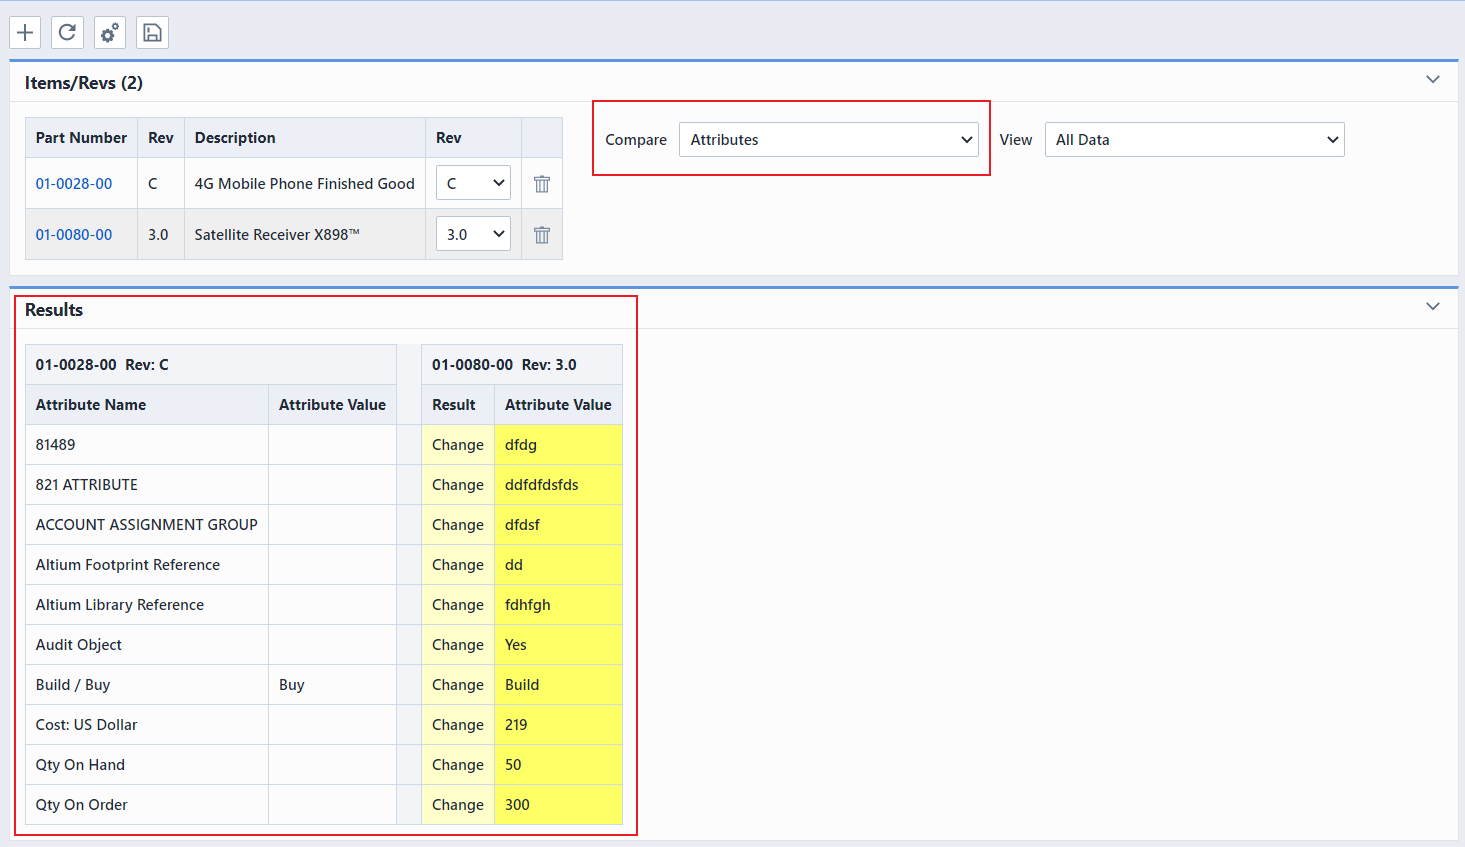
In addition to the BOM Compare Parts List/BOM export, users can also export the BOM Compare Attributes export.
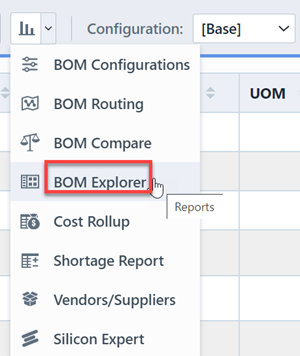
BOM Explorer
To review the BOM in explorer view, you can select the BOM Explorer option from the Reports drop list.
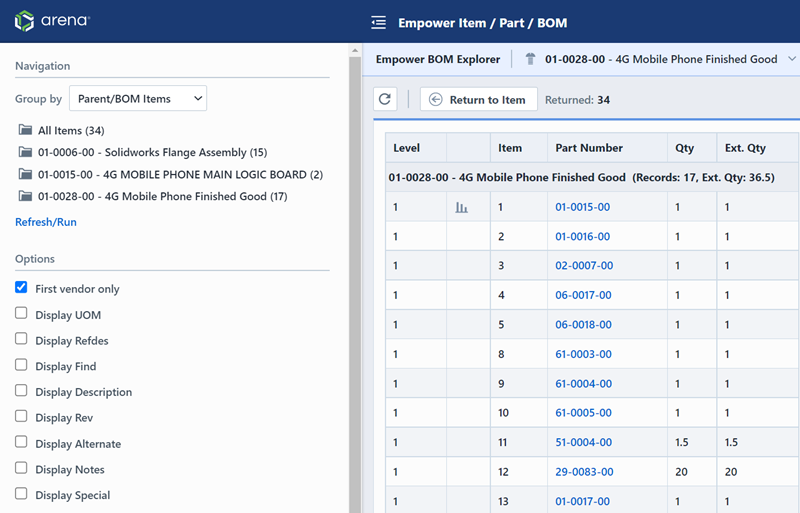
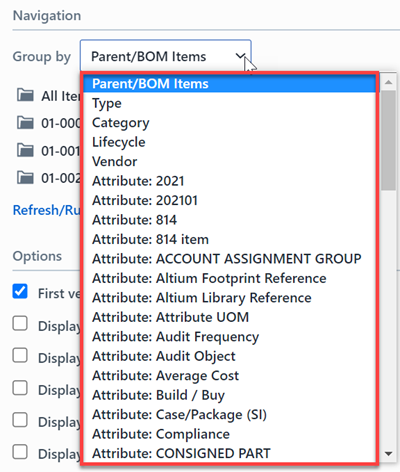
Group Filter List
You can set different display lists by selecting from the Group by drop list.
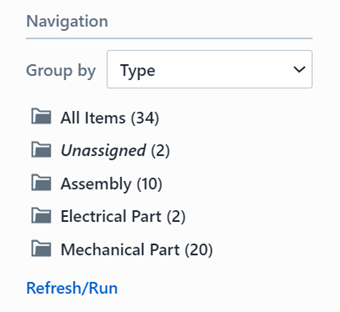
For an instance, select Type filter, and the list will be divided by different item types.

Also the navigator bar will display types and numbers of various sections.
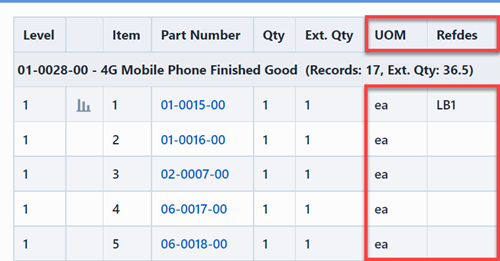
Options
The Options section allows you to select desired fields to display in the form.

Cost Rollup
To review cost rollup detail report, you can select Cost Rollup option from the Reports drop list.
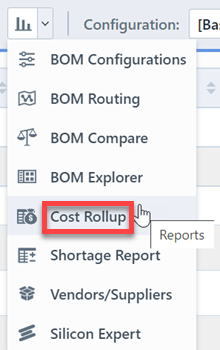
This will launch the Cost Rollup Report page.
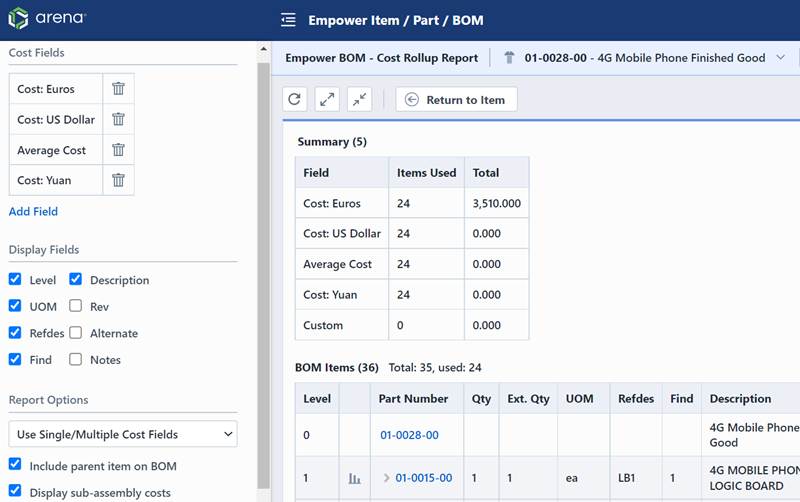
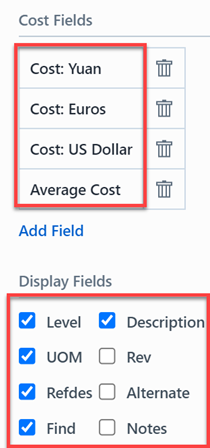
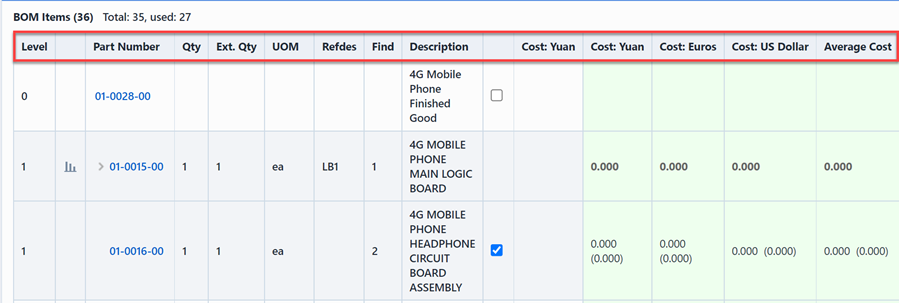
The Cost Fields and Display Fields sections allow you to select desired fields to show in the form.
Shortage Report
To view BOM shortage, you can select Shortage Report option from the Reports drop list, this will invoke the Shortage Report page.
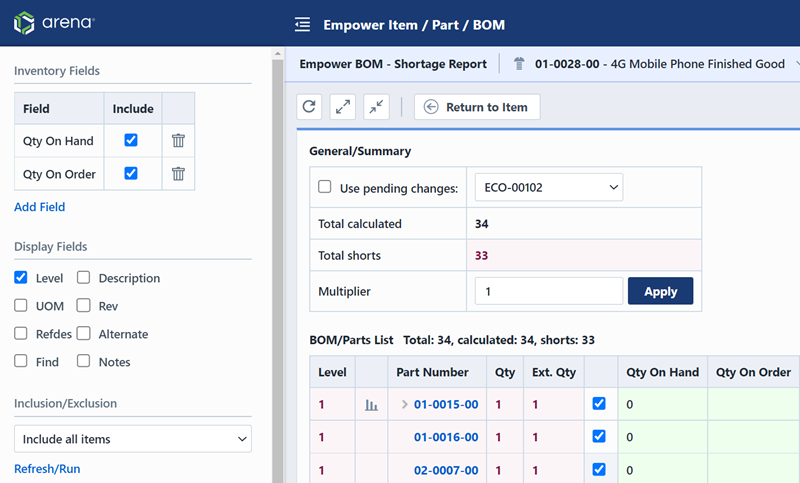
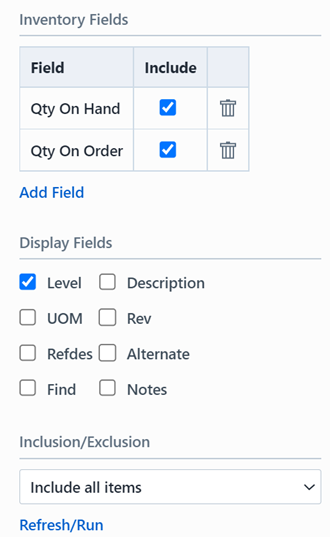
To show desired fields in the form, you can select from the Inventory Fields and Display Fields.
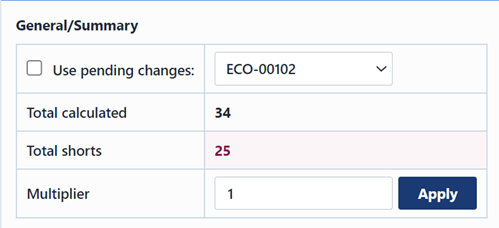
There is a Summary form assists you to view on general scope.
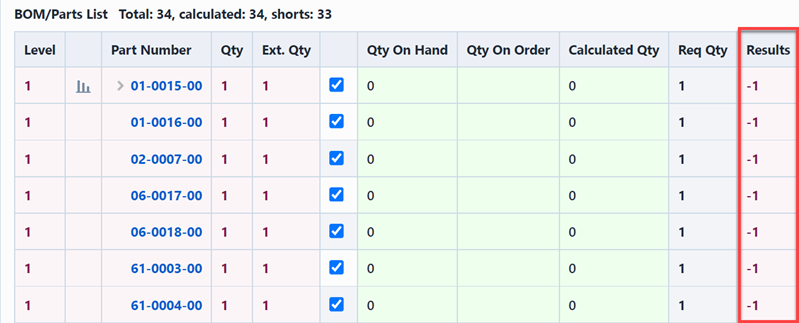
Also you can view the details in BOM/Parts List.
Vendors/Supplier
To view vendors or supplier report, you can select Vendors/Suppliers option from the Reports drop list.

This will launch the Vendors/Suppliers Report page.
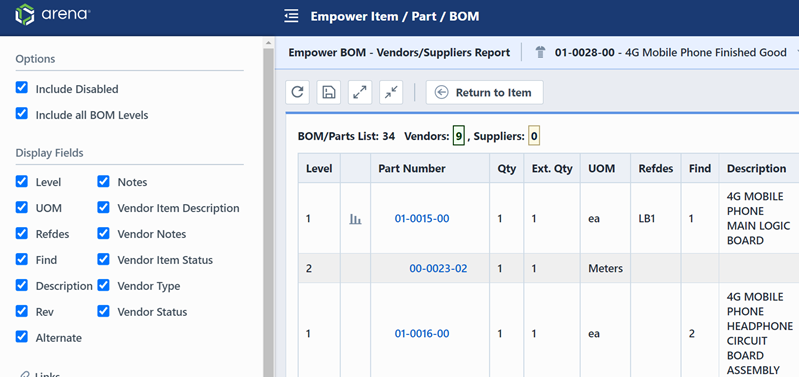
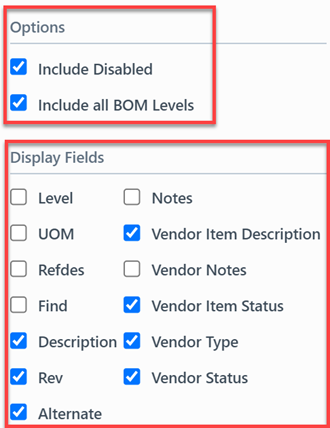
You can set desired fields to display in the form by selecting from Options and Display Fields sections.
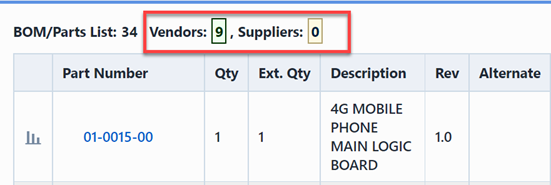
There is a summary column upper on the top of the list.
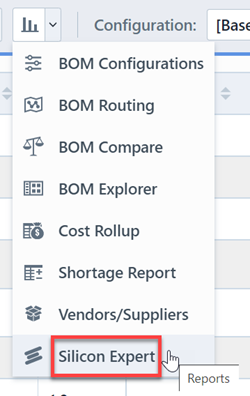
Silicon Expert
To review Silicon Expert report, you can select Silicon Expert option from the Reports drop list.
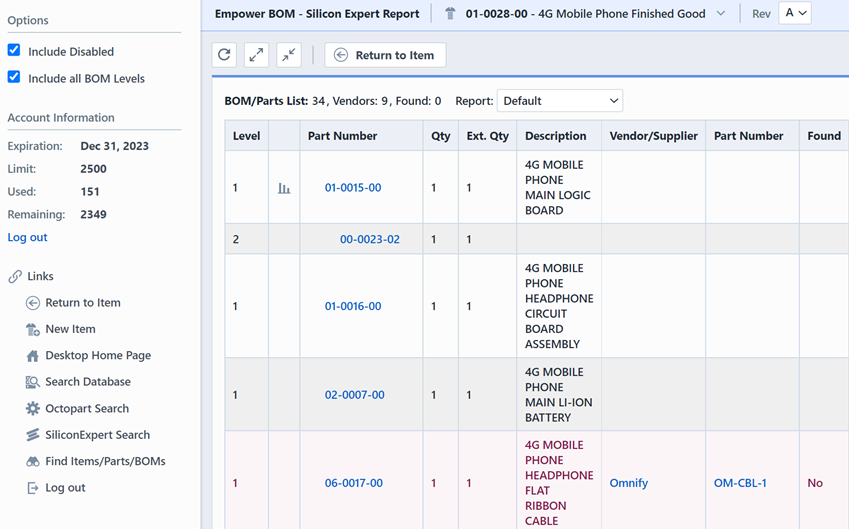
This will launch the Silicon Expert Report page.
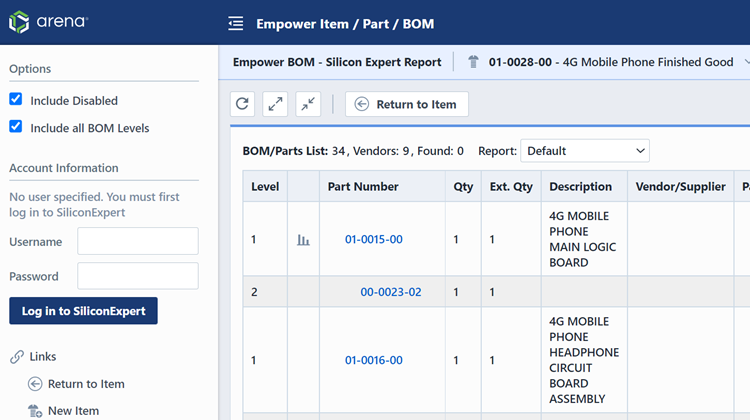
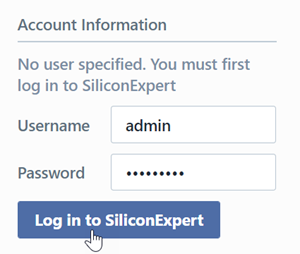
Then you need to log in to SiliconExpert.
This will reload the form.
Configurations
BOM configurations are for creating a specific instance of a bill of material (BOM) that differs from the released BOM for that revision. An instance means a particular configuration for a lot number, serial number or specific customer’s shipped configuration. The BOM configuration module is an ideal module to be used to manage BOM deviations for a specific revision. Configurations store the specific changes or deviations from a BOM and assign it a name.
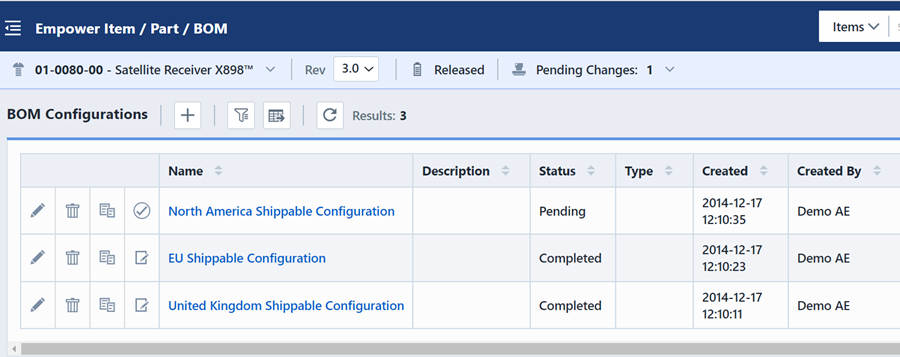
To run BOM Configurations, click the BOM Configuration option from the Reports drop list. Or you can also click the link from the Page Navigator.


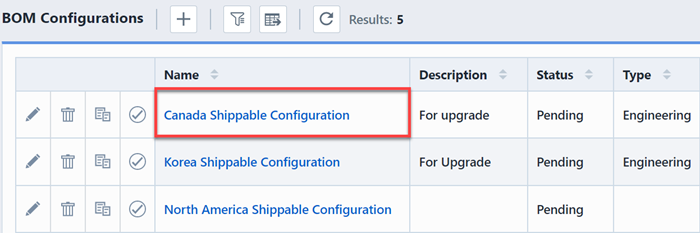
This will display the BOM Comfiguration page.
Create New Configuration
You can create new configuration by clicking the Create toolbar button, this will display the New Configuration panel.
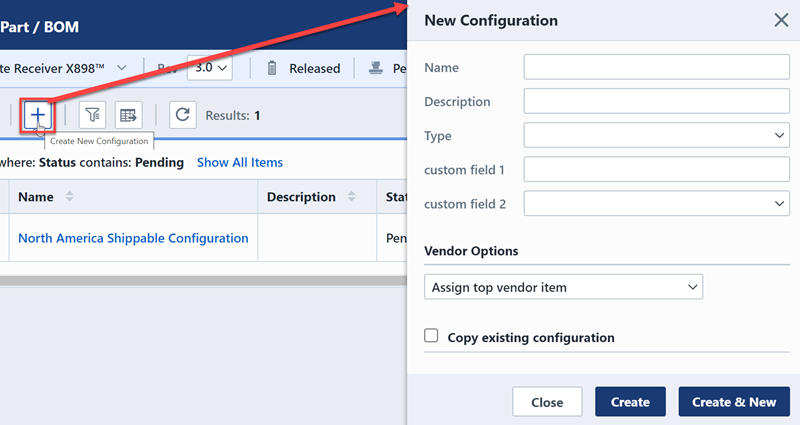
Fill in the information needed by the form, then click the Create button.
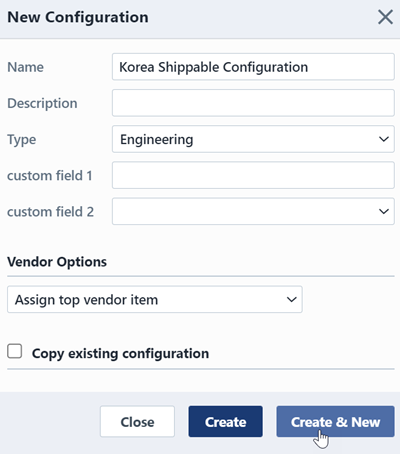
Then a new configuration will show in the BOM Configuration list.
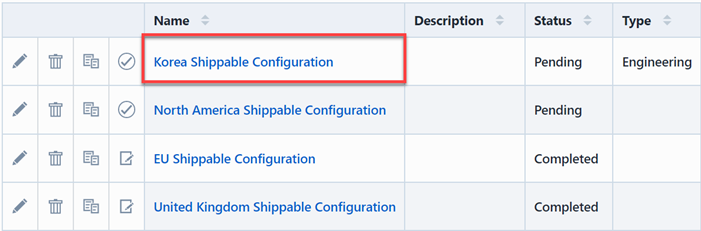
Edit Configuration
You can edit configurations by clicking the Edit button in Actions Column.
And this will display the Edit Configuration panel.
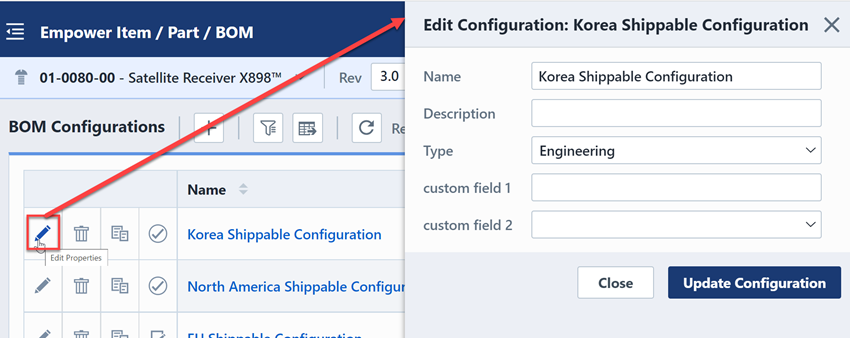
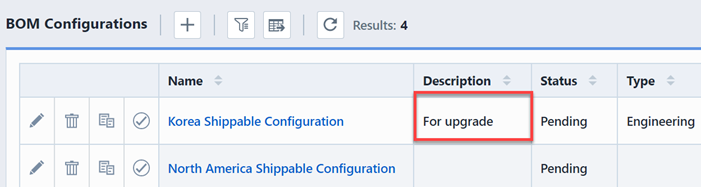
Modify the information you want to edit, then click the Update Configuration button in the bottom of panel.
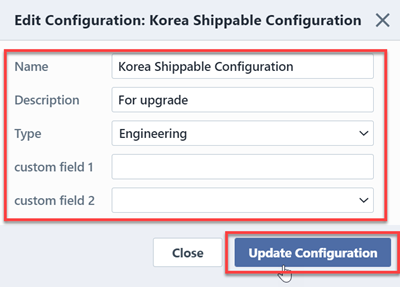
The renewed configuration will display in the BOM Configuration list.
Delete Configuration
To delete BOM configuration, click the Remove button in Actions Column, this will display the Delete Configuration panel.
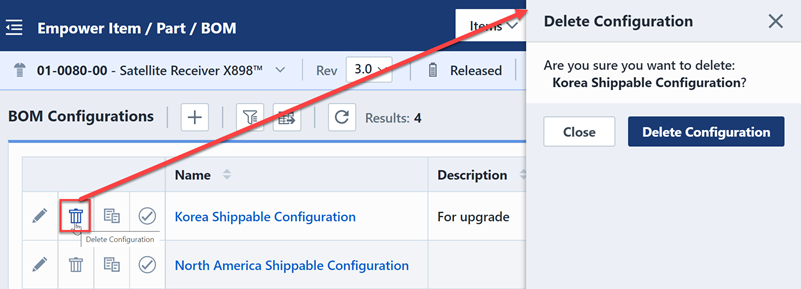
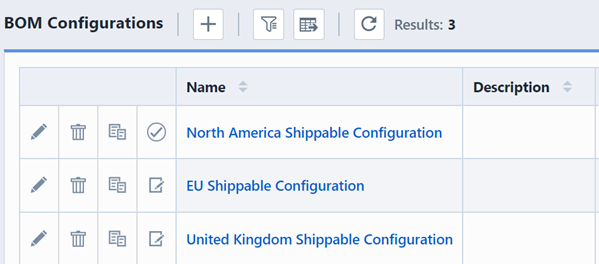
Confirm to remove configuration, click the Delete Configuration button.

Then the deleted configuration will disappear in the BOM Configuration List.
Copy Configuration
To copy from an existing configuration, click the Copy button in Actions Column, this will display a New Configuration panel.
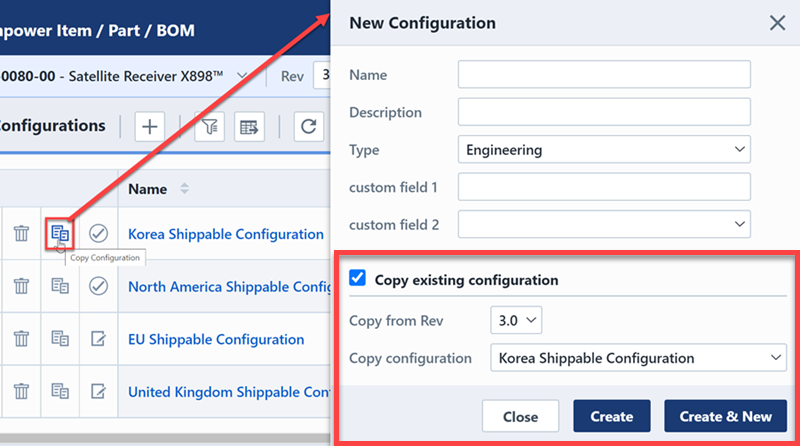
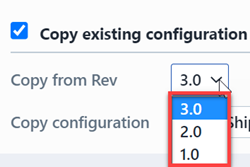
You can select desired rev from Copy from Rev section drop list.
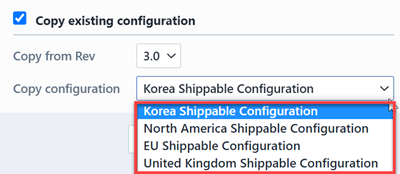
Besides, you can change the selected copying configuration by choosing from Copy Configuration drop list.
After selecting the desired copying configuration and rev, click the Create button in the bottom of panel.
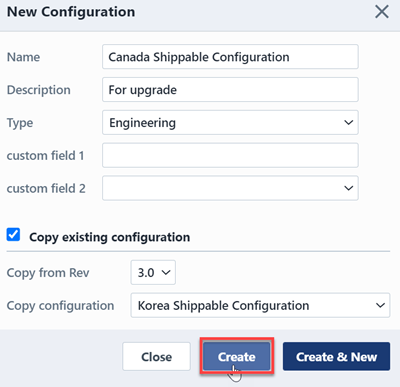
The new copy configuration will show in the BOM Configuration list.
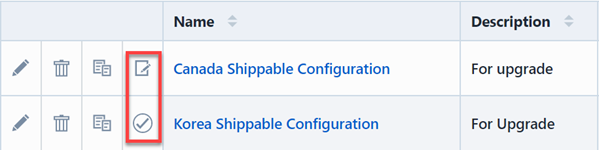
Change Status
To change configuration status, click the Complete/Pending button in Actions Column, this will display a Mark as Complete/Mark as Pending panel.
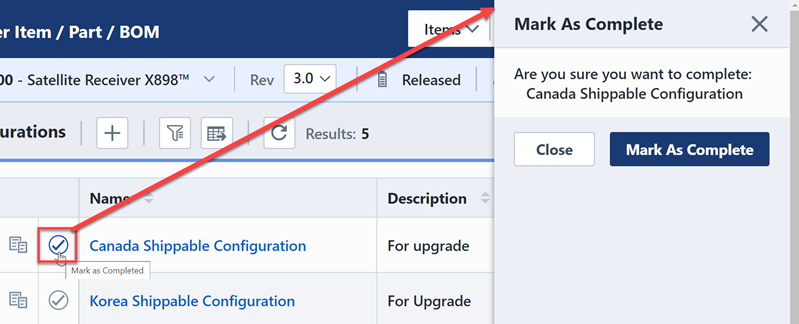
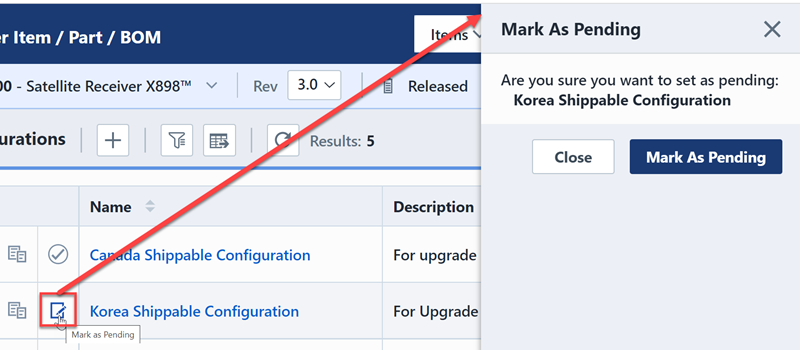
Once you click the Mark as Complete/Mark as Pending button in the bottom of panel, the configuration will change status in the list.
Export Configuration
To export configuration, click the Export toolbar button.
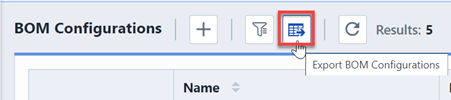
This will go to BOM Configuration Export Wizard page.
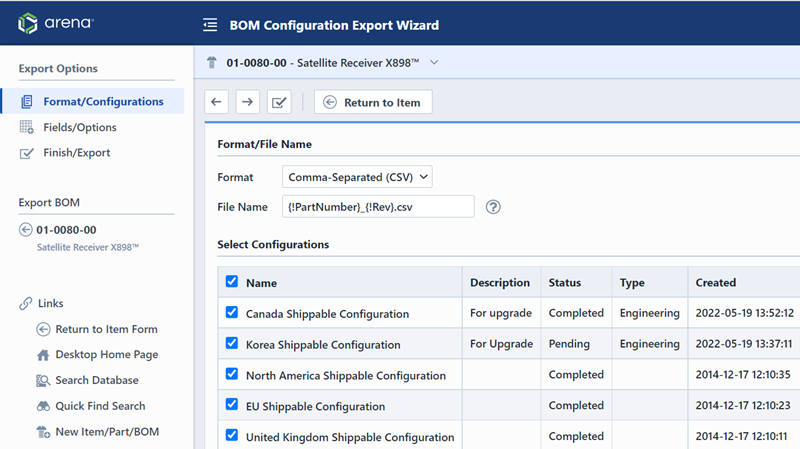
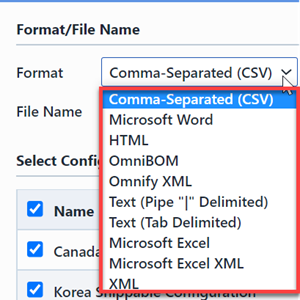
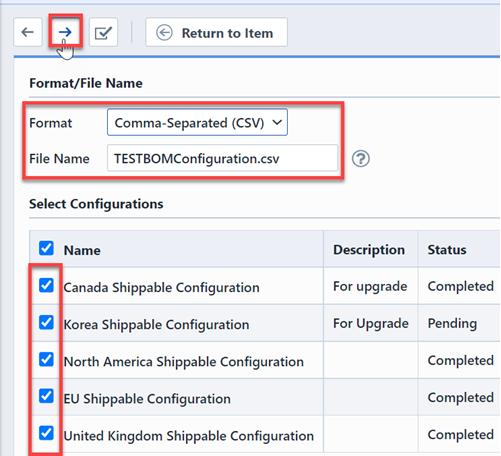
Select desired file format from the Format section drop list.
Select configurations needed to be exported, input a file name, then click the Next toolbar button.
Then select desired fields to show in the report, click the Finish toolbar button.
The dialog box will indicate that Report Created Successfully, click the hyperlink to download the exported file.
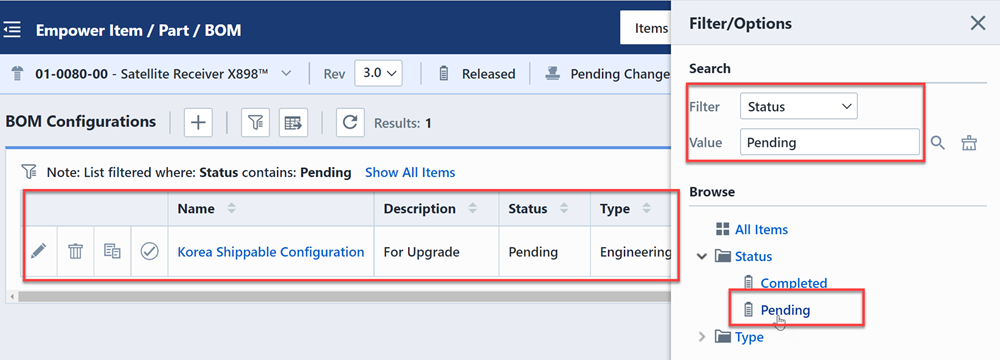
Display Option
To browse or display desired fields and configurations, click the Filter toolbar button, this will display a Filter/Options panel.
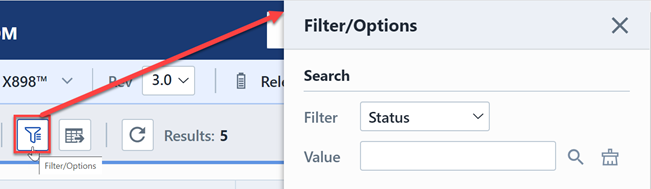
According to your selected search filter and value, the list will display the corresponding BOM Configurations.
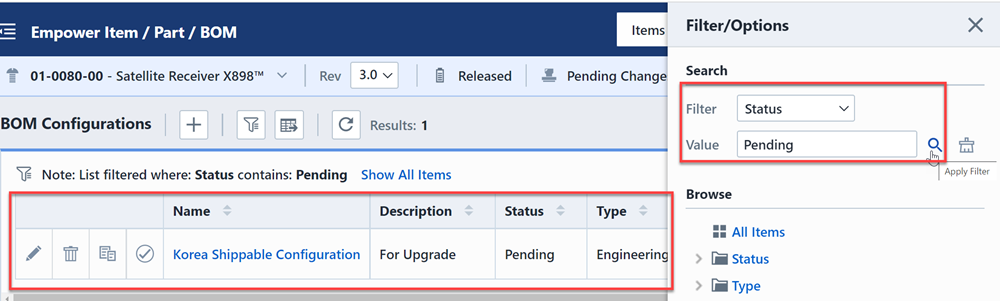
Meanwhile, you can browse the configurations with specified fields by selecting from the Browse list.
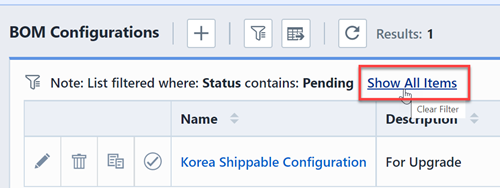
To review all configurations, click the hyperlink- Show All Items.
BOM Configurations--Parts list View
Click the Parts List View option in Navigator bar, this will appear the BOM Configuration-Parts list page.
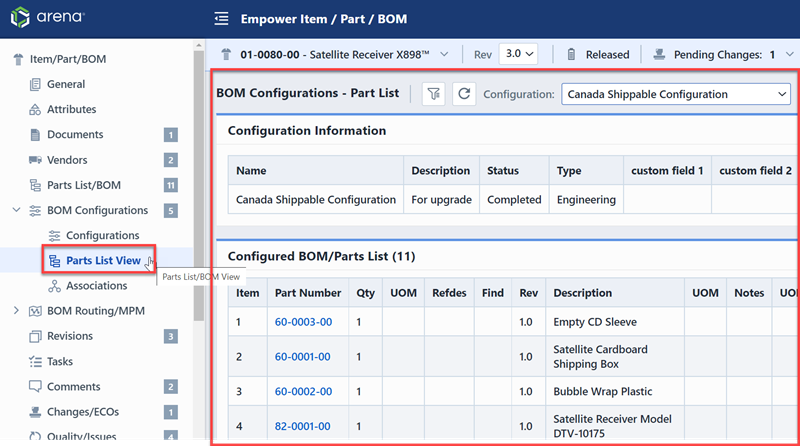
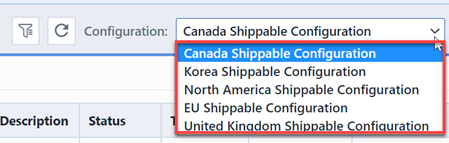
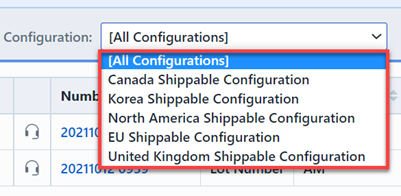
You can preview different configurations parts lists by selecting from the Configuration drop list.
For fields display, click the Filter toolbar button, this will show a Filter/Options panel.
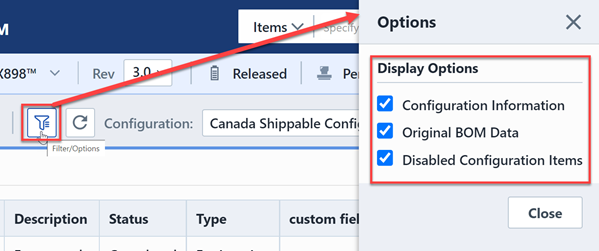
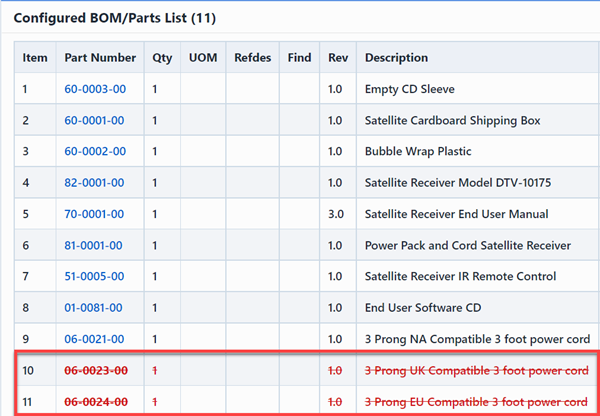
For instance, if Disabled Configuration Items option enabled, the parts list will display all the disabled BOM items.
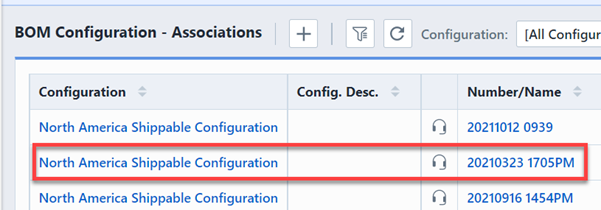
BOM Configurations--Associations
To review the BOM configuration Associations, select Associations option in navigator bar.
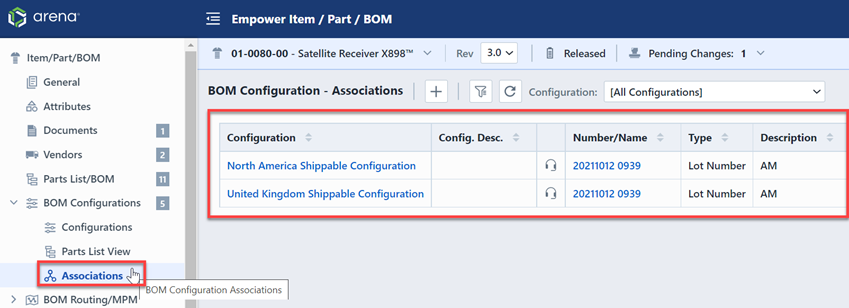
You can preview different associations by selecting from the Configuration drop list.
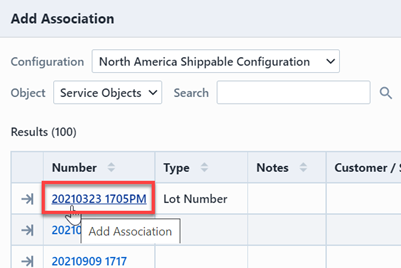
You can add associations by clicking the Add toolbar button, this will display a Add Association panel.
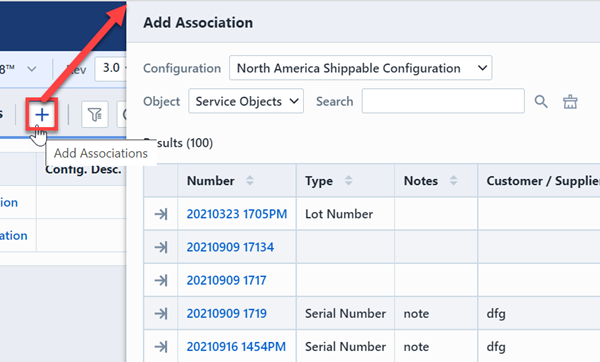
Select desired objects and click its hyperlink, the new associations will appear in the list.
BOM Routing
To view BOM Routing, select the BOM Routing option in the Reports drop list of Parts Lists/BOM page.

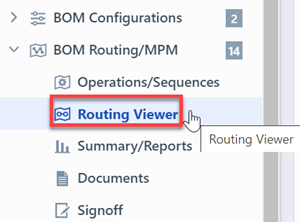
Also you can click the BOM Routing/MPM option in Navigator bar directly.
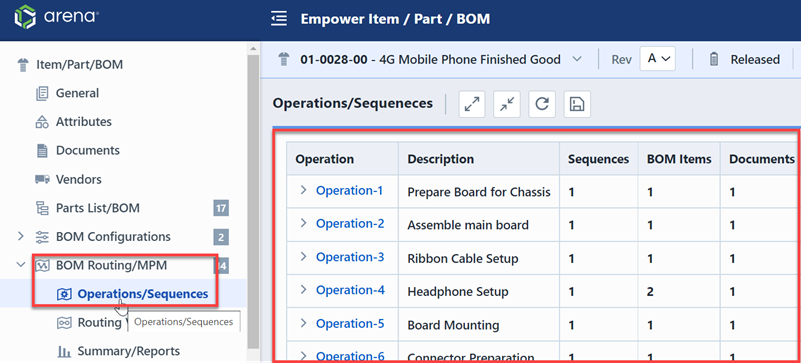
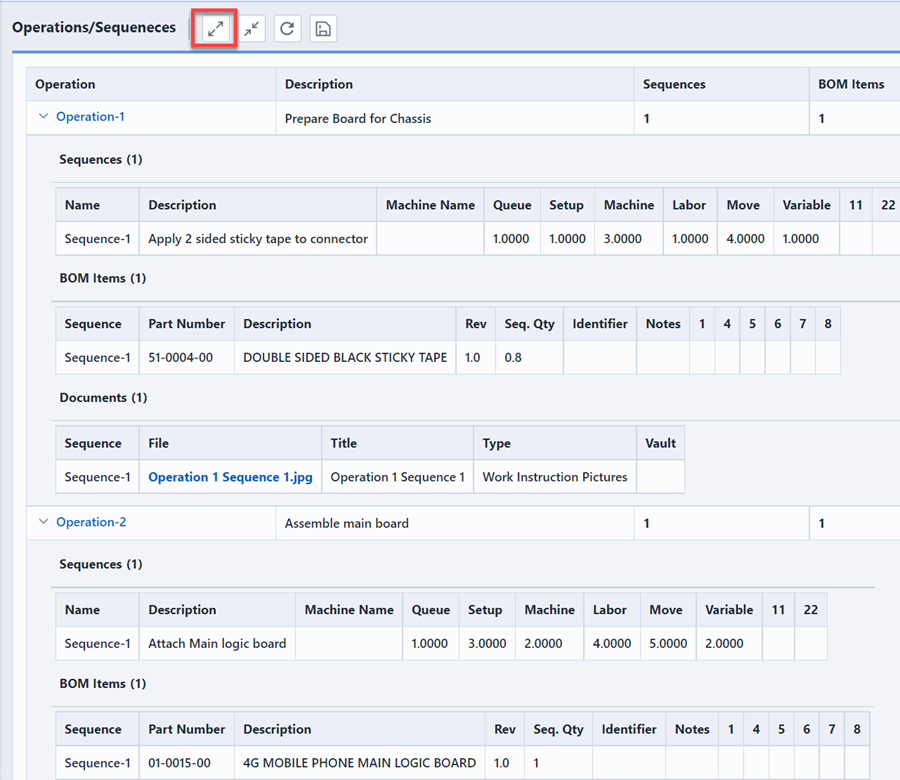
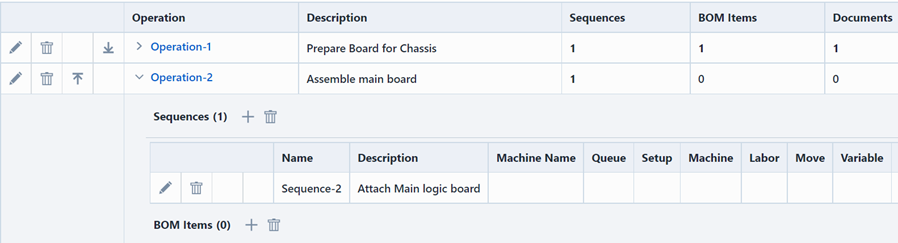
Operations/Sequences
To see more details, click the Expand toolbar button.
To add an operation or sequence, click the Add toolbar button.

This will display the Add Operations/Sequences/Items panel.
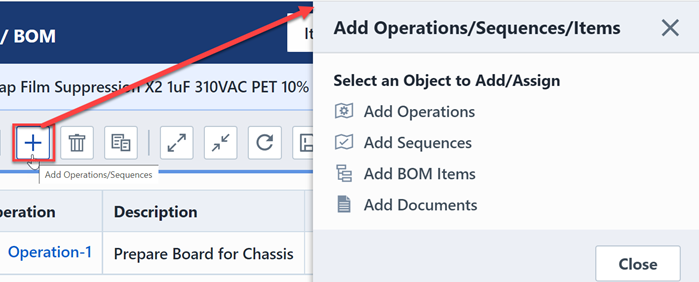
To add an operation, select Add Operations option in the panel.
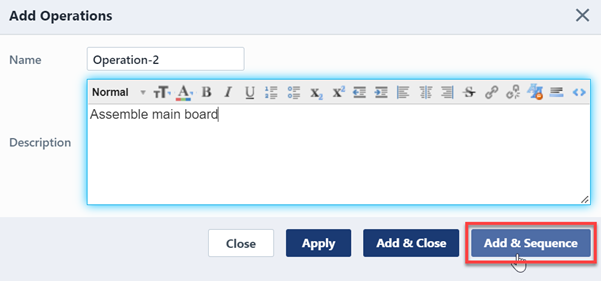
Then a new Add Operations panel will appear.

Fill in the name and description for operation then click the Apply&Sequence button to add its own sequences.
Then a new Add Sequence panel will appear, fill in the information needed and click the Apply button in the bottom of panel.
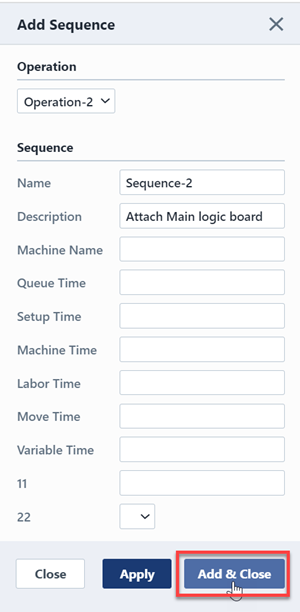
The new operation and seqence will display in the list.
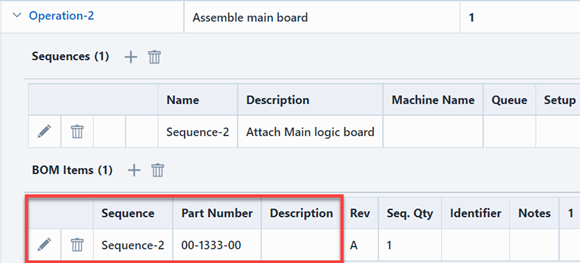
To add BOM items to the corresponding sequence, you can click the Add button, this will display the Assign BOM Items panel.
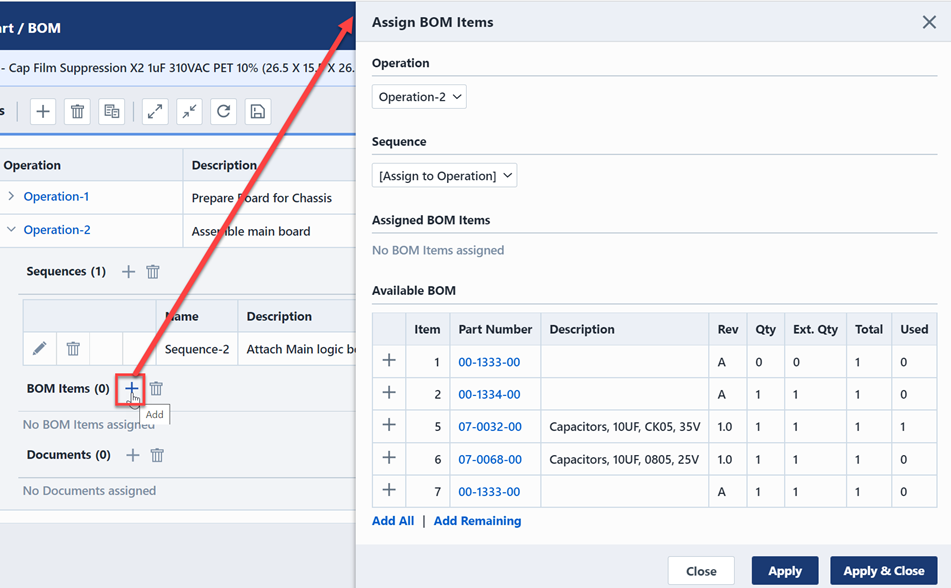
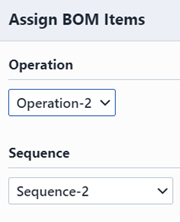
Select specific operation and sequence from the drop list.
To assign a BOM item, click the Add button, then Assigned BOM Items section will appear in the panel.
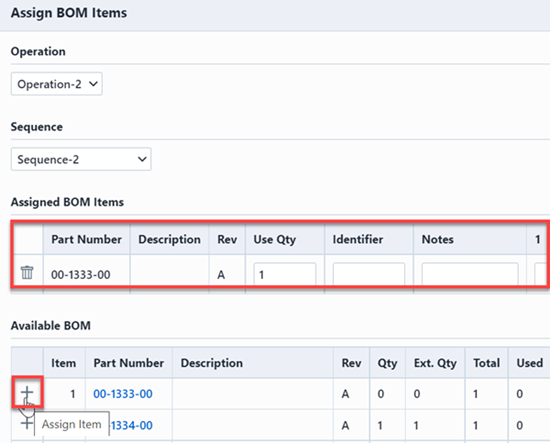
After selecting assigned items, click the Apply button in the bottom of panel.
The assigned BOM Items will display in the list.
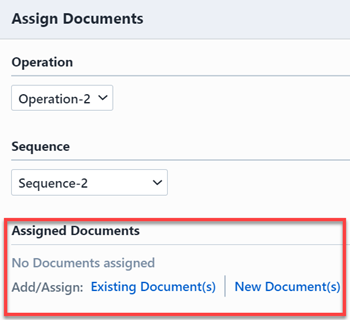
To add documents to the corresponding sequence, you can click the Add button, this will display the Assign Documents panel.
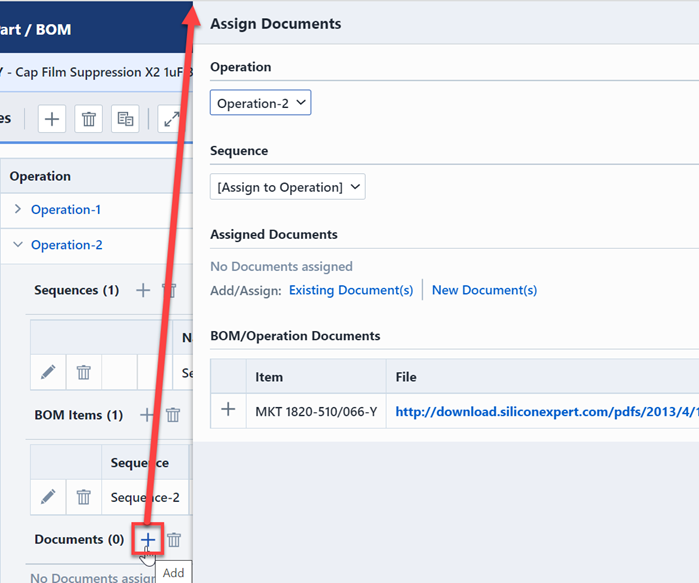
After selecting specific operation and sequence from the drop list, you can assign documents from Existing Documents or New Documents.
To assign from existing documents, select Existing document(s) option, this will go to the Document Assignment page.
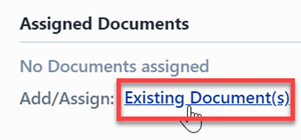
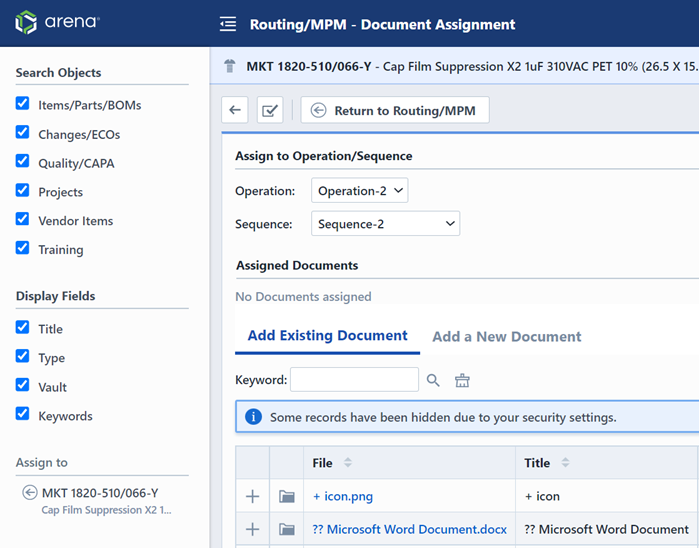
You can click the "+" button or the hyperlink to assign documents.
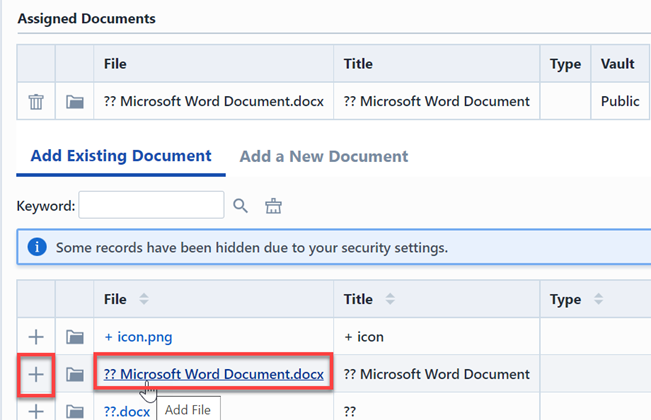
Click the Finish button to assign documents.
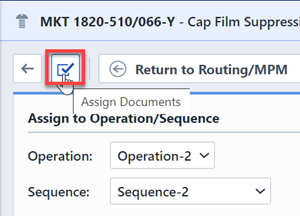
The assigned documents will display in the list.

Routing Viewer
To review operations and sequences in routing viewer, select the Routing Viewer option in the Navigator bar.
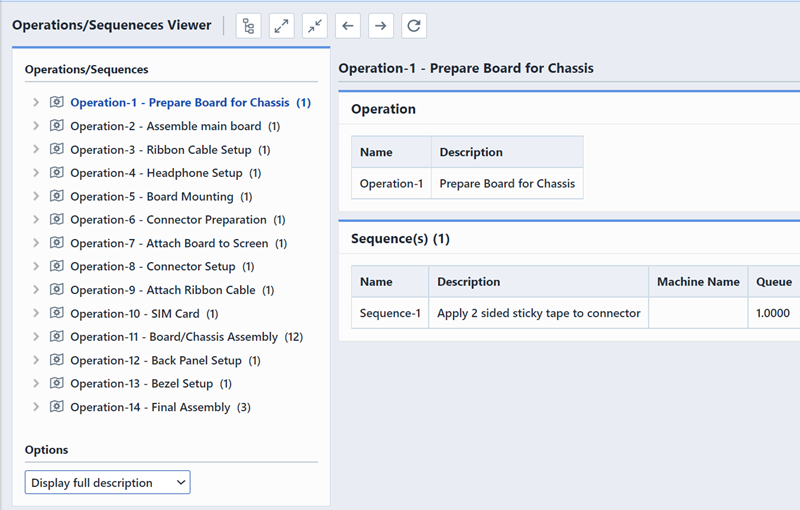
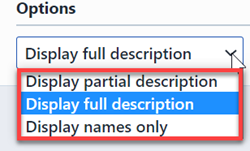
Select different display options, the operations/sequences lists vary.
The Operations/Sequences viewer toolbar contains the following commands:
| Icon | Command |
|---|---|
 | Show/Hide Operation Tree |
 | Expand all lists |
 | Compress all lists |
 | View previous sequence/operation |
 | View next sequence/operation |
 | Refresh/Reload the viewer page |
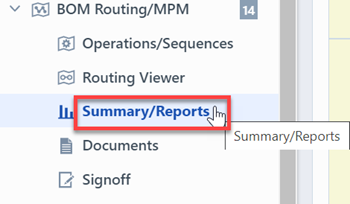
Summary/Reports
To view reports, select Summary/Reports option in the navigator bar.
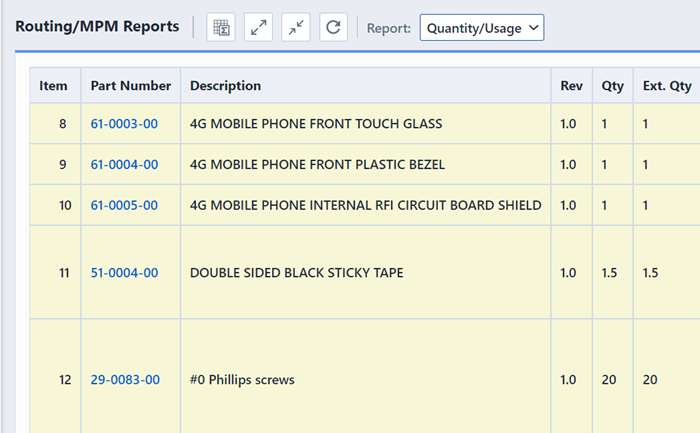
The Report drop list allows you to select desired display list.


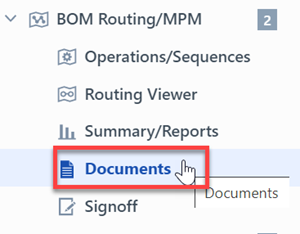
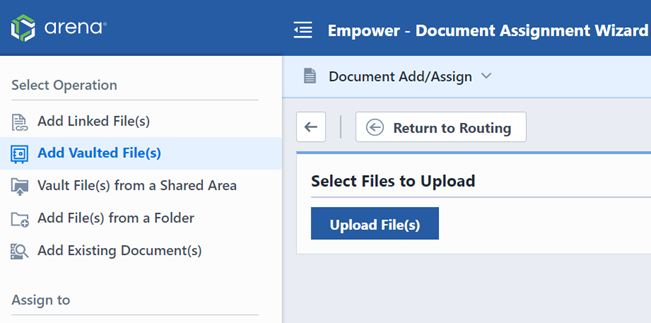
Documents
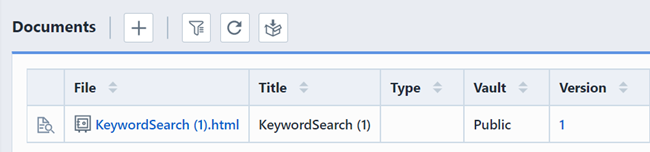
To view documents list, select Document option in Navigator bar.
You can add documents by clicking Add toolbar button.
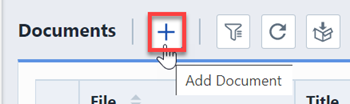
This will launch the Document Assignment Wizard.
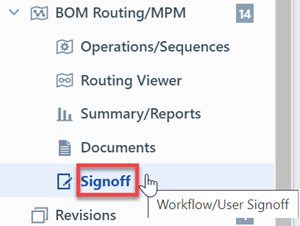
Signoff
For workflow in BOM Routing, select Signoff option in Navigator bar.
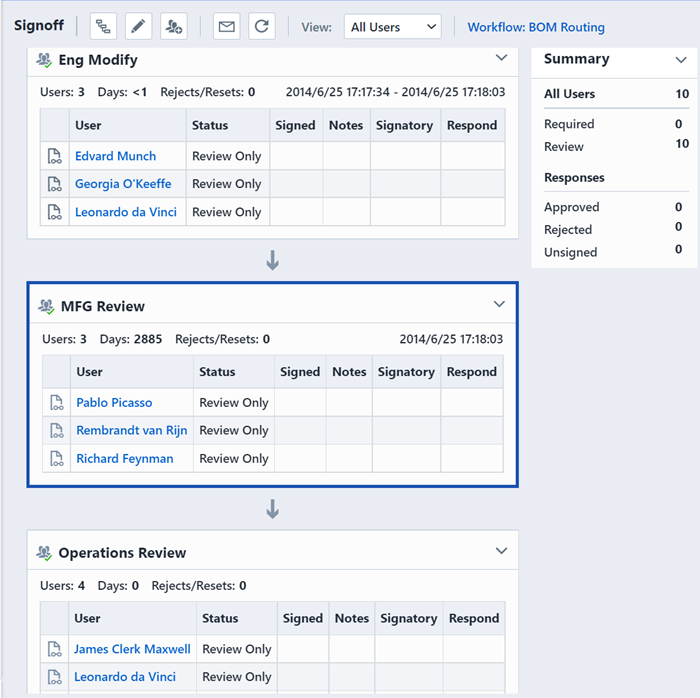
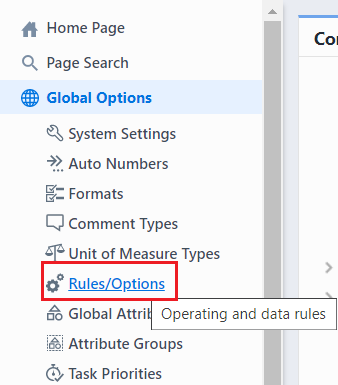
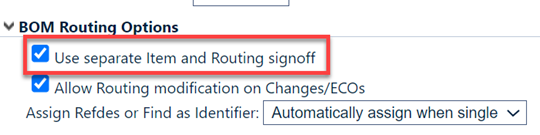
Note: For seperate BOM Routing signoff, it can be configured in Empower Administrator--Global Options--Rules/Options--BOM Routing Options section, make sure Use seperate item and Routing signoff option enabled.