Signoff and Workflows
Signoff and Workflows
Overview
When creating new objects they will be placed in an "unreleased" state until the defined signoff users have approved the object. Once all (required) users have approved the object, the object will be placed in an "Awaiting Release" state. Users with appropriate permissions can place an object in an Awaiting Release state to a "Release" state using the Release (or Complete) function.

When a new object is created, the system will automatically assign a signoff workflow based on the rules and conditions defined in the Administrator. Refer to the Administrators User's Guide for more information on creating and assigning workflow conditions.
Refer to the Workflow/Signoff section for more information on workflow management and object signoff.
Signoff Page
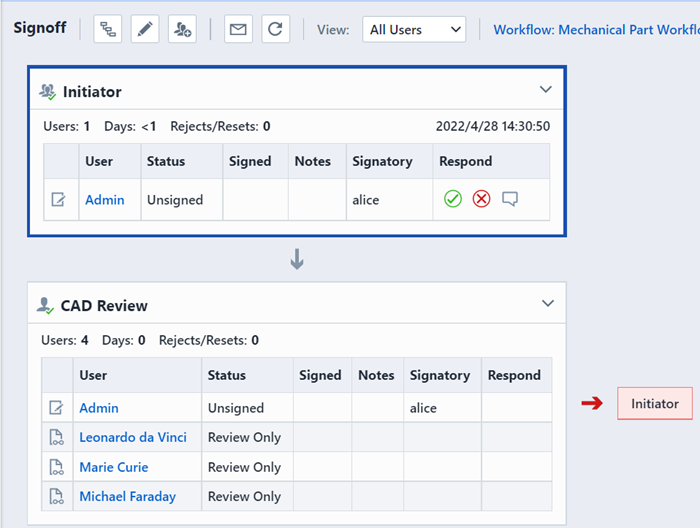
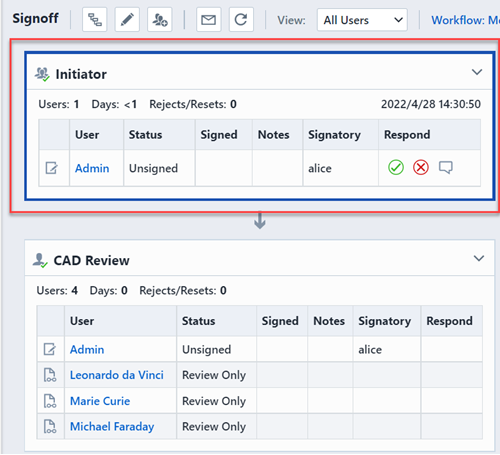
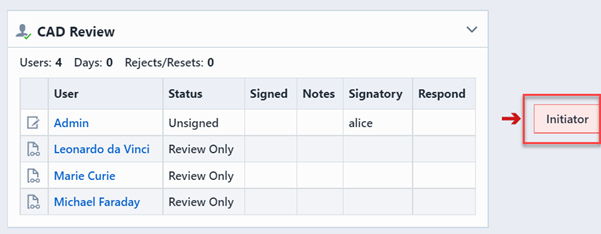
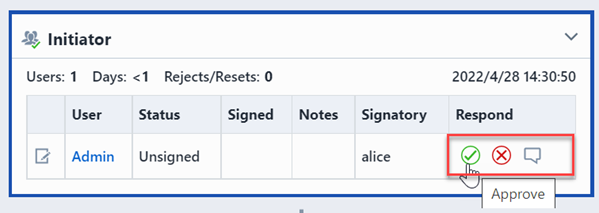
The Signoff page will list the signoff stages and users who are reviewing or must sign off on the object before it is released.
The Signoff Page contains the following sections:

| Section | Description |
|---|---|
| Toolbar | Quick access to common Signoff functions |
| Signoff Stages and User Lists | List of stages and users reviewing or signing the item |
| Rejection Stages | Indicates the rejection stage |
| Summary | Stage/user completion |
The signoff follows a workflow (defined in the Administrator). Signoff workflows are comprised of a set of signoff "stages".
A Signoff stage can contain one or more users who are required to sign or review. During each signoff stage, user approvals or rejections can be processed in parallel.
Once all required users (signers) approve the request, the next stage will be activated. Each signoff stage can contain an unlimited number of users.
The Signoff Toolbar contains the following commands:
| Icon | Command |
|---|---|
 | Assign a workflow |
 | Add users, stages, workflows |
 | Add users to specific stages |
 | Send an email to signoff users |
The signoff page will display all stages and users who are required to sign or review the object.
Active stages will be displayed with a different color in the header bar.
Signoff stages with "Reject To" stages will also identify their reject stage on the Signoff Page.
If you are active for signoff, the Approve and Reject icons will be available in the Respond column.
User Signoff
To sign off on any object, select the Signoff tab from any object form.
If you are active for signoff, the Approve and Reject icons will be available in the Respond column.
| Icon | Command |
|---|---|
 | Approve |
 | Reject |
 | Add Comment |
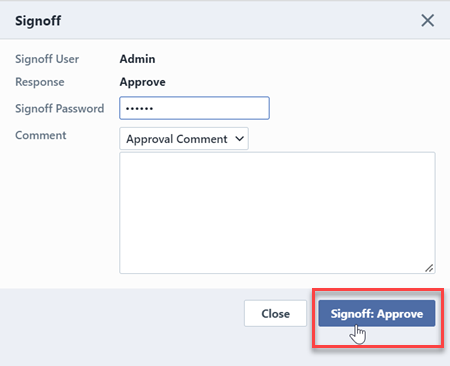
To approve or reject, click the appropriate icon. You will be asked to validate your response. You can also add a signoff comment.

If approval passwords are required (Empower Administrator), the user will be asked to provide the signoff password.
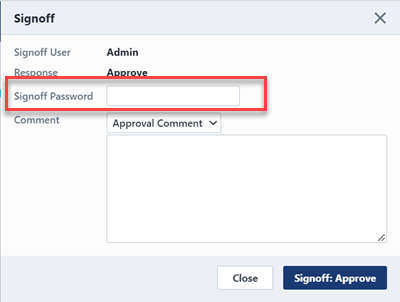
Click the Signoff: button to validate your response. Your signoff status will be displayed on the workflow.
When rejecting an object, the system will reset the signoff to the associated Reject stage (defined in the Workflow).
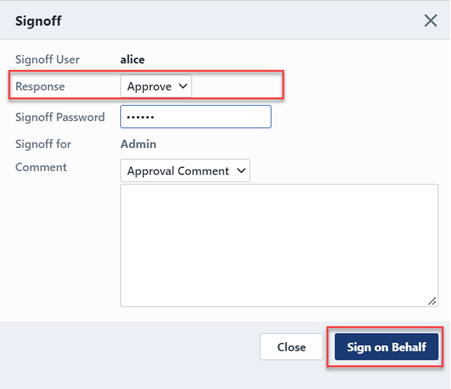
Sign on Behalf
Signoff users can also contain a Signatory. Signatories are users who can sign off on behalf of other users. Default Signatory users are defined in the Administrator. Signatory users can be assigned dynamically on a signoff list from the Edit Workflow pane.
Signatory users can now edit fields while performing signatory duties on Item, Change, Quality, Project, Vendor Item, Vendor, or Service Objects that require a signoff. The fields that a signatory user can edit are based on the signatory user's own permissions and not the user the signatory is acting in proxy for. Previously, signatory users could only sign-off.
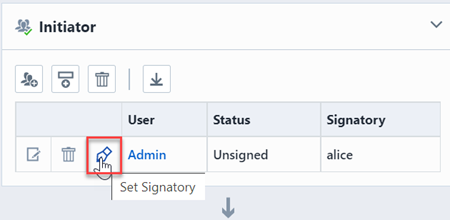
The Signoff Page will display the authorized signatory for each user. If you are an authorized signatory, the Sign on Behalf icon will be enabled. Clicking the Sign on Behalf icon will invoke the Sign on Behalf panel.
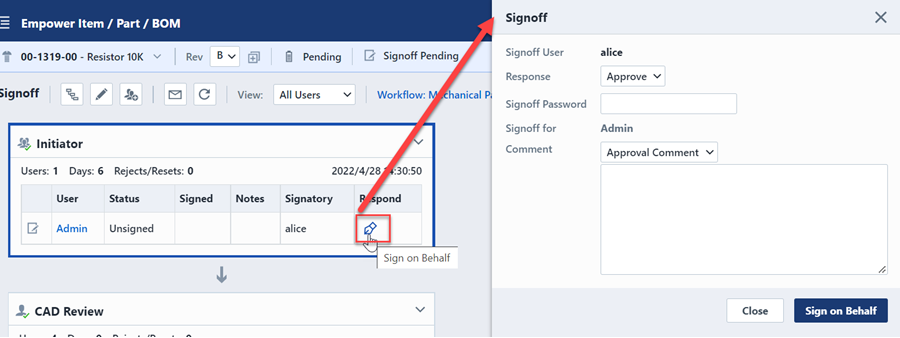
The Sign on Behalf dialog box allows you to add a signoff comment. If the Administrator has enabled the signoff password requirement option, the user will be forced to provide their signoff user name and password.
To approve (or reject) the object, select the Approve or (Reject) option and then click the Sign on Behalf button.