Change/ECOs
Change/ECOs
Overview
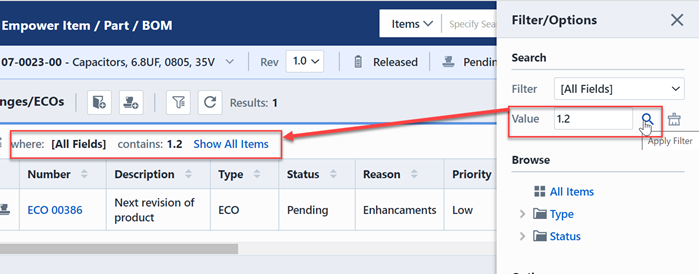
The Changes/ECOs page will display all formal changes and CAPA objects that have been raised against the item.
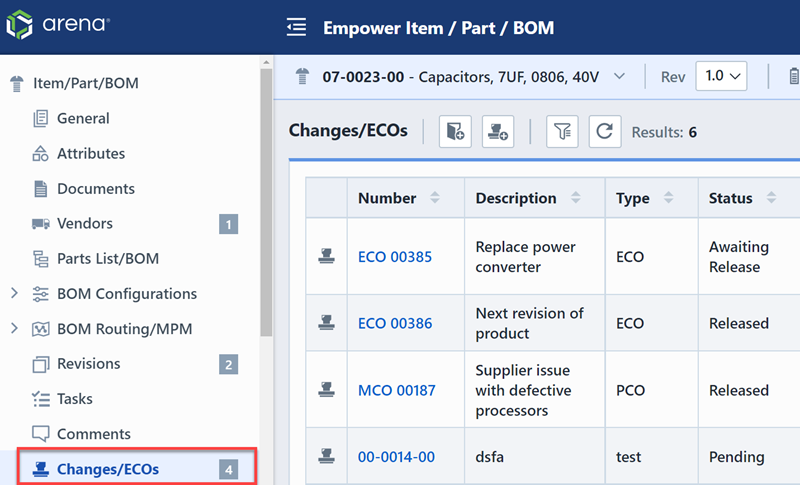
The Changes/ECOs Toolbar contains the following commands:
| Icon | Command |
|---|---|
 | Assign to an existing Change/ECO or Quality/CAPA item |
 | Create a new Change/ECO and assign the item to it |
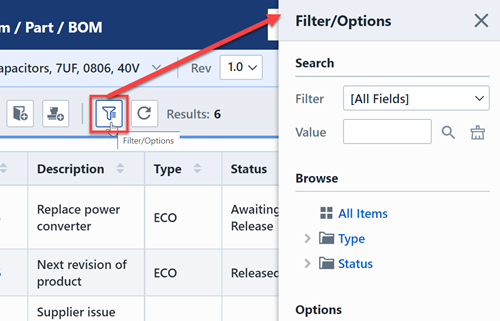
 | Show/Hide the Search/Filter Options Panel |
 | Refresh/Reload the list |
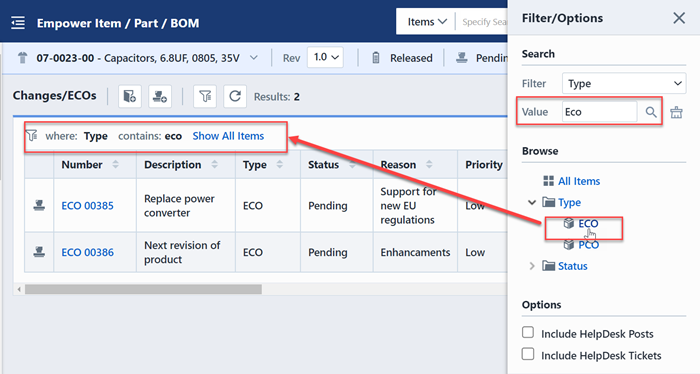
Using the Options Panel allows you to include/exclude various object types. By Default, just the Changes/ECOs objects will be enabled.
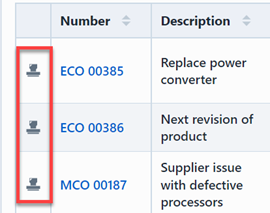
The list contains a type icon column which indicates the object type.
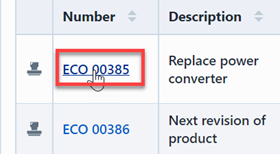
To open any object on the list, click the hyperlink on the number column.
Options Panel
The Changes/ECOs page can display associations to the following objects:
- Changes/ECOs
- Quality/CAPA Items
- HelpDesk Posts
- HelpDesk Tickets
Using the Options Panel allows you to include/exclude various object types. By Default, just the Changes/ECOs objects will be enabled.
The Options Panel also provides a Search option which allows you to filter the list based on any field.
Assigning
To assign the item to an existing Change/ECO or Quality/CAPA item, click the Assign toolbar button. The Assign to Change/Quality/CAPA Item panel will appear.
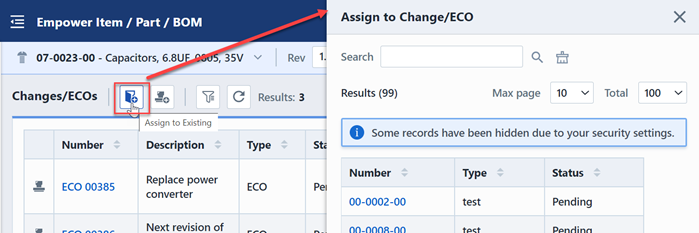
You can then search to find the desired item.
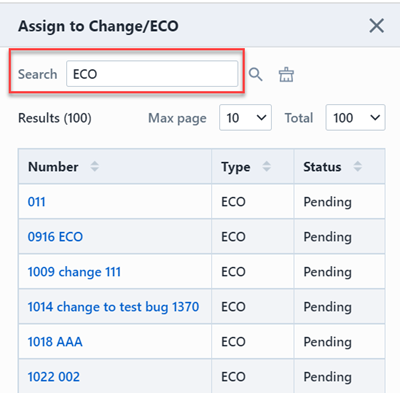
The search form will list all pending items. To assign the item to the object, click the Number hyperlink.
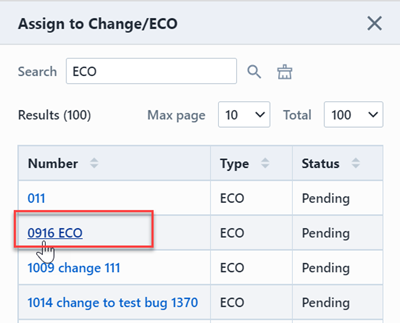
This will launch the object and automatically assign the item to it.
Refer to the Change Management section for more information on affected item rollup.
New Change/ECO
To create a new Change/ECO or Quality/CAPA object and assign the item as an affected item, click the Create New toolbar button. This will display the Create a New Change/ECO panel.
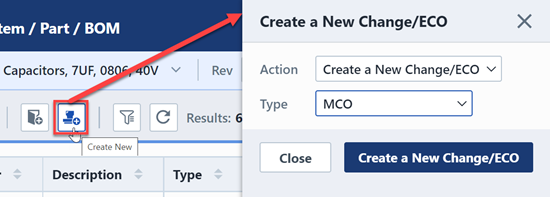
You will be able to select the desired object and type.
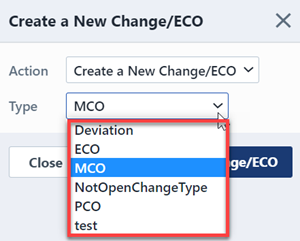
Clicking the Create New button will invoke the New Object Wizard. The item will appear on the affected items list once the new Change/ECO or Quality/CAPA object has been created.