Common Features
Common Features
Overview
Desktop contains many common concepts and features that are available throughout the modules and forms.
| Section | Description |
|---|---|
| Search Widget | Quick object search available on all forms |
| Title Banner | Common title bar functions and menu on all forms |
| Slide-out Panels | Editing/Viewing dialog boxes/panels that can be repositioned and "pinned" |
| Page Navigation | Navigation bar and sub-page viewing |
| Option Files/Themes | Guide files to customize the user interface |
Search Widget
Many of the Desktop forms provide a Search Widget available near the top of the form.

The Search Widget provides database search capabilities from any form and contains the following key areas:
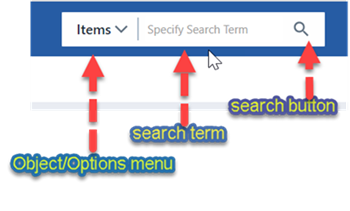
| Area | Function |
|---|---|
| Object/Options Menu | Provides access to object and search options |
| Search Term | Specify the term to search |
| Search Button | Executes the search |
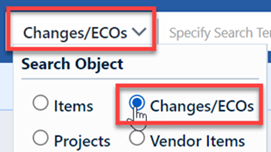
The Object/Options Menu allows you to select search objects and options. Clicking the menu will present the options form.
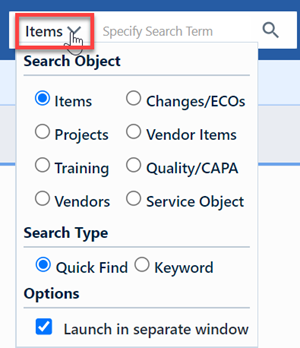
From the options menu, you will be able to select the search object.
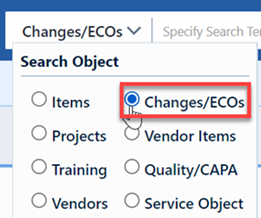
Selecting an object will change the option menu title and icon.
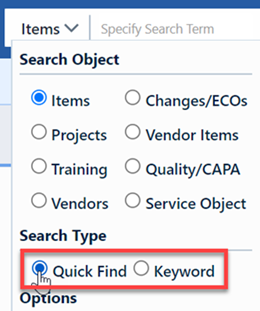
You can select the target search type as either Quick Find or Keyword.
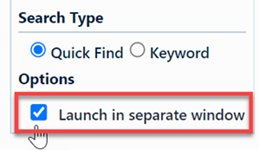
You can have the widget launch a separate browser window by checking the Launch in separate window option.
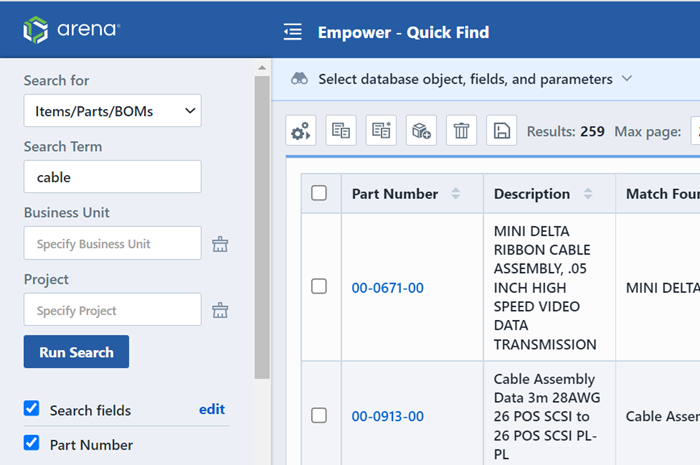
To execute a search, type a keyword into the Search Term field and click the Run Search button.

Based on your object and options, the search results window will appear and display the results of the search.
Title Banner
Each form in Desktop contains a Title Banner that contains the following features:

| Section/Feature | Description |
|---|---|
| Home Page Link | Clicking the Desktop icon will return you to the Home Page |
| User Image and Link | Displays the user's image. Clicking will open the user form. Users can upload their own user image. |
| Title Bar Menu | Clicking will display the title bar menu that contains object specific commands |
| Object Type | Displays the type of form/object |
| Object Title/Description | Specific description based on the selected object |
Clicking the Title Bar Menu will display the menu commands.
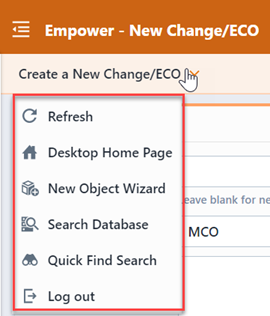
Each form will have common form functions, as well as commands for returning to the Home Page and logging out of the system. Many forms contain a Navigation Bar.
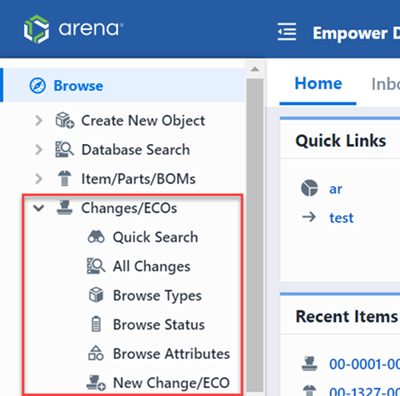
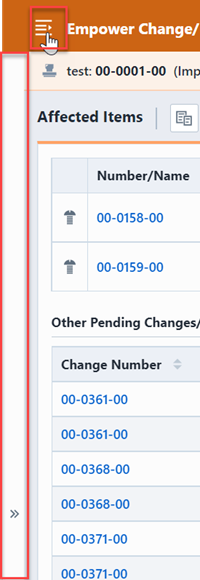
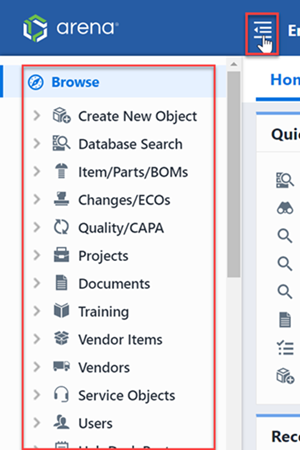
Forms that contain a Navigation Bar will also include a "Menu" button on the Title Bar. Clicking the Menu button will hide and show the Navigation Bar.
Slide-out Panels
Many forms contain slide-out panels that allow you to perform specific viewing and editing functions.
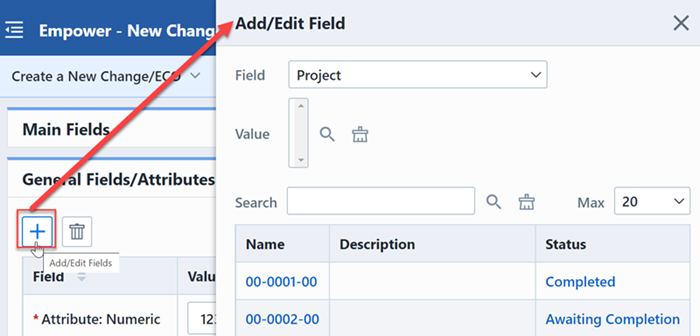
Slide-out panels provide independent scrolling from the main form.
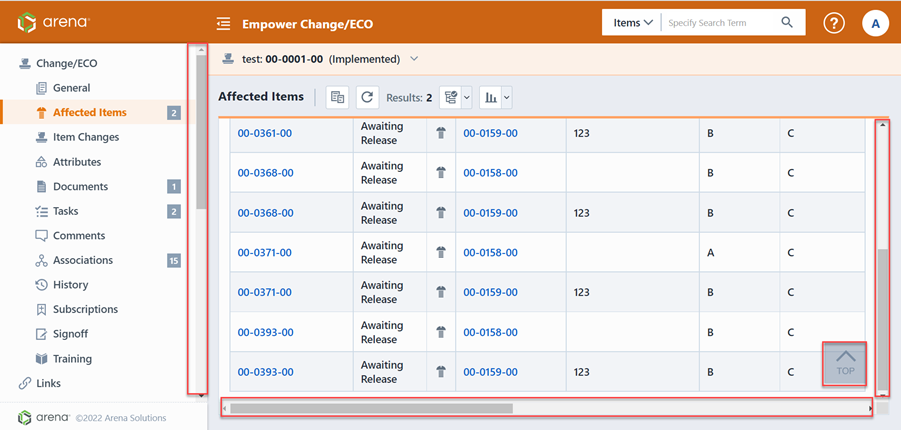
Page Navigation
Each Empower "object" (Items, Changes/ECOs, Quality/CAPA, Projects, Vendors, etc.) contains a main form with multiple sub-pages.
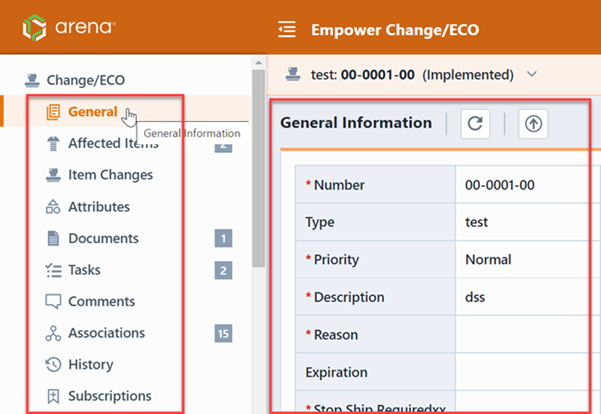
Each form has a page navigation bar that allows you to activate a sub-page.
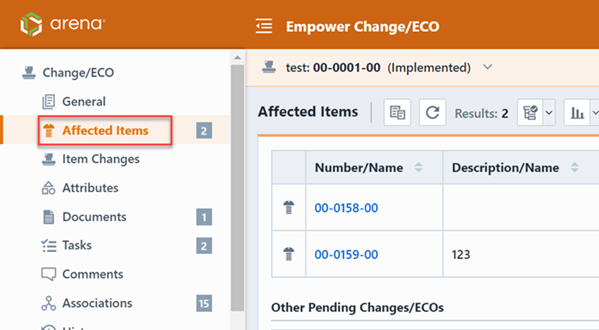
Clicking the Menu button on the Title Bar will hide and show the Navigation Bar.


When the navigation bar is hidden, a slide bar will be available.
You can view multiple sub-pages by holding the Control (Ctrl) button when clicking on the sub-page header.
Count Badges
Empower objects now contain count badges within the object navigation bar. Each number that appears to the right of the object view indicates the number of entries for that view within that object. For example in ECO-00070 below the badge count indicates that ECO-00070 currently has one Affected Items, one Documents, one Task, one Comment, one Subscription, and is associated with one other object.
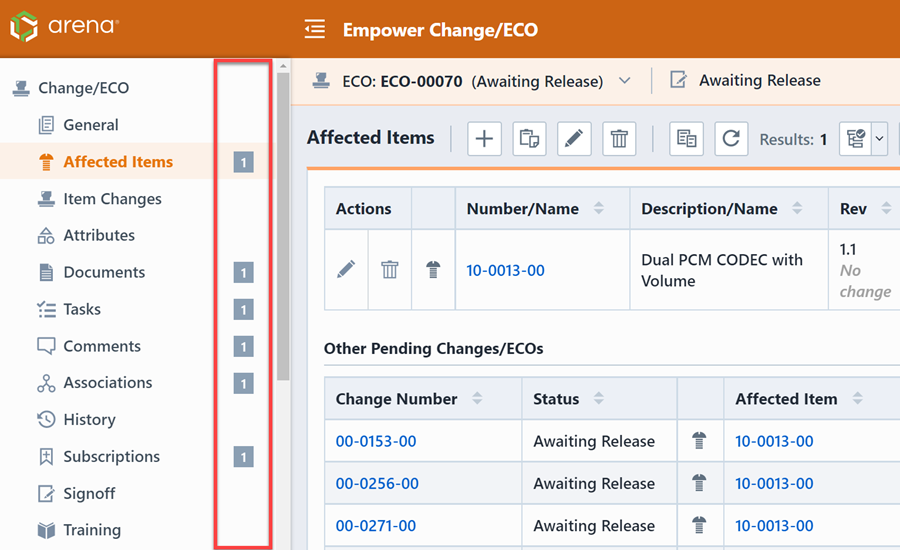
Not all object views support count badges. For Changes, like ECO-00070 above, count badges are not supported for the following pages: General, Item Changes, Attributes, Signoff, and History. Here's a quick table on objects and the views that do not support count badges.
| Object | Object Views Where Count Badges Are Not Supported |
|---|---|
| Item/Parts/BOMs | General, Attributes, Signoff, and History |
| Change/ECO | General, Item Changes, Attributes, Signoff, and History |
| Quality/CAPA | General, Attributes, Signoff, and History |
| Projects | General, Attributes, Signoff, and History |
| Vendor | General, Attributes, Signoff, and History |
| Vendor Item | General, Attributes, Signoff, and History |
| Service Object | General, Attributes, Signoff, and History |
| Training | General, Attributes, Signoff, History, and Comprehension |
| HelpDesk Post | General and History |
| HelpDesk Ticket | General and History |
For Item count badges, the object view Changes/ECOs counts pending Changes only and the object view Quality/Issues counts pending Quality issues.
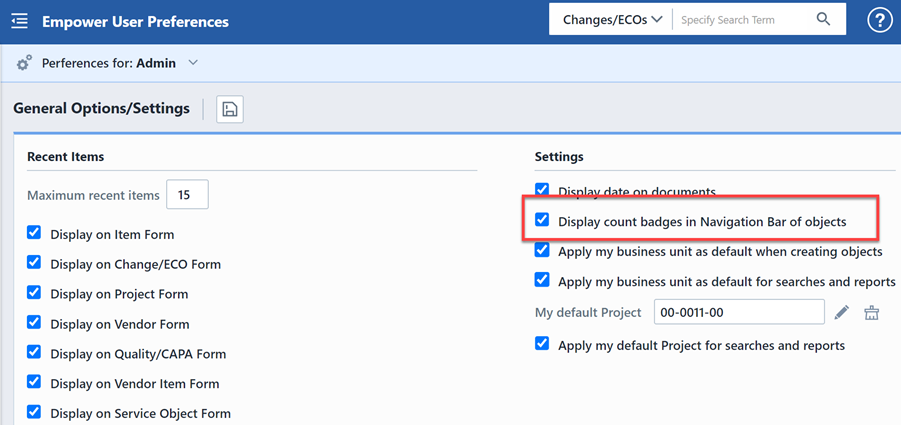
Empower users can enable object count badges by checking the box next to the setting Display count badges in Navigation Bar of objects and saving your settings within user Preferences. This setting is disabled by default.
Option Files/Themes
Desktop forms use Option Files to control most of the content on each form and sub-pages. Option files are XML based files that are created/approved by Empower and are available in the standard installation or can be downloaded through the Application Portal.
Option files can be grouped together to form a "Theme". Theme files (XML based) can be selected to automatically assign option files.
Empower objects (Items, Changes/ECOs, Quality/CAPA, etc.) and specific forms (Searching, Home Page, etc.) can be mapped to individual option files. Option files can be mapped on the User Preferences form. To launch the User Preferences, click the Preferences/Settings option from the Home Page Title menu.
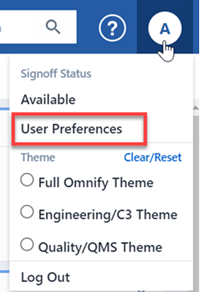
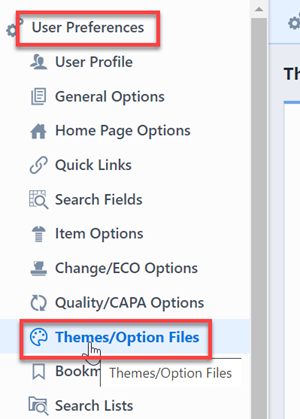
From the User Preferences form, select the Themes/Option Files page.
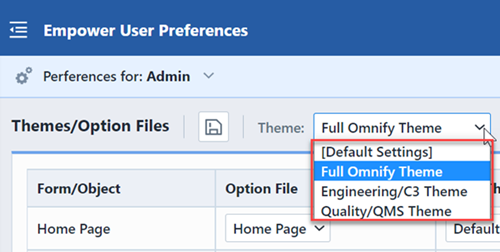
You can select a theme from the Themes drop list.
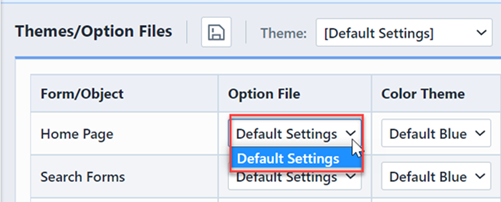
The Theme file can enable certain option files to be available for specific objects and forms. For those objects that have multiple option files, you will be able to select the option file from the option file drop list.
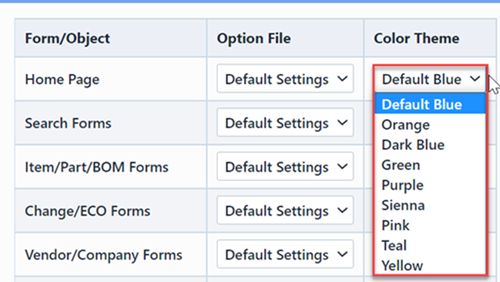
You can also set a color theme for each object.
Once all option files have been mapped, click the Save toolbar button.

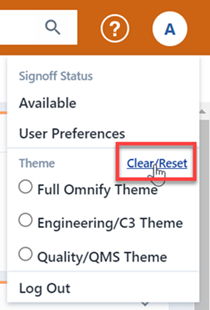
You can also change the Theme from the Home Page title menu.
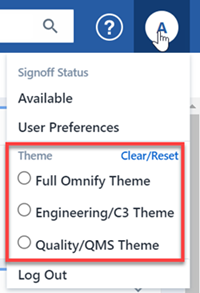
The Theme will automatically be applied to the system.
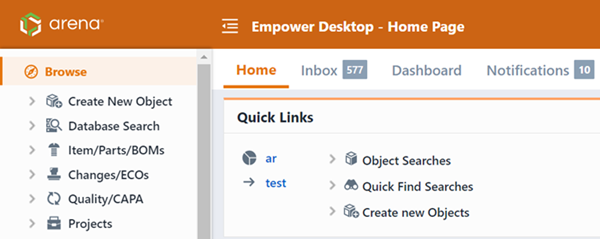
You can clear/reset the theme by clicking the Clear/Reset button from the Home Page title menu.
