Configuring Empower
Configuring Empower
Overview
The Empower Server applications and services are highly configurable to meet your specific requirements. Many of the options are controlled through an XML file (web.config) that resides in the virtual directory of your server installation (e.g.: C:\Program Files\Empower Software\Empower). Other settings are specified within the applications such as the Empower Administrator and Empower Desktop (User Preferences).
These settings should only be modified by (or with the help of) a qualified Arena Empower Application Engineer.
Database Connections
For the Empower Server applications and services to communicate with the correct database, you must then modify the web.config file to identify the Empower metadata, documents, and Toolkit databases. The Server applications and services use 3 connection strings:
- EmpowerDatabase
- connection string (http://www.connectionstrings.com) to the Empower metadata database
- EmpowerDocumentsDatabase
- connection string to the Empower documents database
- EmpowerToolkitDatabase
- connection string to the Empower Toolkit database
Note: Empower can be configured to use a single database or multiple databases, however 3 connection strings are always required even in the event of a single database.
To modify the connection strings/database pointers, go to the Server Home Page and click on *Configuration Server.

This page requires a password that can be obtained from your qualified Empower Application Engineer
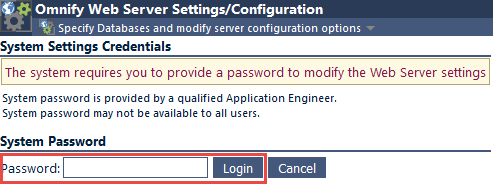
Once a valid password has been provided, you will be able to modify/configure various server settings
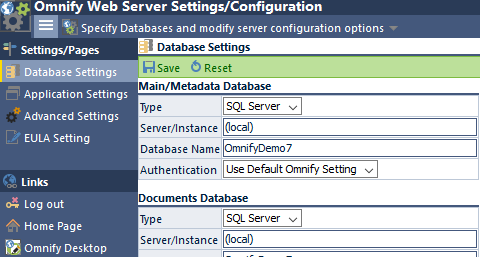
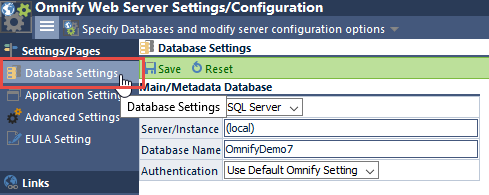
To modify the database connection strings, select the Database Settings page.
On this page you will be able to define the settings for each connection.
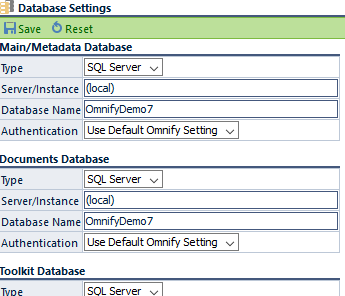
For each connection you will be able to define:
| Type | Select the database type |
|---|---|
| Server/Instance | Server name (or IP Address) as well as an "instance" reference (if necessary) |
| Database Name | Specify the name of the database |
| Authentication | Use the default user or specify your own user |
Mail Services
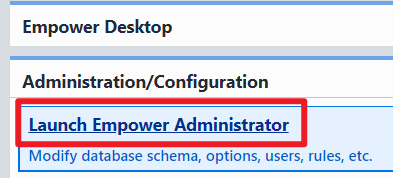
The Empower applications can be configured to send automatic and interactive email to users. All email settings are defined in the Empower Administrator. To set the email settings, launch the Empower Administrator from the Empower Server Home Page.
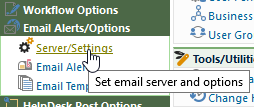
From the Empower Administrator navigation tree, select the Server/Settings page under the Email Alerts/Options section.
All email settings are assigned in the Mail Settings section. You can define/modify the following settings:
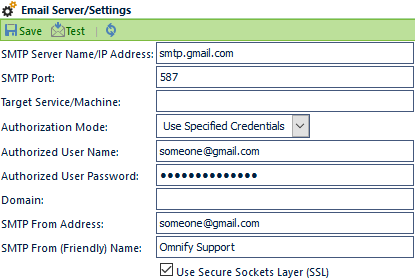
| Setting | Description |
|---|---|
| SMTP Server Name/Address | Specifies the Mail Server name or IP Address |
| SMTP Port | Specifies the outgoing TCP Port for mail traffic (usually 25 or 465 [SSL]) |
| Authorization Mode | Select the authorization mode the applications should use to authenticate and send mail through the mail server. Options include:
|
| Authorized User Name | When the Use Specified Credentials option is selected, this setting defines the username to use for authentication |
| Authorized Password | When the Use Specified Credentials option is selected, this setting defines the password to use for authentication |
| Domain | When the Use Specified Credentials option is selected, this setting defines the domain to use for authentication |
| SMTP From Address | Specifies the email address that the messages are to be sent from |
| SMTP From (Friendly) Name | Specifies the user name that will appear as the "From" field in the user's mailbox |
| Use Secure Sockets Layer (SSL) | When checked, email will use Secure Sockets Layer (SSL) to send mail. |
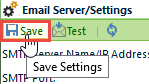
Once all necessary settings have been defined, you can test the mail services by clicking the Test Settings link.
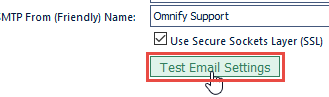
You can save the settings by clicking the Save toolbar button.
Document Vaulting
When vaulting documents, Empower can be configured to store the documents in the following locations:
| Location | Description |
|---|---|
| Documents Database | Entire document is stored in a database, no physical file is present/available. When a user requests a document, the Empower services create the physical file from the database and transmit it to the user. |
| File/Folders-based | Each vaulted document is stored as a physical file in a protected area of the server. Physical files are renamed with unique identifiers that are known to the databases and services. When a user requests a document, the Empower services rename the stored file to the original file name and then transmit it to user. |
There are benefits and drawbacks to each method. You should consult a qualified Arena Empower Application Engineer to determine the best setup for your environment.
In addition to the physical location of files, Empower's vaulted document services provide the following additional options for document storage:
| Option | Description |
|---|---|
| Single Server, Single Document Database | The default architecture of the vaulted document services and database is to have a single server that manages a single document database. In this scenario, all vaulted documents are stored in a single document database. |
| Single Server, Multiple Document Databases | In this scenario, 2 or more document databases can be created on the Empower Server and the services can be modified to determine the best location for storing the file content. Advantages to this configuration include smaller database files, more intuitive document locations, and improved upload/extract performance. |
| Multiple Servers – Replicated Document | Using this configuration, the web services will write document content to 2 or more servers when documents are checked-in/uploaded. Advantages to this configuration include automatic document backups and improved extraction/viewing for various client locations. This configuration is common for customers with multiple, remote, locations/sites where network performance is a concern. |
| Multiple Servers – Split Document Storage | Similar to the previous configuration, the web services can determine the location to store the contents of a particular file. The additional benefits of using this configuration include smaller and more intuitive document databases. |
| Hybrid – Vaulting/File Based Storage | The vaulted document services can store document contents in either the document database or maintain the file as a physical file on the server. The services also allow employing a "hybrid" approach where some files are stored in the database and others stored as physical files on the server. The benefits of this configuration include smaller documents databases, access to files without going through Empower, and ability to leverage other file storage systems. |
You can configure the system to manage the files in multiple locations. Locations can be configured in the Empower Administrator.
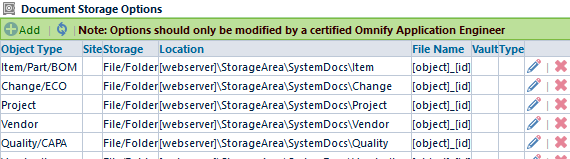
You should contact your Empower Application Engineer for more information on setting folder/file locations.
Security/Folders
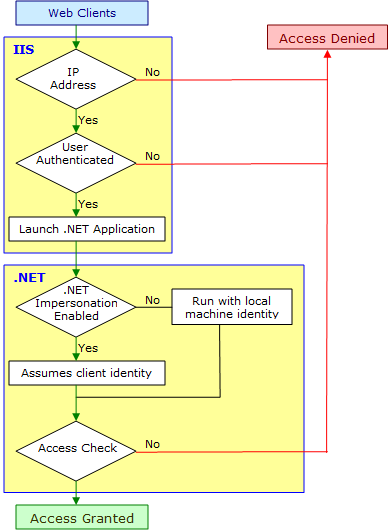
.NET application security configuration and IIS security configuration are completely independent and can be used independently or in conjunction with each other.
IIS maintains security related configuration settings in the IIS database. However, .NET maintains security (and other) configuration settings in XML configuration files (web.config).
The following figure illustrates the relationship between IIS and .NET.
.NET implements authentication using authentication providers, which are code modules that verify credentials and implement other security functionality such as cookie generation. .NET supports the following three authentication providers:
- Forms Authentication
- Using this provider causes unauthenticated requests to be redirected to a specified HTML form using client side redirection. The user can then supply logon credentials, and post the form back to the server. If the application authenticates the request (using application-specific logic), .NET issues a cookie that contains the credentials or a key for reacquiring the client identity.
- Passport Authentication
- This is a centralized authentication service provided by Microsoft that offers a single logon facility and membership services for participating sites.
- Windows Authentication
- This provider utilizes the authentication capabilities of IIS. After IIS completes its authentication, .NET uses the authenticated identity's token to authorize access.
<!-- web.config file -->
<authentication mode = "[Windows/Forms/Passport/None]">
</authentication>
Authentication Using Windows
For accounts Using Windows Authentication mode, you can use accounts maintained by a Windows domain controller or Active Directory. When authentication happens using this method, .NET constructs and attaches a Windows Principal object to the application context based on the authenticated user. As a result, the .NET thread can run as the authenticated user and can obtain the user's group membership.
Impersonation and Delegation
With impersonation, .NET applications can optionally execute with the identity of the client on whose behalf they're operating. Impersonation is usually performed for resource access control.
If impersonation is enabled, .NET will receive the token to impersonate from IIS. This is controlled by specifying a value in the application's Web.config file.
<identity impersonate="true"/>
To identify a specific account, use the name and password attributes:
<identity impersonate="true" userName="domain\user" password="passwd"/>
Many operations performed with Empower will interact with the physical file folders/directories of the web server. For example:
| Operation | Description/System Interaction |
|---|---|
| User checks-in/adds a document | The user specifies a local or shared document that they wish to "upload"/assign to an object. The web server accepts the local file and uploads it to a location accessible to the IIS server. The services then determine if the file is to be moved to a vaulted document area or loaded into the documents database. |
| User checks-out/views a document | The service determines the location of the physical file (folder or database) and copies or creates the file to a location accessible to the IIS server. The service then transmits the file (through the browser) from the accessible location. |
| User imports a BOM | The user specifies a local or shared document that they wish to "upload"/assign to be read and assigned as BOM items. The web server accepts the local file and uploads it to a location accessible to the IIS server. The services then read the local file for its contents as BOM child items. |
There are many scenarios like this in which the system needs to access and create files on the Web Server. The system will use the system security settings as assigned to the .NET user (as described above).
Thus, for the system to operate correctly, the .NET user must have access to the files\folders for these operations. Most of the locations are configurable in the web.config file. By default, you should provide read/write access for the .NET user to the following locations:
| Location | Default Folder | Description |
|---|---|---|
| StorageArea | C:\Program Files (x86)\Empower Software\Empower\StorageArea | Default location for File/Folders-based vaulted files. |
| TempUpload | C:\Program Files (x86)\Empower Software\Empower\TempUpload | Default/temporary area that the system uses when a user uploads a file for vaulting, import, etc. |
| VaultView | C:\Program Files (x86)\Empower Software\Empower\VaultView | Default/temporary area that the vaulting services use to create/copy vaulted files that a user would like to view/check-out. |
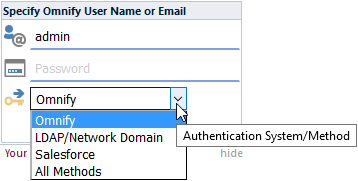
Login Methods
Empower administrators can define various login methods such as:
- Empower
- Use the traditional Empower database user name and password as defined in the Empower Administrator
- LDAP
- Lightweight Directory Access Protocol, looks up users and validates passwords as defined in LDAP by a network administrator (i.e. your network username and password)
- Salesforce
- Uses your Salesforce username and password. The system will use the OAuth REST services available.
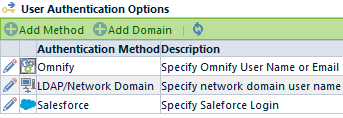
When more than one method is enabled, the system will provide a "Method" list on the login page.
Refer to the Administrator User's Guide for more information on setting up authentication methods.