Installation/Setup
Installation/Setup
Overview
The Empower installation and setup consists of 3 main components:
- Database Server
- Server running either SQL Server 2012, 2012, 2014, or 2016 (recommended)
- Application Server
- Server running Microsoft IIS, .NET Framework, and the Empower applications
- Web Services
- Server running Microsoft IIS, .NET Framework, and the Empower Web Services
Note: all 3 components can be installed on the same or different machines.
Database Server
The setup of the database server consists of installing Microsoft SQL Server (2012, 2014, or 2016). Microsoft SQL Server can be obtained from the Microsoft web site.
Application and Web Services
The Empower Server Applications and Web Services are installed using the Empower Server installation. The Empower Server installation is available from the Arena Empower Downloads page.
The Empower Server installation and setup consists of the following steps:
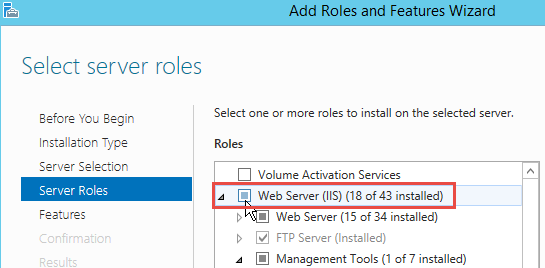
Installing/Enabling IIS
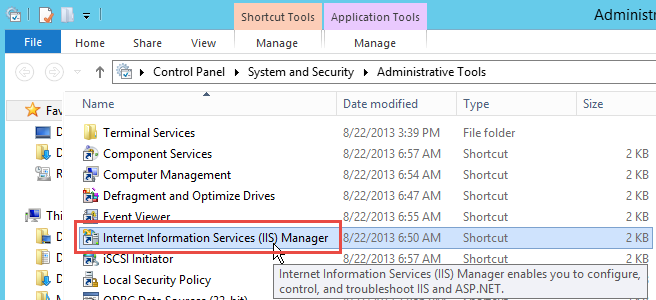
Internet Information Services (IIS) is Microsoft's Web Server that runs on most Microsoft operating systems. Many systems will automatically come configured with IIS installed and running.
To check if IIS is installed, go to the Administrative Tools section of the Windows Control Panel.
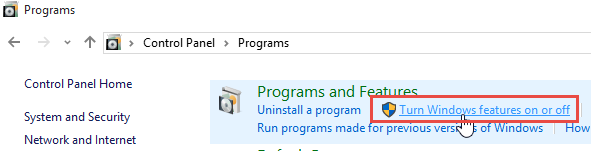
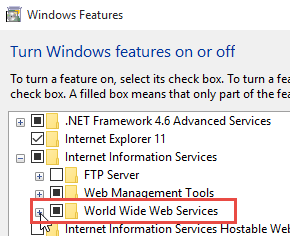
If IIS is not installed:
On a Windows "client" operating system, go to the "Turn Windows features on or off" option in the Programs section of the Windows Control Panel.
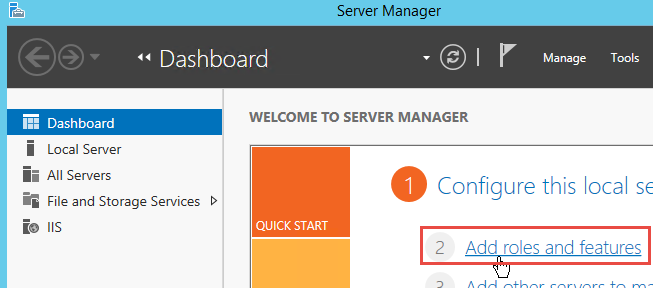
On a Windows "server" operating system, go to the "Add roles and features" option of the Server Manager.
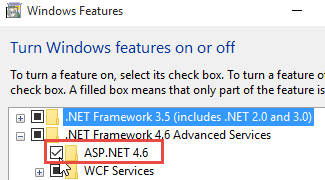
Installing/Enabling .NET
To install/enable the .NET Framework on a Windows "client" operating system, go to the "Turn Windows features on or off" option in the Programs section of the Windows Control Panel.
To install/enable the .NET Framework on a Windows "server" operating system, go to the "Add roles and features" option of the Server Manager.
Note: Empower requires .NET Framework version 4.8 or higher.
Installing the Empower Server
The Empower Setup Wizard/Installer can be downloaded at:
http://www.Empowersoft.com/downloads
This is the only installation required for Empower. This will be run/installed on your Empower Web Server.
Note: All applications run in a web browser. There is no client installation or setup required.
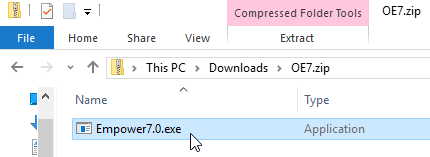
After downloading Empower, unzip the files and run the setup executable.
The first/title page of the Setup Wizard allows you to select the location for the server/web files.

The Setup Wizard can also create a test instance when the Create Test Site option is checked.

You can review the End User License Agreement by clicking the License terms and conditions link.

You must agree to the License terms before you will be allowed to continue.

The User Information page allows you to specify your name and organization.
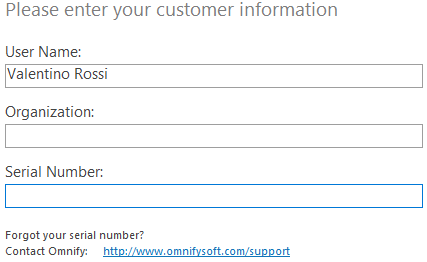
A valid Serial Number must be provided to advance. Your qualified Empower Application Engineer will provide you with your valid Serial Number.
The Web Site page of the setup wizard will allow you to define the virtual directories for the Production and Test sites.
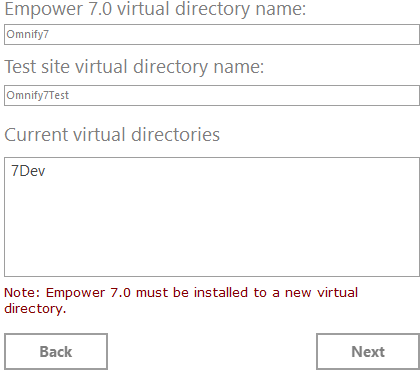
The Server Home page will be available at that address: http://[server_name]/Empower7
Administrators will need to send this address to the users.
The Advanced Options page allows you to set the following options:
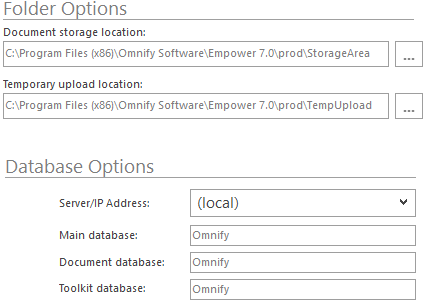
Folder Options
- The storage location for vaulted documents
- Location for temporary upload files (vaulting, importing, etc. operations)
Database Options
- Server/IP Address
- Main Database
- Documents Database
- Toolkit Database
Note: these settings will be applied to the Web.config file after the installation
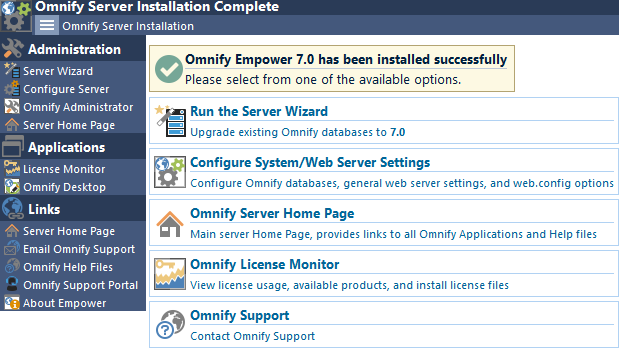
When the installation is complete, you will be able to close the wizard or launch the setup page.
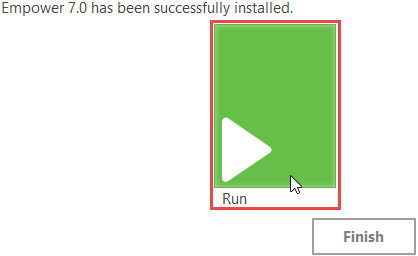
Click the Run button to launch the Empower Setup page.
Installing the Empower Database
The Empower Server install includes blank Empower databases, however most often your databases will be prepared for you by a qualified Arena Empower Application Engineer. These prepared databases will typically contain your own legacy data. The databases will be provided in the SQL Server Backup (.bak) format.
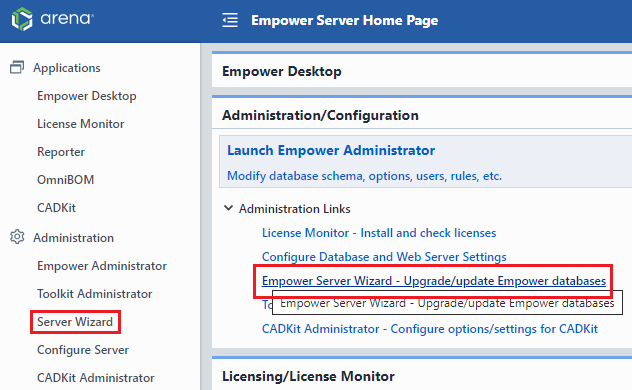
You can install blank and/or prepared databases using the Empower Server Wizard. You can launch the Server Wizard from the Server Home Page.
After launching the Server Wizard, you will be asked to connect to the Database Server before executing any of the Server Wizard operations.
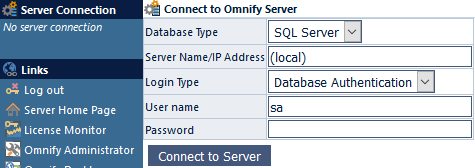
To connect to a server, first specify the IP Address or Name of the Empower Database Server. Once the server is specified, you will then be required to supply a database user name and password.
Note: this is not an Empower user name and password. The specified user name and password must be an internal SQL Server database user that has access to all databases including the master database. It is best to specify the built-in system administrator (sa) account.
Once the user and password are specified, click the Connect to Server button.

If you have logged in successfully, the system will redirect you to the database selection page.
The Information Pane will display the current connection.
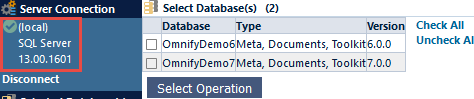
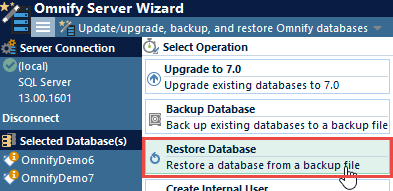
From the database selection page, click the Select Operation button.
To restore a database from a backup file, select the Restore Database option from the Operation Selection page.
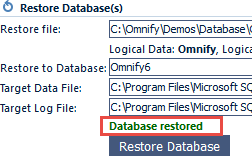
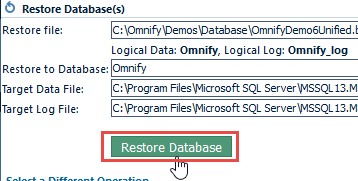
To restore a database, you must first specify/type the location of the backup file.

Once the backup has been specified, click the Read File button to load the file settings.

Once the file has been read, the system will display the original Logical Data and Log file names as well as set the options for the database name and location.
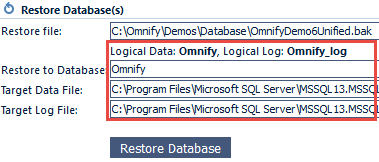
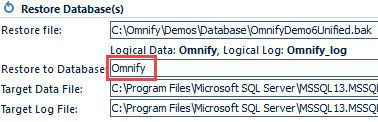
When you are restoring a database, you will be able to define the new database name.
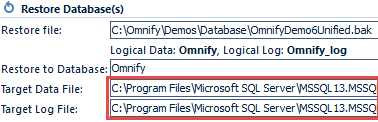
You can also set the location of the data and log files.
Once the database name and file locations are set, click the Restore Database button.
The status area will display the results of the Restore operation.