Solid Edge Adapter
Solid Edge Adapter
Overview
The Solidedge adapter can be used to generate BOMs from any Solidedge assembly. The Adapter reads the assembly directly from the Solidedge application. Each user will need a valid Solidedge license and have the application loaded on the same machine that is running CADKit.
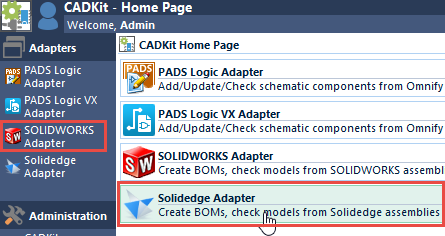
To open the Solidedge Adapter, select the adapter from the CADKit Home Page.
When the Solidedge adapter is launched, it will connect to a running instance of Solidedge. If Solidedge is not already running, CADKit will launch Solidedge.
Loading Assemblies
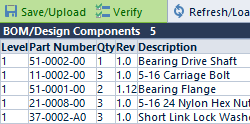
When the adapter is launched, it will read and load the currently open assembly. If no assembly file is open in Solidedge, the adapter alerts you.

Once an assembly is opened or changed in Solidedge, you can click the Refresh/Load Design toolbar button to reload the assembly.

When loading the assembly, CADKit will read/list the currently active configuration in Solidedge and display the open assembly file. You can change the Configuration by selecting it from the drop list.

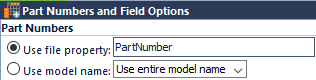
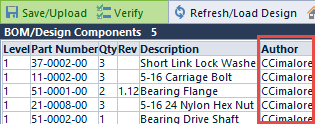
Part Numbers
CADKit links a Solidedge model/component to a unique Empower Item. When determining a link between the model and part numbers, you can use either a file property or the model name.
Fields
You can map Empower Rev and Description fields to specific model/file properties.

These fields will appear when loading an assembly in the adapter.
You can also define additional fields to be displayed in the adapter.

The field mappings are defined in the CADKit Administrator. For more information on field setup, refer to the CADKit Administrator section of this manual.
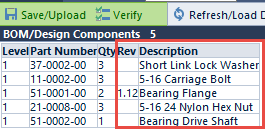
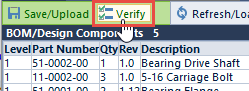
Verifying Items
The adapter contains a model verifier which will load components from the assembly and then search the Empower database to find matching part numbers. To launch the Verifier, click the Verify toolbar button.
The Verifier will search for each part number in the Empower database and, if found, compare the current revisions of the model and the revision in Empower. The Verifier will display the model revision and description as well as the active revision and description found in the Empower database.
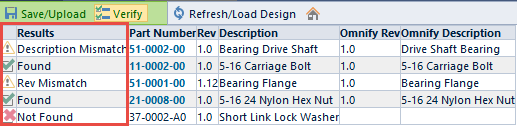
The Results field will indicate one of the following:
| Results | Description |
|---|---|
| Found | Part number was found in the Empower database |
| Not Found | Part number was not obtained from the model |
| Rev Mismatch | Part number was found in the Empower database; however there is a Rev difference between the item in Empower and the model file. |
| Description Mismatch | Part Number was found and the Revisions match between Empower and the model file, but there is a difference in the Description. |
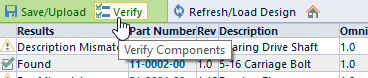
To close the Verifier, click/uncheck the Verify toolbar button.
You will be returned to the BOM view.
Uploading BOM
To Export or Upload the assembly BOM, make sure you are in the BOM view. Note: if you are in the Verifier view, click the Verify toolbar button again.
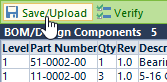
To Export or Upload, click the Save/Upload toolbar button.
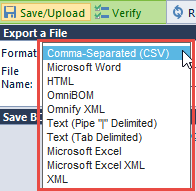
In the Save/Export Results area, you will be able to export to a variety of formats.
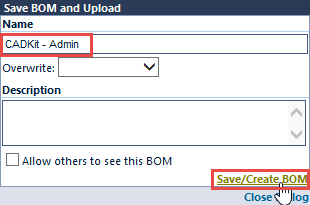
To upload the BOM directly to an Empower item or Change/ECO, select the Save BOM and Upload option.
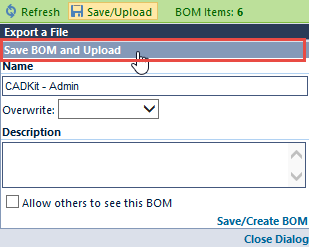
To upload a BOM, you must define a Name to the BOM and then click the Save/Create BOM button.
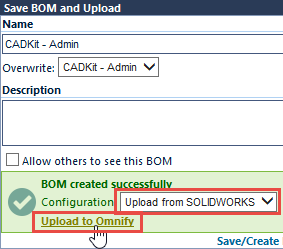
Once the BOM has been saved, you can select the upload configuration and then click the Upload to Empower button.
The Design Upload Utility will be launched and the BOM will appear.
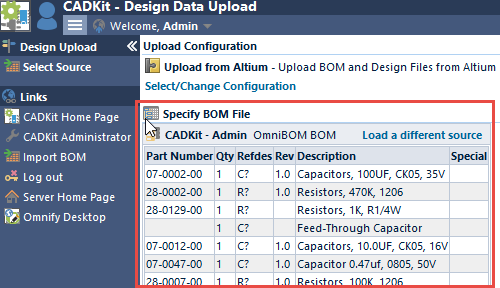
The Design Upload Utility will allow you to specify parent items and Changes/ECOs.
Refer to the Design Upload Utility section for more information on using the Upload Wizard.
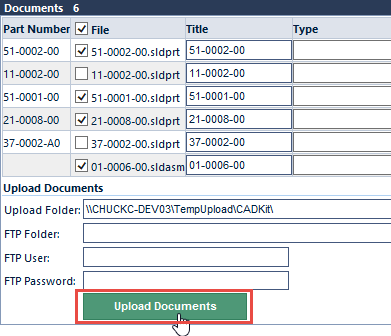
Uploading Documents
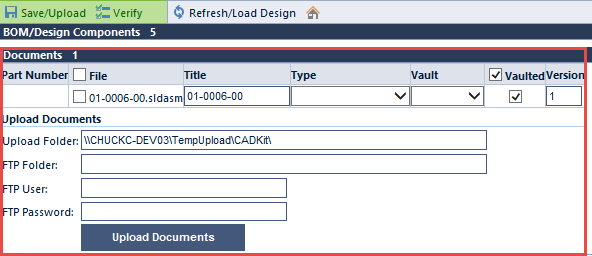
You can upload documents (model and assembly files) directly to Empower in the Documents section of the main form. All associated files will be listed.
The form will display all associated files and also provides a list of additional files. You can configure the system to automatically look for additional files by setting options in the CADKit Administrator. Refer to the CADKit Administrator section for more information on automatically including additional documents.
For each file, you will be able to assign a Title, Type, Vault, and Version.

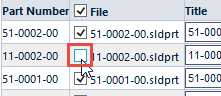
The list will also provide a checkbox for each file to define whether or not the file will be vaulted or linked.

If this option is checked, the file will be vaulted, if the option is unchecked, the file will be linked.
If you do not wish to include a specific file, you can uncheck the document checkbox.
To begin the upload process, click the Upload Documents button.