Design Upload Utility
Design Upload Utility
Overview
The CADKit Design Upload Utility provides users with a simply manner to upload information from various sources (such as MCAD, ECAD, manually created files, etc.). The Design Upload Utility will guide the users through the upload process. The Design Upload Utility allows administrators to create various "Configurations".
Each configuration allows you to define specific data sets (such as BOM, design files, etc.) to help guide users through the design upload process.
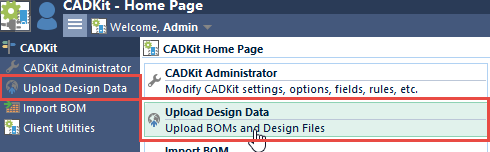
You can launch the Design Upload Utility from the CADKit links on the Server Home Page.

From the Design Upload Utility, you can select a Configuration by clicking the Select/Change Configuration button.
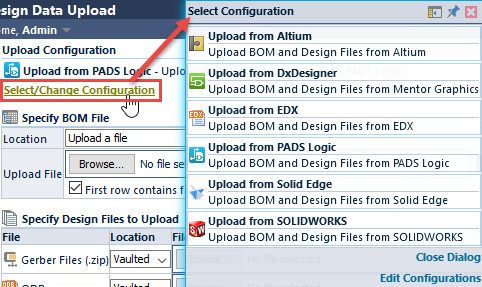
You can define/modify Configurations in the CADKit Administrator.
BOM Source
If the selected configuration has the BOM option enabled, the BOM upload/selection area will be displayed.

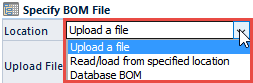
When selecting a BOM, you will be able to select one of the following options:
| Options | Description |
|---|---|
| Upload a file | Upload a local BOM file in the various supported formats (Excel, CSV, Text/Delimited, etc.) |
| Read/load from specified location | Specify a file in a location that can be read by the web server |
| Database BOM | A BOM stored in the Empower database |
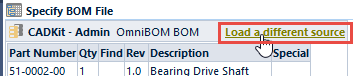
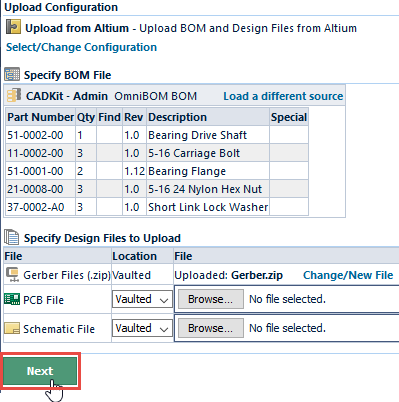
Once a BOM has been loaded, the utility will display the entire BOM contents.

You can specify a different BOM by clicking the Load a different source button.
Documents
If the selected configuration contains file options, the file requirements will be displayed in the Documents section.

To specify a file, click the Browse button to select a file.
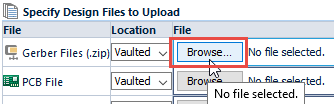
Once the file is specified, click the Upload File to load the file to the server.

Once the file has been uploaded, you can then define properties for each file.

Once the desired BOM and files have been specified, click the Next button to continue.
Source/Change Options
The next page of the Design Upload Utility allows you to define the parent item, how to implement changes, and map BOM fields.
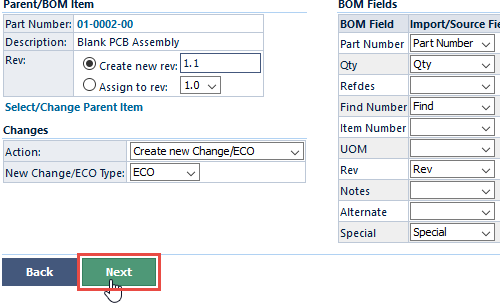
Parent/BOM Item
To implement the BOM and document changes, you must specify a Parent Item. To select a parent item, click the Select/Change Parent Item button to display the Select Parent Item panel.
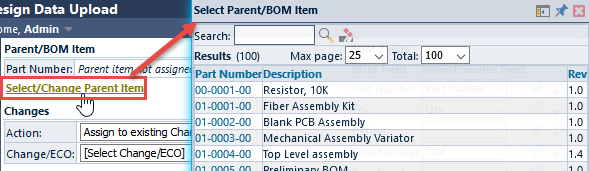
You can search the database to find the desired item.
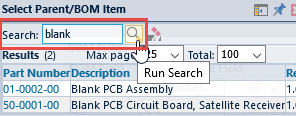
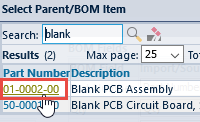
To set the parent item, click the number link.
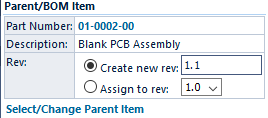
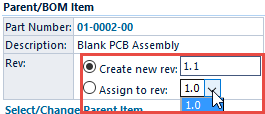
Once a parent item has been selected, you will then be able to assign the changes to a specific, existing revision or instruct the system to create a new revision.
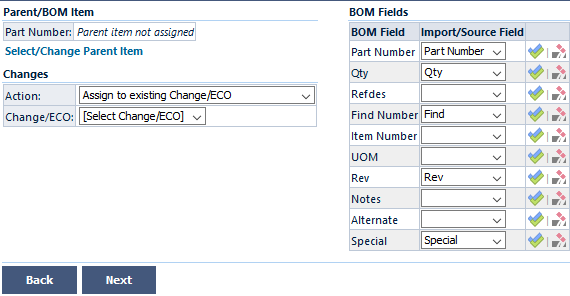
Change Options
You have 2 methods to implement the changes:
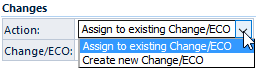
| Option | Description |
|---|---|
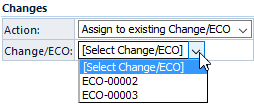
| Assign to existing Change/ECO | Assigns changes to an existing Change/ECO. You will need to select an existing Change/ECO. |
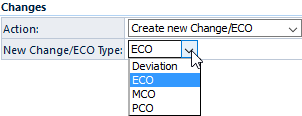
| Create a new Change/ECO | Assigns changes to a new Change/ECO. The system will create a new Change/ECO and apply the changes to that Change/ECO. |
If you assign the changes to an existing Change/ECO, you will be required to select a pending Change/ECO.
If you assign the changes to a new Change/ECO, you will be required to select a Change type for the new Change/ECO.
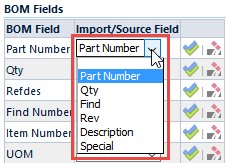
BOM Fields
If a BOM was specified, the BOM Fields section will be available.
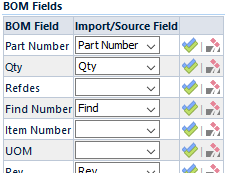
You will be able to map the source fields to Empower BOM fields using the drop lists.
Changes/Redlines
Once the Parent Item, Change Options, and BOM field mappings have been assigned, click the Next button to view the possible changes/redlines.
The final page of the Utility display all changes that will be implemented.
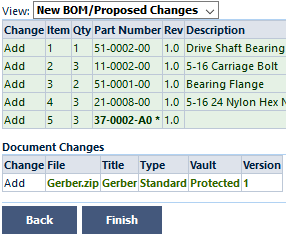
To apply the changes as defined, click the Finish button.