Creating Users
Creating Users
Overview
The Empower Tool Suite allows you to define an unlimited number of database users. Users can be internal company resources or "outsourced" resources (such as: Contract Manufacturers, System Integrators, Customers, Partners, etc.).
All Empower databases are shipped with a default user that has full privileges to all database functions:
- User Name : admin
- Password : admin
It is recommended that you either remove or change the password of this user once you have created your own users.
Administrator
All user information can be defined in the Empower Administrator.
To launch the Empower Administrator, visit the Empower Server Home Page using any Web browser with the URL: http://[Server Name]/[Empower Virtual Directory] (e.g. http://Empowerserver/Empower8).
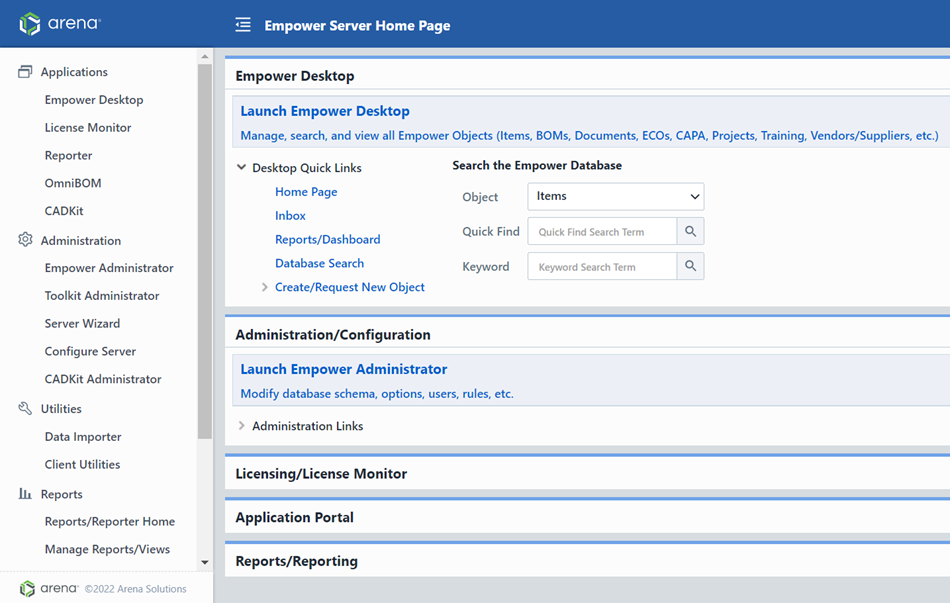
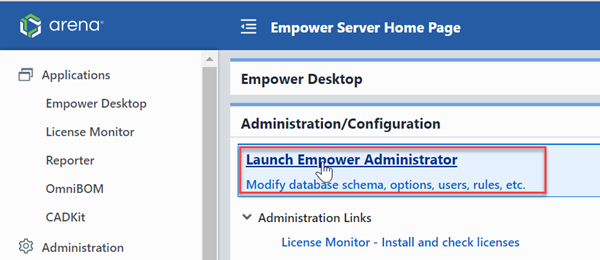
Select the Empower Administrator link from the Empower Server Home Page.
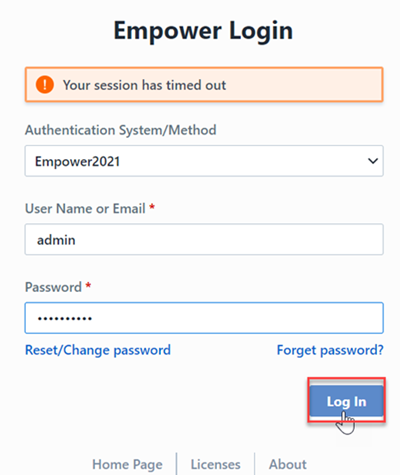
You will be asked to provide a user name and password. Note: you will need to specify a user that has Administrative privileges to access any areas/pages of the Empower Administrator.
To access the user information in the Administrator, select the Users item in the Navigation tree or Home Page.
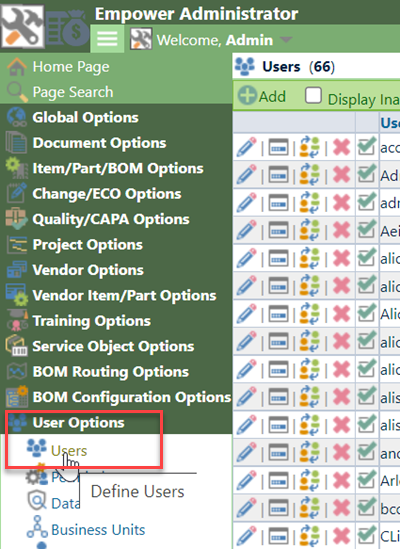
To add a user, click the Add User command from the toolbar.
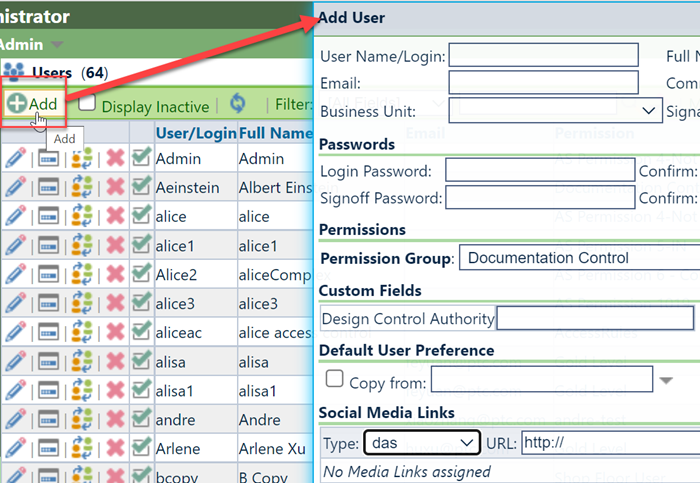
When defining users, you can define the following fields:
General
| Option/Field | Description |
|---|---|
| User/Login Name | The name the user will use when logging into the system |
| Full Name | Full Name of user |
| Email address | User's email |
| Comment/note | Additional user information |
| Business unit | User's business unit |
| Signatory | User who is allowed to sign on behalf of this user |
Passwords
| Option/Field | Description |
|---|---|
| Password | User's password (note: users can modify their own password from any login screen) |
| Signoff Password | Password to be used when user signs any object. |
Permissions
| Option/Field | Description |
|---|---|
| Permission Group | User's permission group |
| Administrator login | Enable/Disable option to allow user to log in to the Administrator |
Custom
| Option/Field | Description |
|---|---|
| Custom Fields | Additional user fields |
Permissions
When defining a user, you must specify the user's Permission Group.
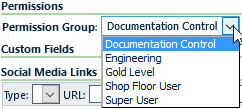
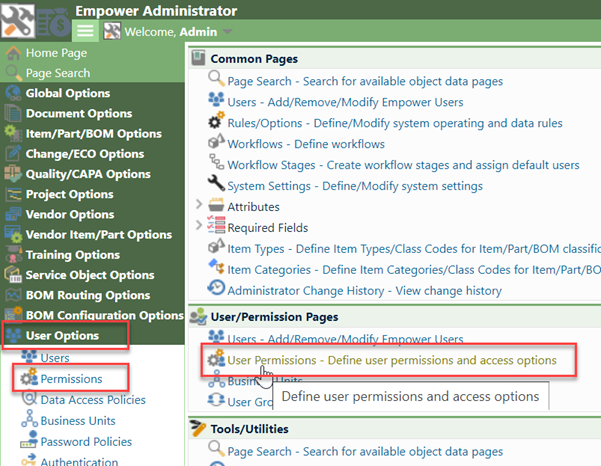
You can create and modify Permission Groups on the Permissions page of the Administrator.
To create a new permission group, click the Add button.

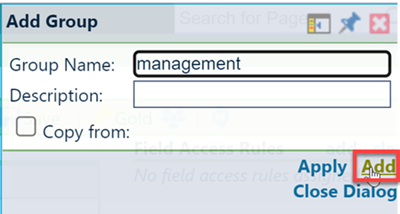
Once the group is added/selected in the group list, you can then select the available options for that group.
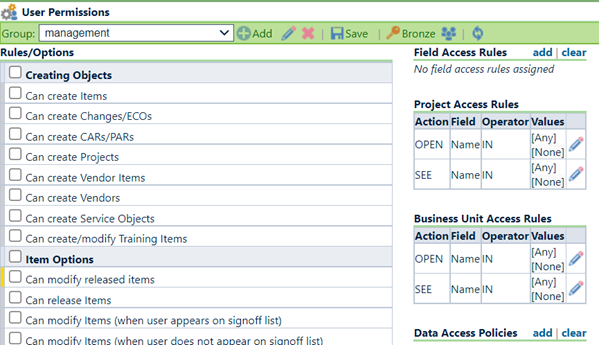
As you select certain options and save the settings, the license requirement will update displaying the type of license that will be requested by a user in that permission group. You can also define/limit user's access to certain objects and documents by specifying various Prohibited field options.

The system provides a color-coded display to indicate the required license level for each option.
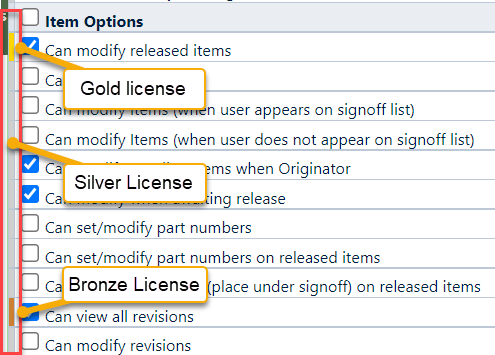
License Options
Desktop users will check out a license upon login. The type of license will depend on the user's permission settings. The following list gives a general overview of each license type and its capabilities; however, individual permission can be adjusted by the permission group.
| License Type | General Capability |
|---|---|
| Bronze | Read only and electronic signoff |
| Silver | Bronze level options and permission to raise Part Requests, Changes/ECOs, CAPA Objects, Projects |
| Gold | Silver level options and permission to release Changes and CAPA Objects, as well as the ability to modify released Items |