Watermarking
Watermarking
Empower 8.5 introduced Watermarking, which allows administrators to create an Overlay, Header, and Footer that can be applied to documents in their system. Watermarks can be applied to all .pdf, .doc, and .docx files. These watermarks can include dynamic variables related to the Part Revision that the document is related to, including the Part's Number, Revision, Revision Effective From Date, Lifecycle, Pending Changes, and the document's Print Date.
Requirement: Watermarking requires the Watermark license for your workspace. Check to see if you have this license in the Empower License Monitor. If not active, please talk with Empower Customer Support to add it. ![Empower Watermark license]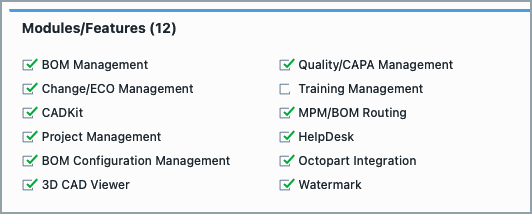
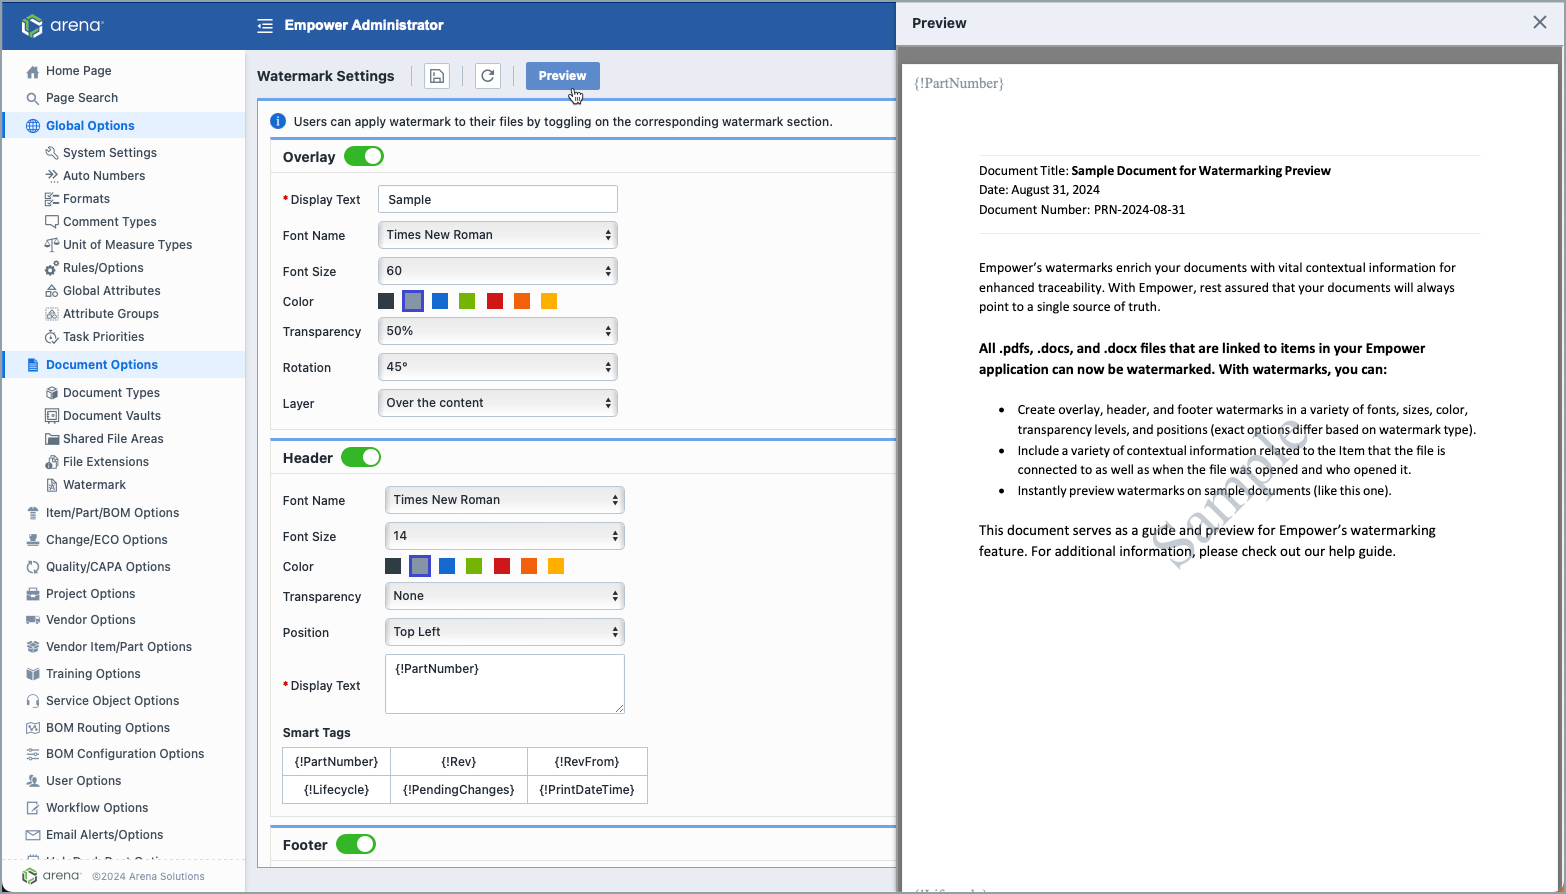
Here is an example of a watermark with an overlay, header, and footer that incorporate dynamic variables: 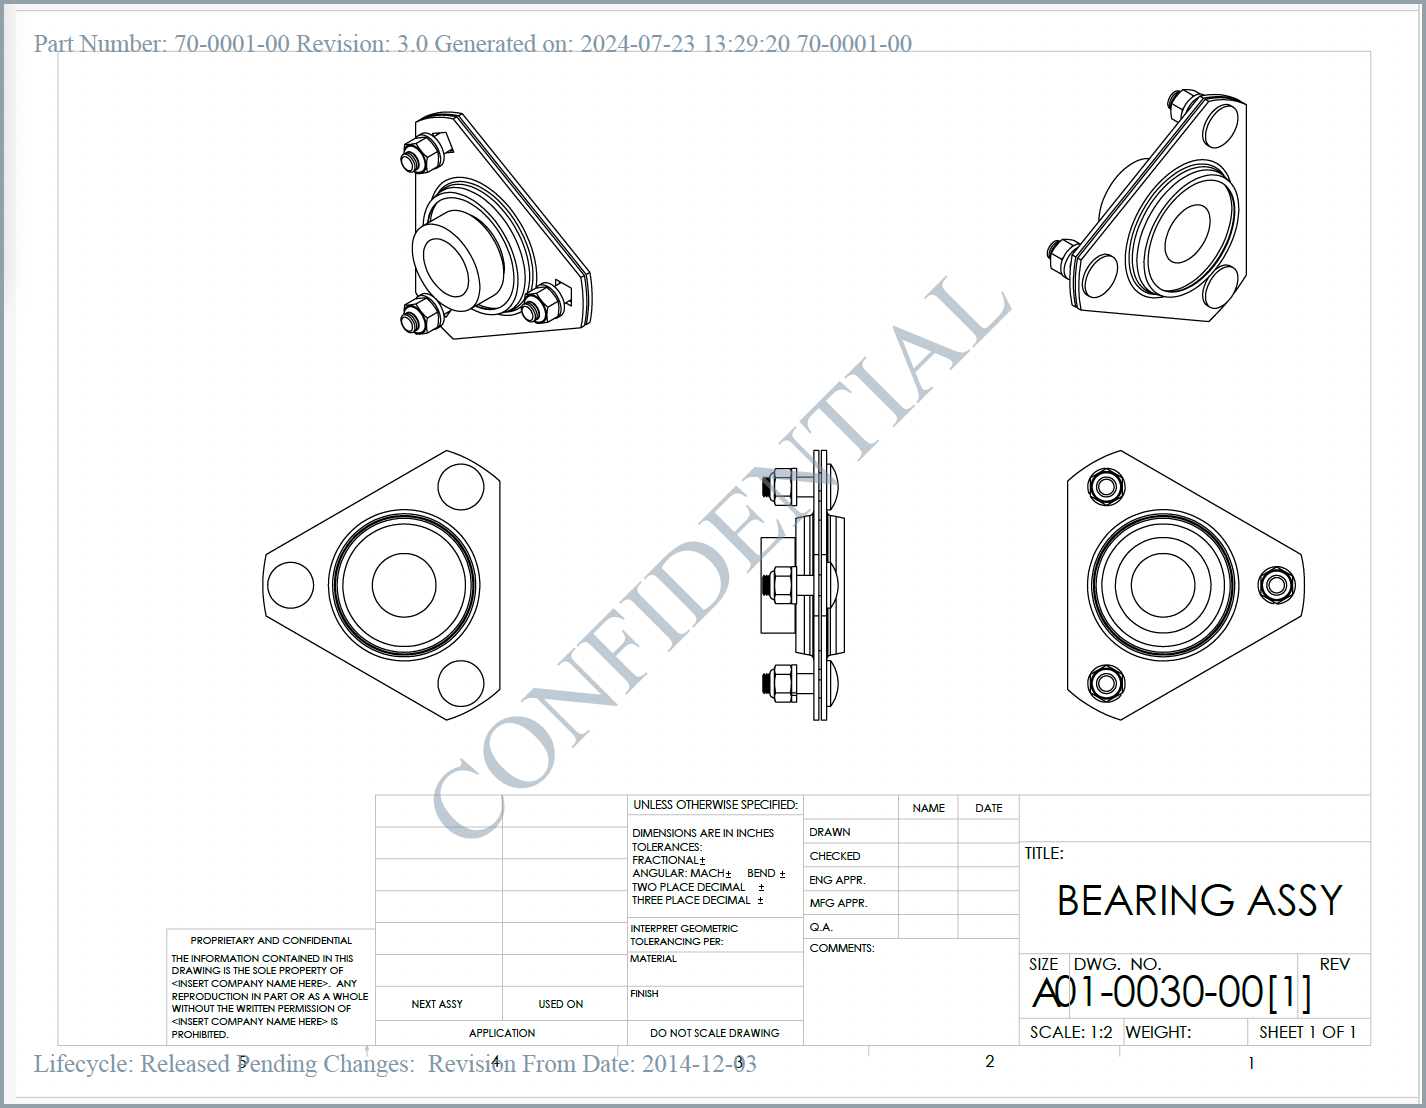
Note: Watermarking requires documents to be sent from your on premises server to a secure Arena online system for processing.
Viewing a Watermarked File
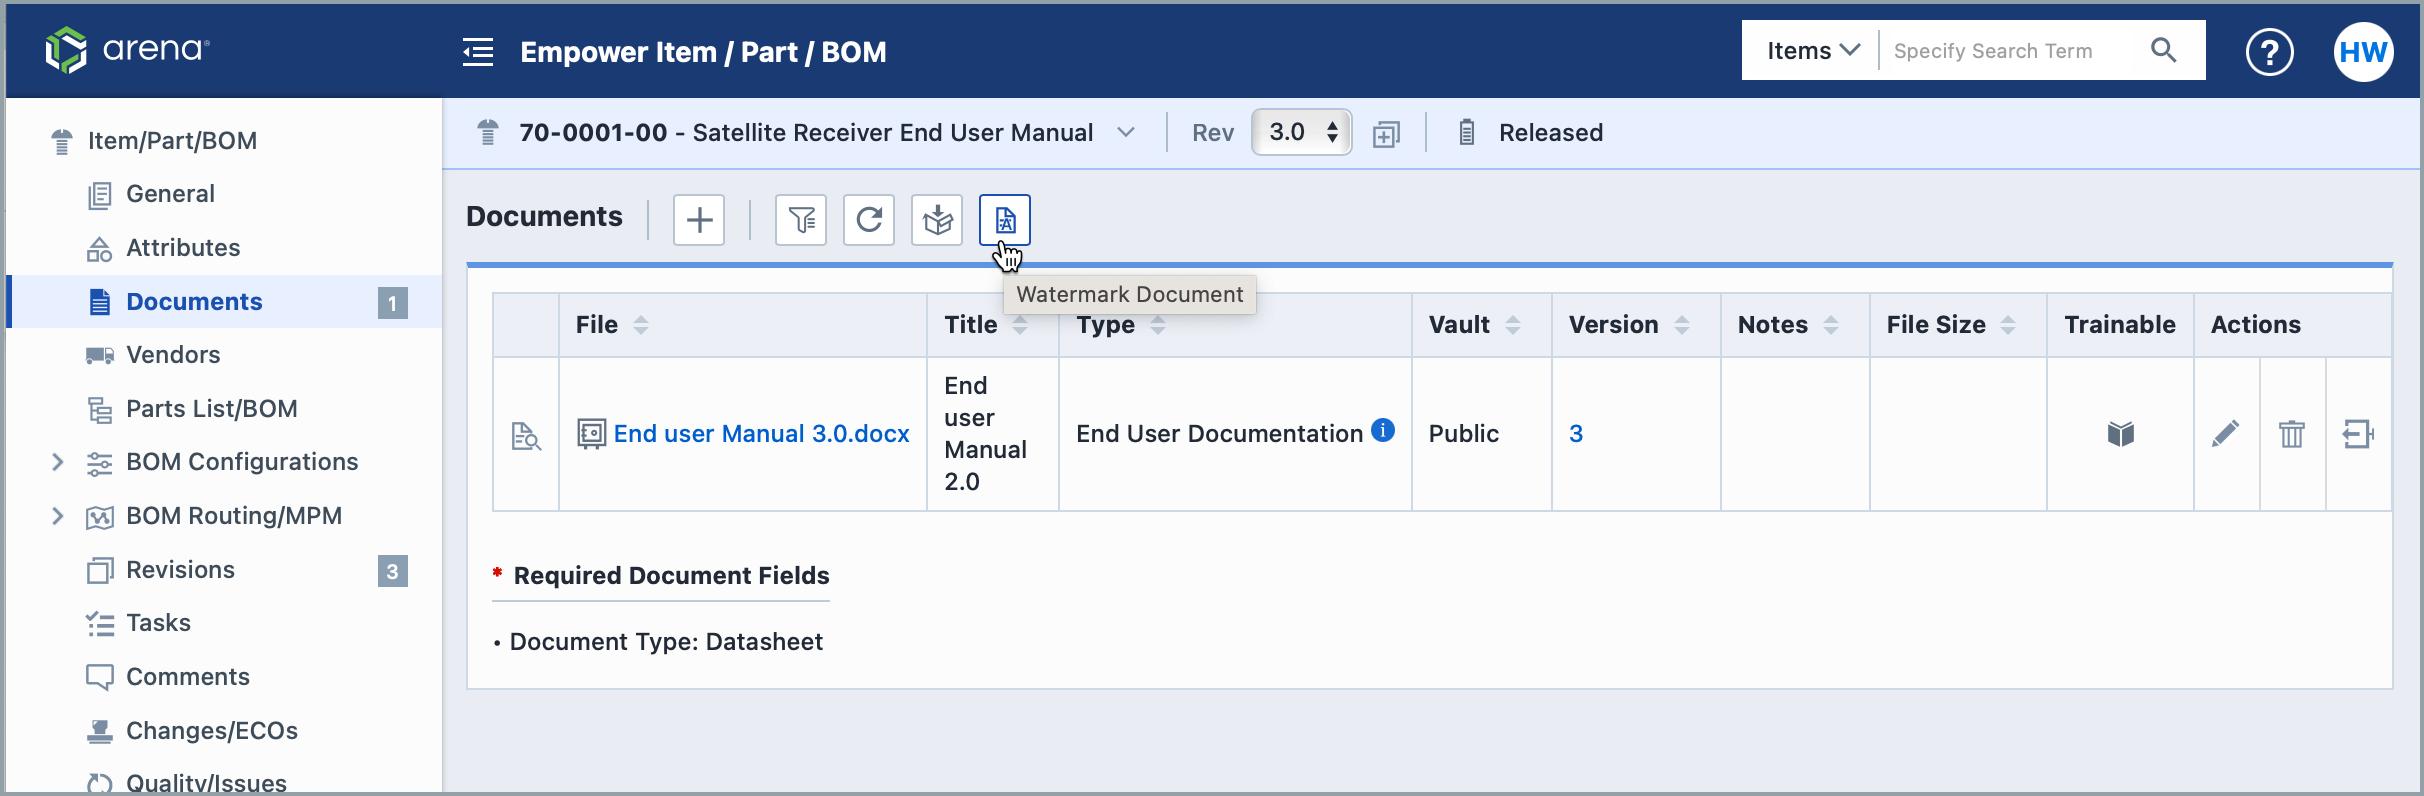
To view a watermarked file, first go to the Document page for the Empower Object related to your File. All variables in the watermark will be generated from the Object Revision that you open the document from.
- Click on the Watermark Document button.
- On the next screen, select the documents that you would like to watermark. When selecting one document, the generated watermarked file will be a PDF. When selecting multiple documents, the generated file will be ZIP and include PDFs.

- Provide a File Name for your Watermark Document. When selecting more than one document, you can name the ZIP file. All documents within that ZIP file will keep their file's original names.
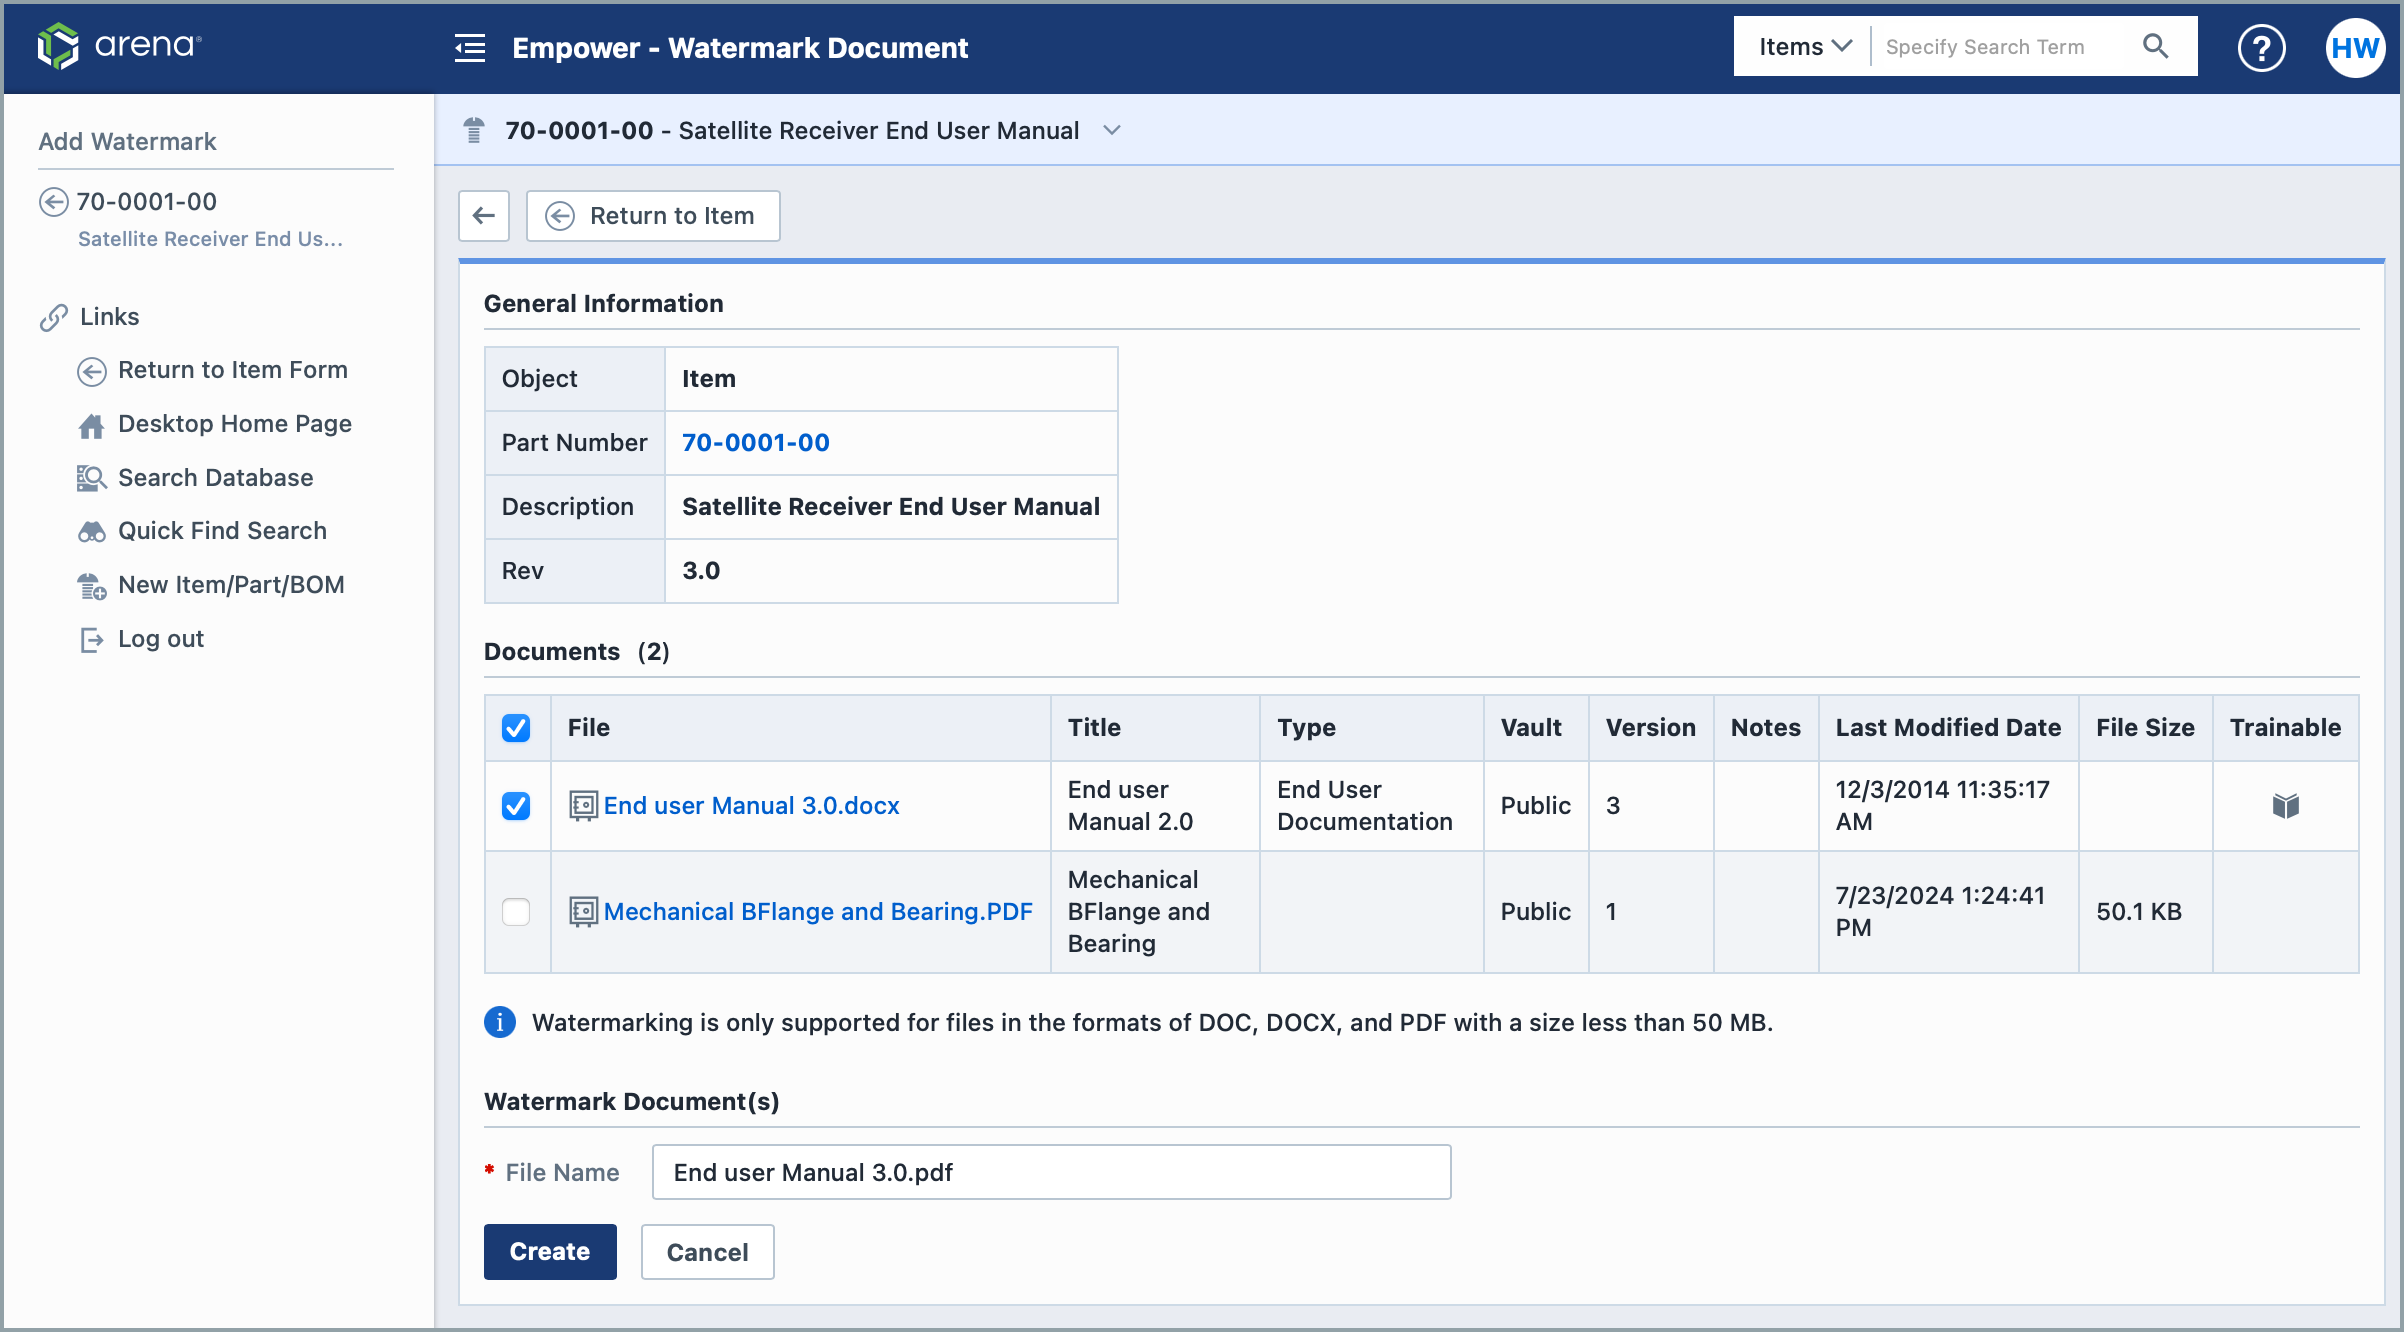
- When finished, click Create.
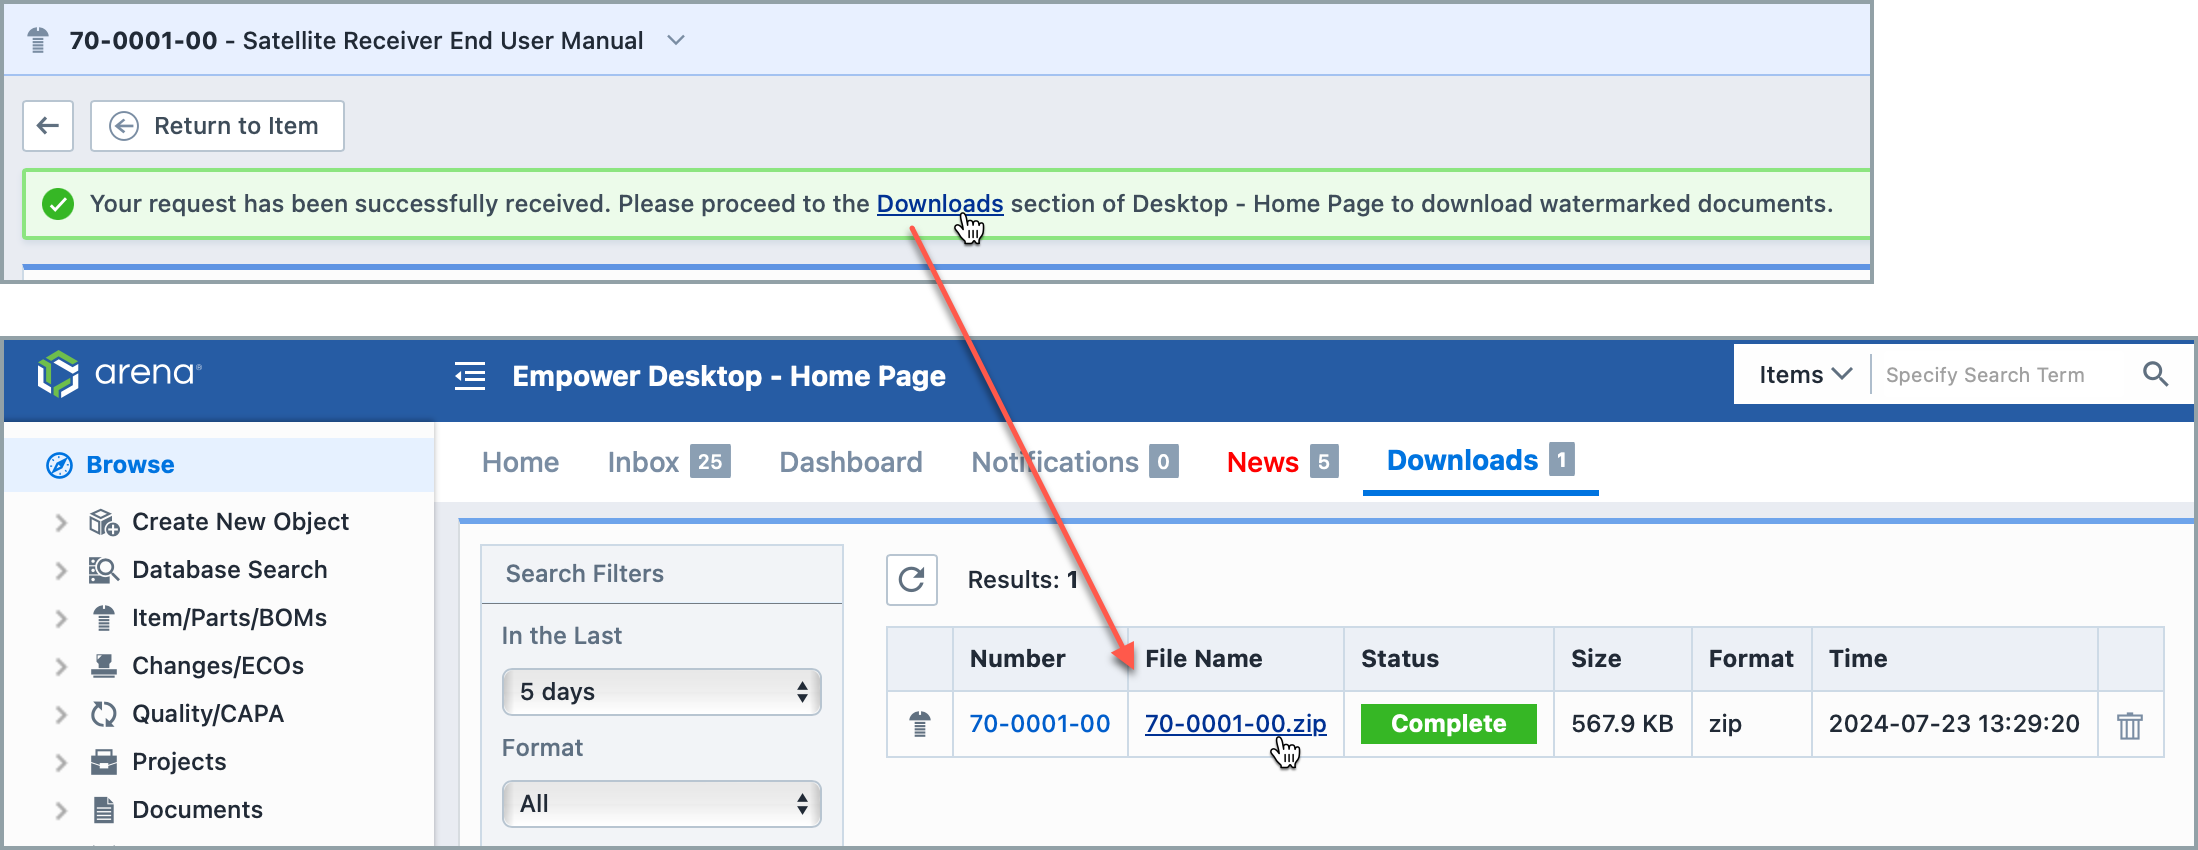
- A message will appear stating that the watermarked documents are being generated and can be collected form the Downloads page. Click the Downloads link to go directly there.
- When the document is ready, click on its name to download it.
Creating a Watermark
Watermarks can be made from Empower Administrator > Document Options > Watermark: 
- Clicking on a section header will expand it.
- Notice the toggles next to Overlay, Header, and Footer. Toggling those to green and then saving your watermark will enable them and they will appear on watermarked documents.
- Preview: Click this button to view how your watermark will look in your documents.
Overlays
Overlays are watermarks that sit above or below the content of your document. They can be styled in the following ways:
- Display Text: This text will become the watermark.
- Font Name: Style your text with a Helvetica, Times New Roman, Ariel, or Futura font.
- Font Size: Select a font size from 8-70 points.
- Color: Choose one of seven colors to match your company's brand.
- Transparency: Higher levels of transparency will make the text below the overlay easier to read but may make the overlay less noticeable.
- Rotation: sets the angle of the Overlay text on the page.
- Layer: Decide whether you want the watermark to be placed above or below the content in your documents.
Headers and Footers
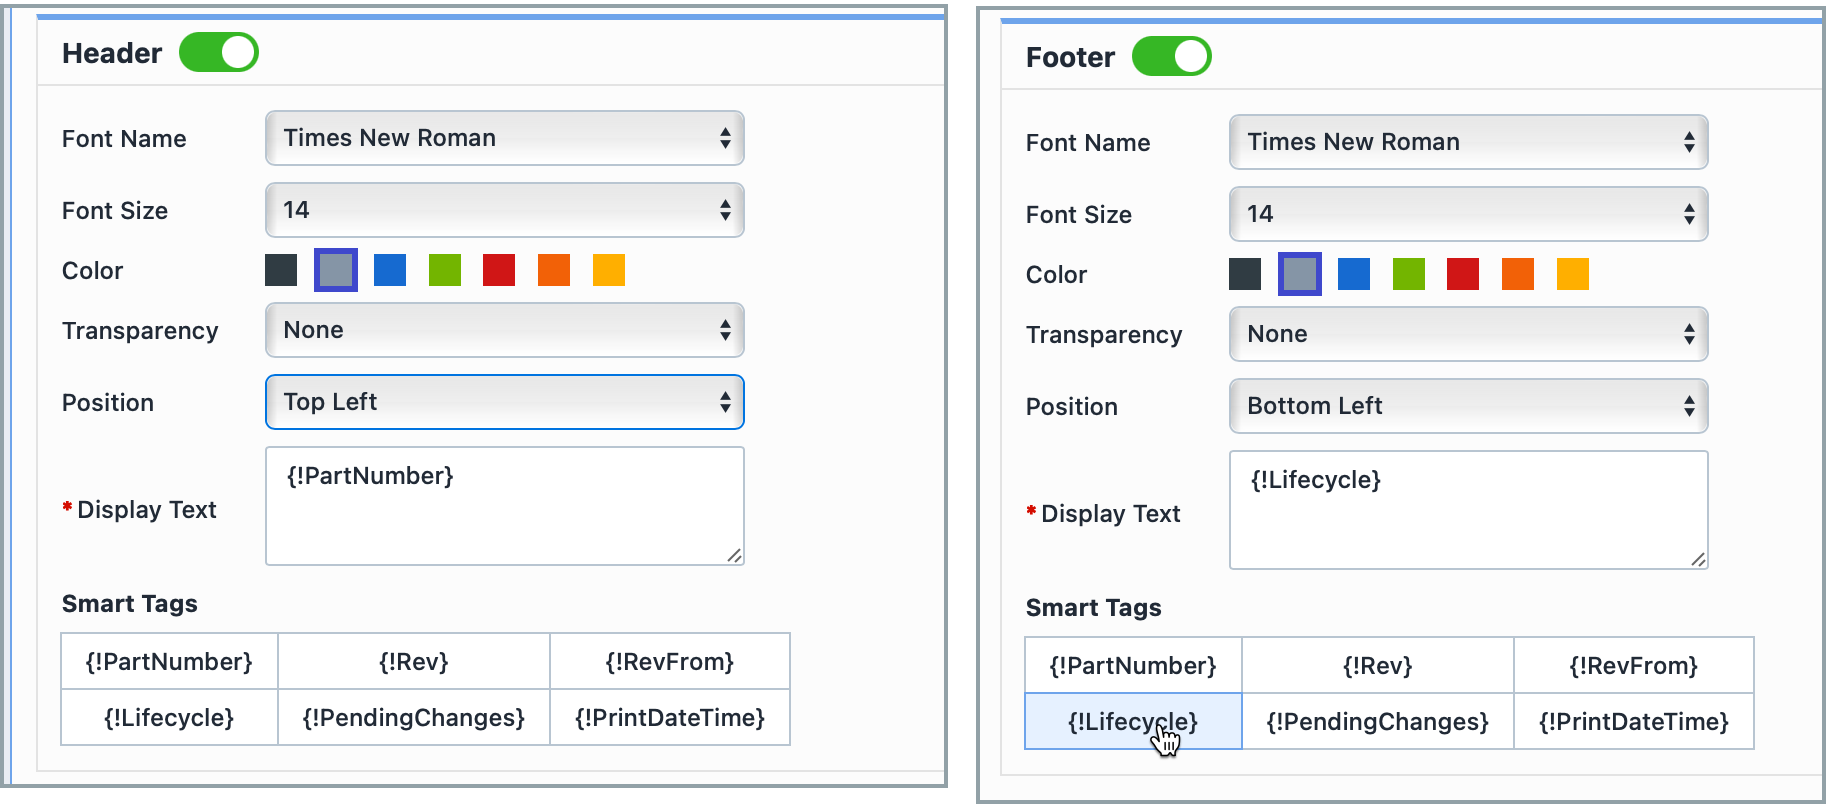 Headers includes text that appears at the top of each page of your documents. Footers include text displayed at the bottom of each page. Both can be styled in the following ways:
- Font Name: Style your text with a Helvetica, Times New Roman, Ariel, or Futura font.
- Font Size: Select a font size from 8-70 points.
- Color: Choose one of seven colors to match your company's brand.
- Transparency: Higher levels of transparency will make the text below the overlay easier to read but may make the overlay less noticeable.
- Position: Header text can be displayed in the Top Left, Top Center, or Top Right of your documents. Footers can be displayed in the Bottom Left, Bottom Center, or Bottom Right of your documents.
- Display Text: This text will become the Header / Footer.
- Smart Tags: Smart Tags dynamically display information related to the Part that the document is associated with. Smart Tags can display the Parts Number, Revision, Revision From Date, Part Lifecycle, Pending Changes, and the date and time that the document was generated. Click on a Smart Tag to bring it into the Display Text Box. When opening a document from a specific Part Revision Page, information related to that Revision will be shown. When opening a document from outside of a Parts Page, these Tags will display information about the most recent Part that the document is associated with.
Workspace Rules and User Permissions
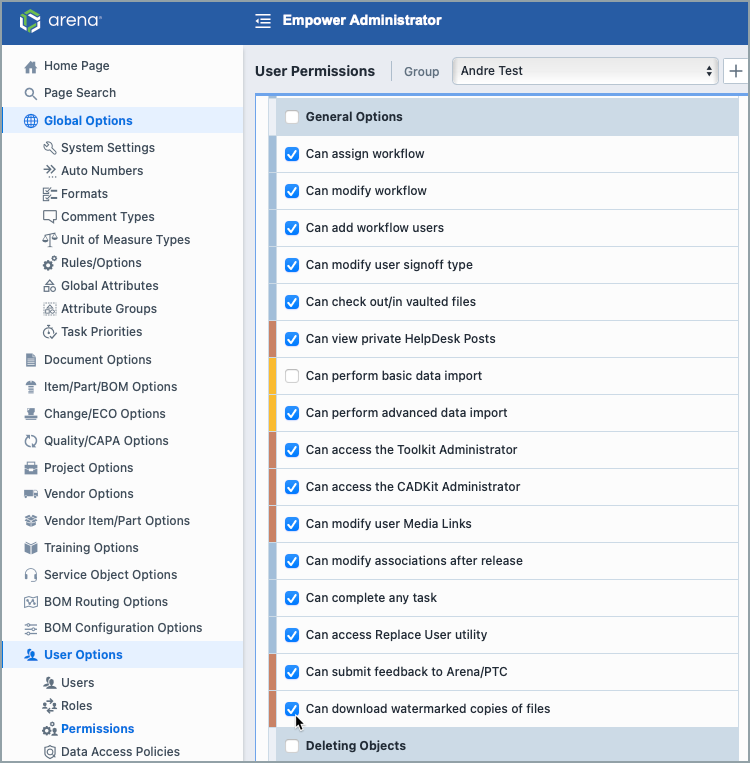
Workspace Rule: Administrators can select whether to turn on the watermarking feature for their workspaces. From Global Options> Rules/Options > Document Options, select "Enable users to download watermarked copies of files." 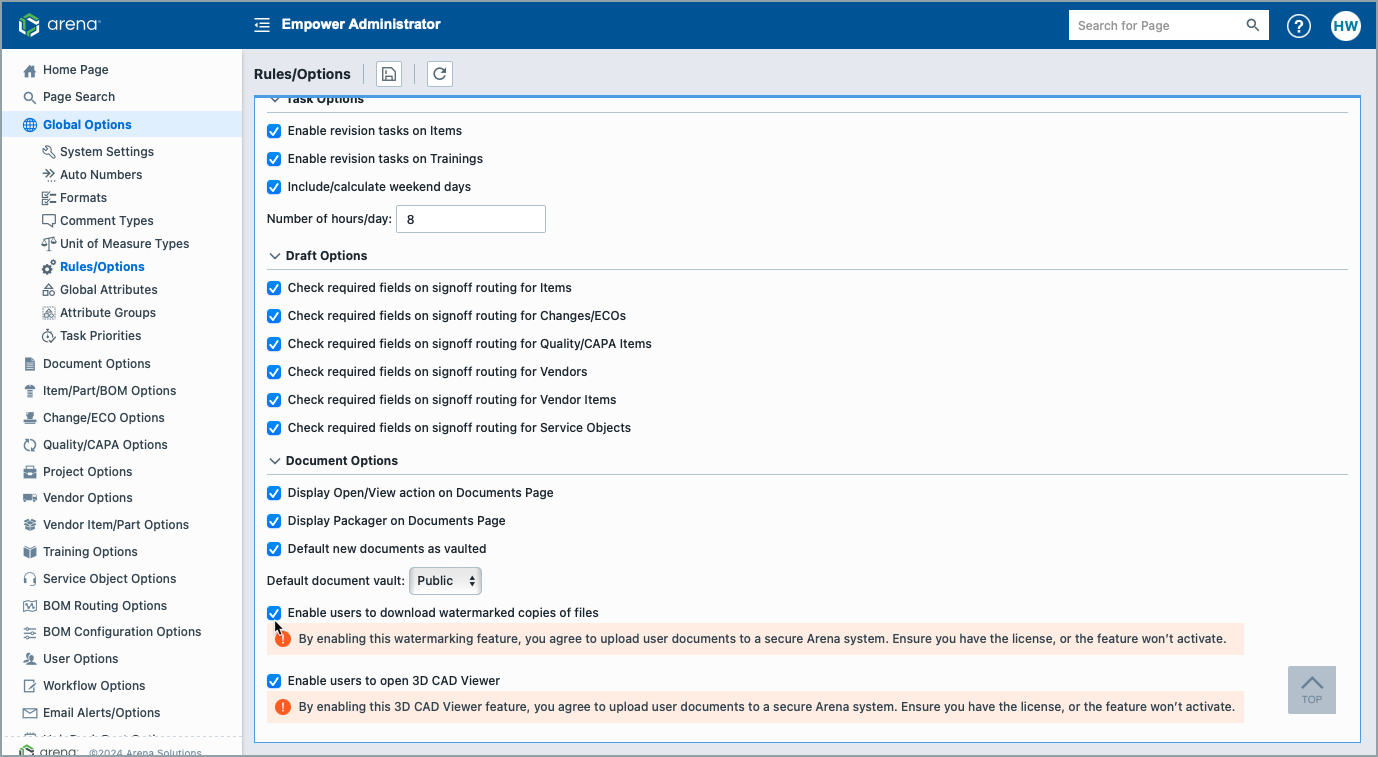
User Permissions: Administrators can select which usergroups can access watermarked documents. From User Options > Permissions > General Options, select "Can download watermarked copies of files."